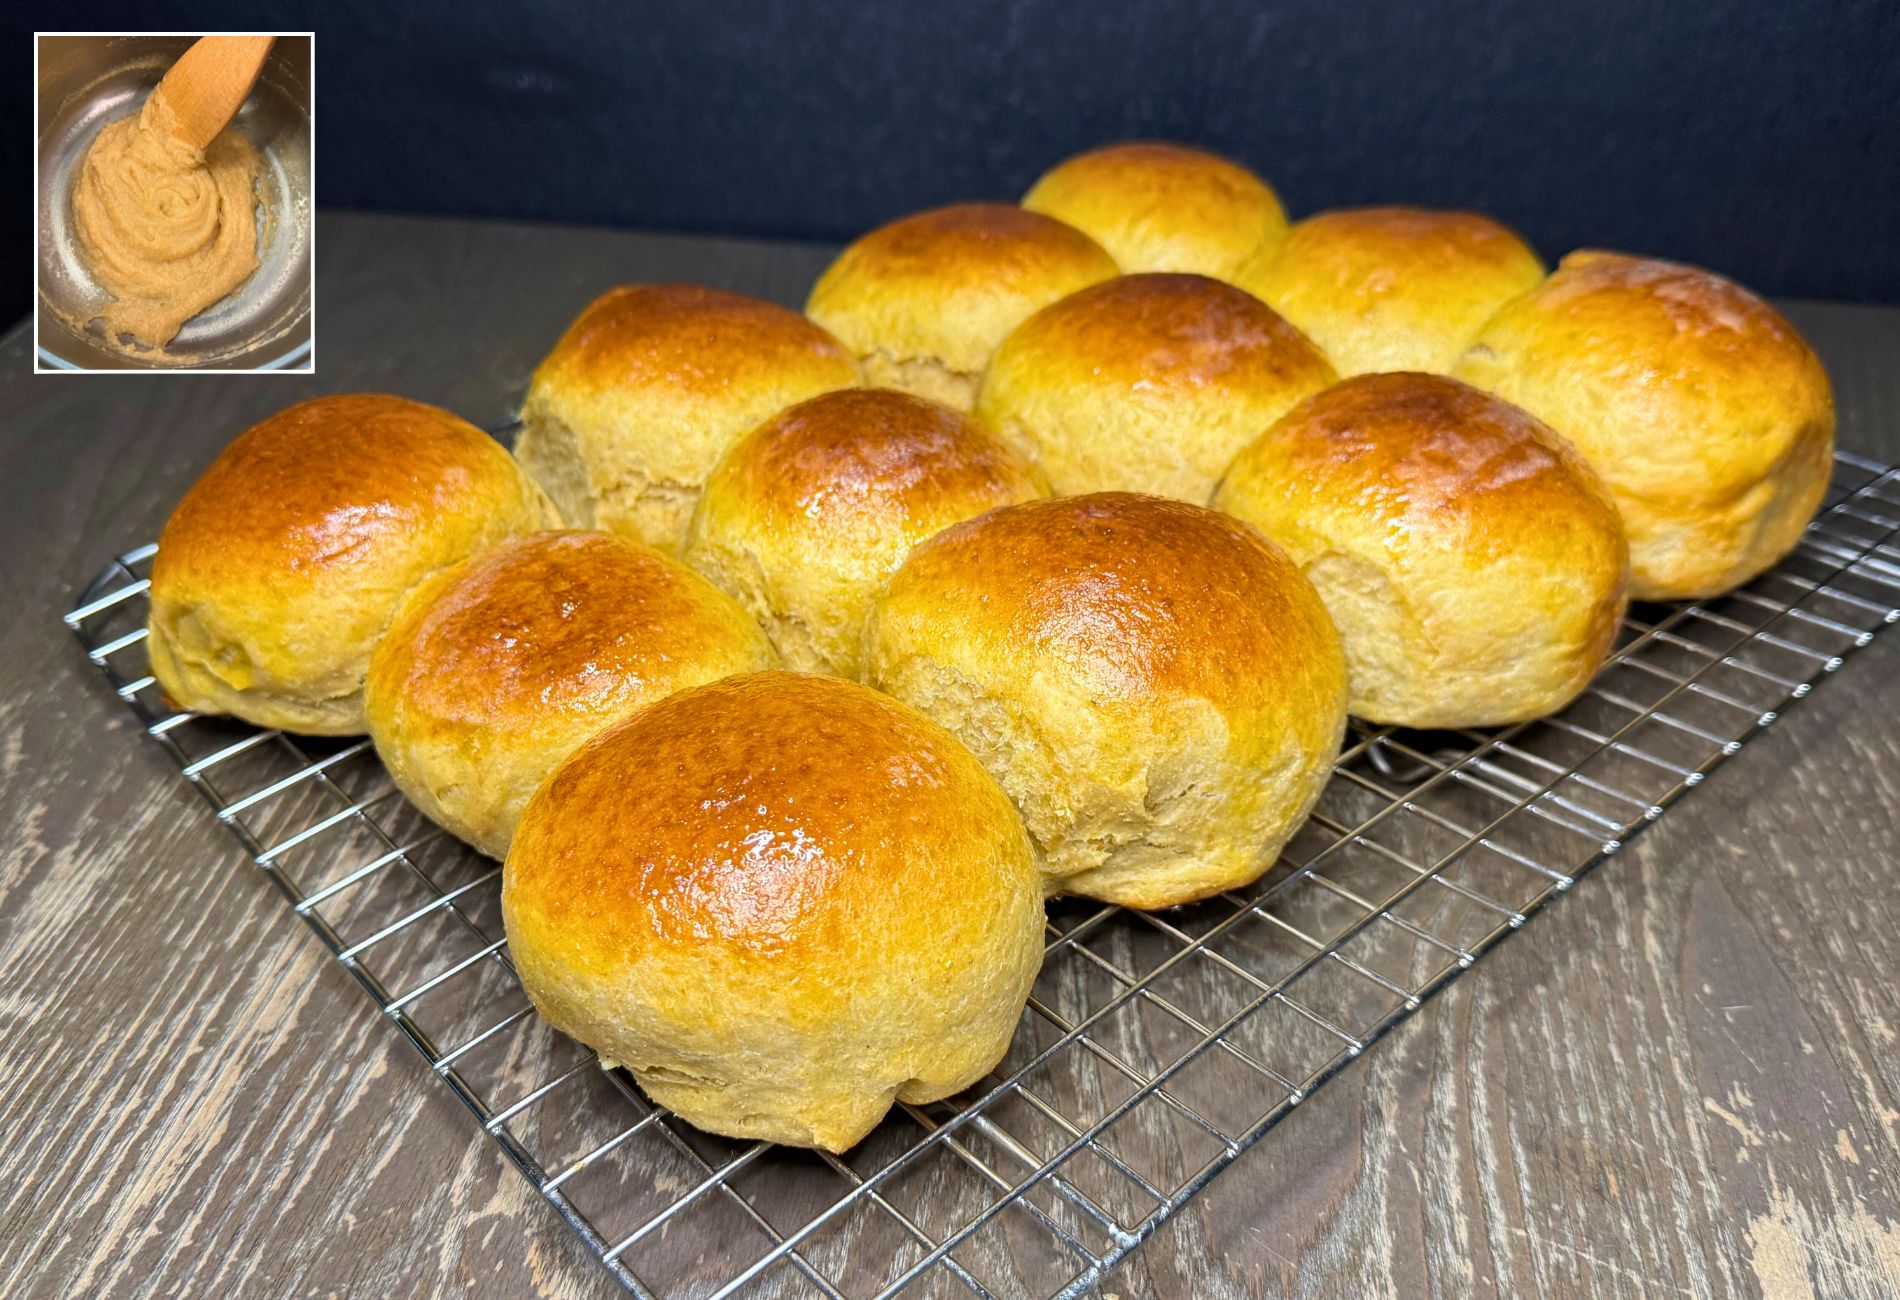
The Best Sweet Yeast Dinner Rolls With Fresh Milled Flour
These are The Best Sweet Yeast Dinner Rolls Made With Fresh Milled Flour! They are perfect for a dinner party or just for a nice family dinner. And, the come together pretty quickly while you are making dinner. Also, my very favorite way to make these dinner rolls is to make the dough the day before, let them rise, shape them, and then cover and pop in the fridge overnight. Pull them out 1-2 hours before dinner, and let them come to room temperature. Lastly, bake them! Fresh yeast dinner rolls warm and ready to go for you meal without very much effort! Win-win!
How Do I Make My Rolls Taste Yeasty?
The best way to make your rolls have a stronger yeast flavor, without adding any additional ingredients, is to give them time. But, too much time, and they will overproof quickly. So, I recommend making the rolls the night before you want to serve them. So, this is my little trick, step by step:
- Make the roll dough, and let it double in size for the first rise (about 1-2 hours.)
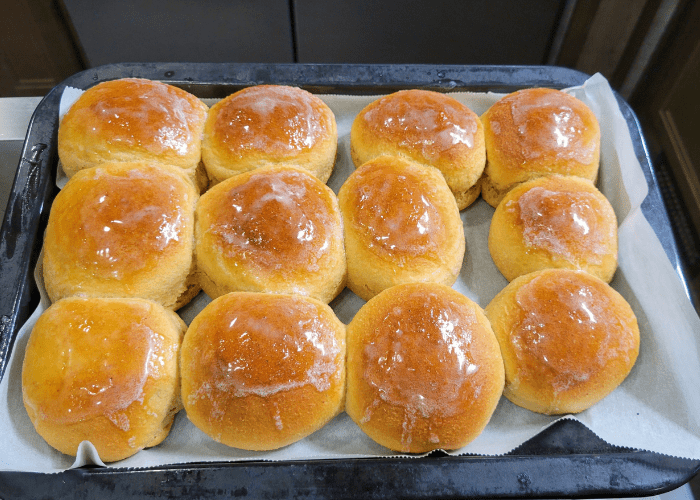
- Shape the rolls, and place them in a parchment paper lined 9×13 baking pan.
- Cover with cling film wrap, and place them directly in the refrigerator.
- Allow the rolls to do their second rise slowly in the refrigerator.
- The next day, get the rolls out of the fridge, and let them sit on the counter for 1 to 2 hours, until they are room temperature.
- Bake them at 350*F for 20-25 minutes.
- Then, right after they come out of the oven, brush them with butter.
- Enjoy that yeasty flavored goodness!
Why Are My Dinner Rolls Not Light & Fluffy?
There are a couple reasons why dinners rolls may not turn out light & fluffy. Here is a list to help you trouble shoot the problem.
- Your yeast was not good, or your liquid was too hot, killing the yeast.
- Too much flour in the dough causes a very dense roll. I like a higher hydration dough to give me a super light, fluffy, and airy roll.
- The dough was not kneaded long enough! Knead until it passes the window pane test! I have a short video HERE if you are interested showing a pass & fail of the window pane test.
- Another reason for dense rolls is over cooking them. Make sure to bake them only until they reach 190* F, so they don’t dry out!
- Lastly, they did not rise long enough.

Why Are My Dinner Rolls Bland?
One reason for bland dinner rolls, is either because too much flour was added, making the salt, flour, sugar ratio off. Another reason for bland dinner rolls is not enough salt or the salt was forgotten. Even on a sweet roll, salt is necessary for flavor, and proper rising. Thirdly, if the dough did not rise long enough, it would not develop the yeasty flavor we all love in our dinner rolls. See above, where I mention how to make your rolls have a strong yeast flavor.
Is It Better To Use Milk Or Water For Yeast Rolls?
This question depends on what you are looking for in a yeast roll. Most recipes say milk is better, because milk will make a softer roll, and it will also help with browning the roll. Milk will also sweeten the roll a bit. But, some will argue that milk affects the gluten structure of bread, so it will be slightly more heavy. I wrote this recipe with water, but feel free to sub for milk 1:1. Just make sure the milk is heated so it doesn’t affect the gluten development.
Ingredients For These Fresh Milled Flour Yeast Dinner Rolls
- 3&1/2 cups fresh milled flour (420g) (I milled 2&1/4 cup hard white wheat berries)
- 1 cup warm water (240g)
- 4 TBSP softened butter (56g)
- 1/3 cup brown sugar (74g)
- 2 eggs (room temperature)
- 1 tsp salt
- 2&1/2 tsp instant yeast
Instructions For Making These Sweet Yeast Dinner Rolls With Fresh Milled Flour
- Firstly, Mill The Flour
- Heat water in microwave for 60 seconds. (You could sub for milk if you prefer)
- Pour warmed water, softened butter, brown sugar, eggs, and salt in mixer, mix until combined.
- Then, add the flour & mix until incorporated. This is a sticky dough.
- Now, let the dough sit and rest for about 15 minutes for the fresh milled flour to start absorbing the liquids.
- After the rest, add your instant yeast, mix in.
- Knead dough until it passes the window pane test. (see video)
- Spray the dough ball with oil & cover for 1-2 hours, until dough has doubled.
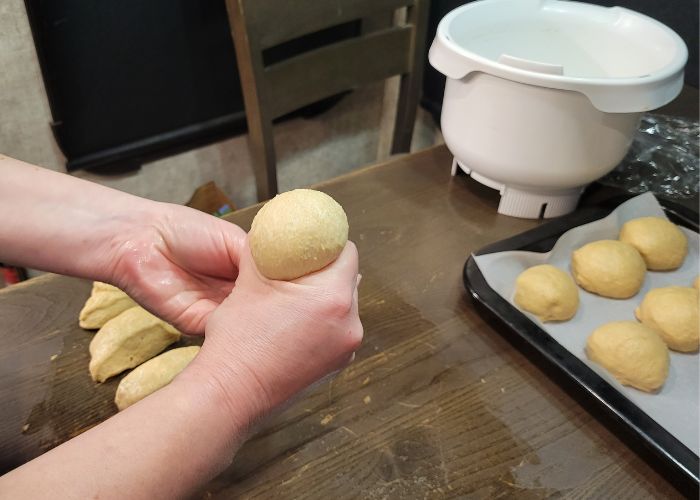
- On an oiled surface, divide dough into 12 equal pieces.
- Then, Roll & shape each pieces into a ball, making sure there is surface tension. (see video)
- Place in a parchment paper lined 9×13 baking dish.
- Then, cover. Now, you can make these the same day, or if you prefer a strong yeast flavor, make a day in advance.
- If making same day, let the dough rise for about 40 minutes until they appear “puffy”
- Preheat oven to 350*F during the end of the rise.
- Bake at 20-25 minutes
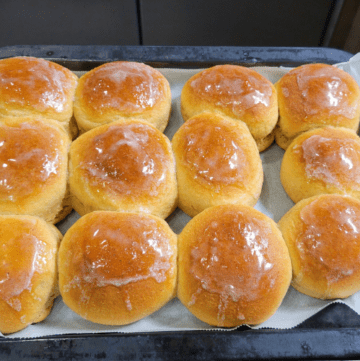
- Brush the rolls with butter after coming out of oven.
- Best enjoyed warm!
- **For a stronger yeast flavor – at step 12 put them covered in the fridge overnight. Then, the next day, get them out and let them come to room temperature. Bake, and enjoy that stronger yeasty flavor!

If You Want To Learn More About Milling Your Own Flour, I have a Fresh Milled Flour 101 post. I Recommend Starting With That Post.
Shop This Post
Checkout My Other Recipes:
Cinnamon Rolls with Dates (or Not)
Sweet Yeast Dinner Roll – Whole Wheat – Yeasty Flavor Tip!

The Best Yeast Dinner Rolls Made With Fresh Milled Flour
Ingredients
- 3&1/2 cups Fresh milled flour (420g) (I milled 2&1/4 cup hard white wheat berries)
- 1 cup warm water 240g
- 4 TBSP softened butter 56g
- 1/3 cup brown sugar 74g
- 2 eggs room temperature
- 1 tsp salt
- 2&1/2 tsp Instant yeast
Instructions
- Mill The Flour
- Heat water in microwave for 60 seconds. (You could sub for milk if you prefer)
- Pour warmed water, softened butter, brown sugar, eggs, and salt in mixer, mix until combined.
- Then, add the flour & mix until incorporated. This is a sticky dough.
- Now, let the dough sit and rest for about 15 minutes for the fresh milled flour to start absorbing the liquids.
- After the rest, add your instant yeast, mix in.
- Knead dough until it passes the window pane test. (see video)
- Spray the dough ball with oil & cover for 1-2 hours, until dough has doubled.
- On an oiled surface, divide dough into 12 equal pieces.
- Roll & shape each pieces into a ball, making sure there is surface tension. (see video)
- Place in a parchment paper lined 9×13 baking dish.
- Then cover. Now, you can make these the same day, or if you prefer a strong yeast flavor, make a day in advance.
- If making same day, let the dough rise for about 40 minutes until they appear "puffy"
- Preheat Oven to 350*F during the end of the second rise
- Bake at 20-25 minutes
- Brush the rolls with butter after coming out of oven.
- Best enjoyed warm!
- **For a stronger yeast flavor – at step 12 put them covered in the fridge overnight. Then, the next day, get them out and let them come to room temperature. Bake, and enjoy that stronger yeasty flavor!
Video
Notes
*This post contains affiliate links, which means I make a small commission at no extra cost to you! As an Amazon Associate I earn from qualifying purchases


Meant to say hard red wheat berries. Thank you
Hard Red can also be found at Winco, Bread Beckers, Pleasant Hill grains, and others online.
Great! Thank you for the quick reply. Merry Christmas!
Welcome! Merry Christmas!
I first tried these delicious rolls made by my youngest daughter. They have to be the best rolls I’ve ever tasted. I am hooked! I recently purchased the Nutrimill Grain Mill for myself and will start making these rolls and other recipes from grainsinsmallplaces. I enjoy watching the videos – good job!!
I am so happy to hear that! Yay! Thank you so much! Happy Baking!
Hello! I just made the rolls again last night, and this time, the dough rose nicely, and then it fell on the second rise. I did the second rise right after the first rise.
Any ideas or tips for why this happened and how to avoid having it happen again?
Thanks!
Vera
If it fell on the second rise, that typically means the second proof time was too long. Try a shorter second proof. I hope that helps! Happy Baking!
We recently bought a grain mill and our milled flour seems to need considerably less liquid than commercial flour. Is that typical, or do you have any advice on what to do?
Thanks!
It depends on what wheat berries you are using. The soft wheat does tend to need less water/more flour. The hard wheat often will need more liquid, but they take much longer to absorb the liquid, so it may seem like they need less. Then when you get later into the kneading, it will be a pretty dry dough. Learning what your dough looks, feels, and acts like is the best way! Sounds like you are already learning that part! Yay!
I had great success with these rolls! I made them and then used them for Buffalo chicken sliders. Delish!
Yay! I am so happy to hear that! Thanks for the great dinner idea!
I just got my Ank. I want to try these rolls but I’m not yet in the milling flour would yet. Could I use some flour from King Arthur or ? Thanks
You can make these with regular flour, you may need to adjust your flour amount slightly and your kneading times will be much less. But, they should work just fine with regular flour as well. Let me know what you think! Happy Baking!
I would love to hear your thoughts on how much to adjust flour amount if using King Arthur flour and how much you time you would suggest kneading. Very excited to make this recipe. Thank you!!!!
You can go by weight, and adjust the moisture as needed. Kneading will go faster with King Arthur flour, but the kneading time will vary greatly on the mixer as well.
Hello,
I am new to milling my own flour and your recipes have been so successful and yummy! I really appreciate your videos and instructions.
Blessings
Hi! Welcome! That is wonderful to hear! Thank you so much!
These came out delicious! Will definitely be making these regularly! Thank you!
Yay! I am so happy to hear that! Thank you so much!
I’ve made these several times and they were a huge hit! I’d like to try with honey instead of brown sugar. Would I put the same amount or should I adjust anything due to honey being liquid ? Thanks.
Yes, you can sub honey for the brown sugar 1:1. Everything else the same. They are yummy like that too!
Wonderful roll recipe! Thank you!
Yay! I am happy you enjoy it! Thank you so much!
OMG, this recipe is incredible, The rolls were the lightest, fluffiest I have ever made using fresh milled flour! Thanks so much for sharing this!
Yay! I am so happy to hear that! Nice job! Thanks so much!
They look wonderful. But mine deflated after putting them in the oven.
I’m just starting out milling at home with a Kitchen Aid mill on my mixer. Is your flower milled finer? Mine seems to not be silky, smooth. Lots of the stuff I mill at home for! But nothing turns out well.
Should I remill my flower or get a better mill?
If they deflated, I am guessing they may have overproofed. So, the second rise was probably just a bit too long. That means the yeast had already exhausted all it’s rise power before it went into the oven, so they could rise it higher or hold it up anymore. Just shorten the second rise to solve this problem. The kitchen aid mill attachment does mill the grains coarser than a stand alone mill will mill. I have a video reviewing my mill, and talk about having the kitchen aid mill before the mill I have now. My mill is currently on backorder, but Nutrimill makes another kind of mill that is a steel impact stand alone mill. It is the least expensive of the stand alone mills that I am aware of. It is on sale right now, plus I have a $20 off coupon code if you want to take a look. Coupon code is: Grainy
Here is that link. https://collabs.shop/rkbfy0
Here is that mill review video I made: https://youtu.be/U4l3gfkttAM
I hope this helps! Enjoy your journey! Happy Baking!
*This post contains affiliate links, which means I make a small commission at no extra cost to you!
Thanks so much for your reply! I’m on my 7th failure with home milled flour. So sad. But I’ve learned a lot and will keep trying. Used to bake bread with store bought flour and did fine years ago but this is what I want now. Health! I will view your vids. Again thank you!
I understand the frustration, I was there once. That is one reason I was inspired to start my Youtube channel and website. There was not a lot of help out there when I started, and nothing on how to troubleshoot or improve my bakes. I started a Youtube channel that I wish I had when I first started milling! LOL. You can do this! It will get easier. Sometimes I think experienced bakers have the hardest time switching to fresh milled flour, because we bake by feel, and texture, and instinct. But, with fresh milled flour, it is very different. So working with a wetter dough than traditionally helps tremendously. The number one reason I see baking fails is from too much flour. Because that is how much we would use with white flour. But, the freshly milled flour takes much longer to absorb the liquid, so at first what would seem perfect, ends up too dry. I hope that helps!
Dear Ruth, I took a bread class. She suggested we make a recipe 2x a week (trusted recipe with no substitutions). and make notes, tweak it as you go. I did that. WOW, in 6 weeks I had learned more than the previous 3 years (ok probably not…but a lot) of baking with fresh ground flour. It was a life changing experience. She said to start with a basic bread recipe and learn and learn it. I mostly made a recipe 1-2 times and then switched to something exciting. But wow. It is a form of meditation, when you are doing the same thing. I plan to do this recipe over and over for a bit to get it. And this teacher said NO ONE will be sad if you bake too much bread to eat yourself. She challenged us to give one away once a week. I was blown away by how I was able to encourage others with a nice hot loaf of “learner” bread. These were NOT perfect loaves and they were still wonderful to share. RUTH, keep at it. You’ve got this. I’m loving the fresh grains now! And this recipe has really been a winner for me.
These are our family’s favorite rolls. Thank you for the great recipes!
Yay! I am so happy to hear that! Thank you!
I’ve made these once before and they were perfect. I made another batch yesterday and once I shaped the rolls (before letting him rise again), I froze the dough balls. The plan is to set them out on the counter to defrost and rise for a few hours before baking. Do you think that will work ok?
I would put them in the fridge the night before to defrost, then the day you want to bake them, put them on the counter to come to room temperature for 1-2 hours. This will give you better rise and results. Let me know how it goes! Happy Baking!
hey! i see you tried to freeze these dough balls and then thaw to bake. I was wondering how that turned out and if it was a success what your method was. I’m trying to decide between freezing rolls already baked or freezing rolls as dough balls!
I’ve made these twice now and they’re absolutely incredible! I also make your burger buns recipe and noticed it’s identical to this recipe, just minus one egg. My family loves the texture and squish of these rolls the most, so could I make burger buns with this dinner roll recipe?
Yes, you can make rolls, buns, or bread with this recipe. Also the other recipe you can make buns, bread, or rolls! The main difference is the extra egg, and brown sugar rather than cane sugar. I am glad to hear you enjoy them! Thanks!
I used this recipe as a base for cinnamon rolls last week and they turned out sooo good! Making them again tomorrow…they are my best cinnamon rolls yet. You’d never even know they are whole grain…so fluffy and light!!
Awesome! I am so happy to hear that! Thanks!
I struggled with fresh milled recipes until I found your sandwich bread recipe and it turned out perfect every time. Recently, I’ve been struggling again. My dough is super wet and sticky, and even after almost an hour of kneading/resting, it’s still not coming together and not passing the windowpane test. I’m not sure what the problem is. I did just get a new batch of wheat berries. I’m not sure if that is the problem? Any suggestions?
I use a nutrition grinder and a kitchen aid mixer.
It could be the new batch of wheat berries, some take longer than others, the nutrition grinder also doesn’t mill the flour very fine could be contributing. Also, if it is super wet and humid in your area then you may need to decrease the liquid a bit. I had to do that today, in fact. Did the dough ever get stretchy?
I do live in South Florida and it’s hurricane season so the humidity is probably pretty high here 😅
I’ll try reducing the liquid some.
It did come together after I added a bit more flour to it.
And I’m sorry, I have nutrimill grinder, like yours. I bought it with a discount code you gave, so thanks for that ☺️☺️
But the rolls did turn out super delicious!! My family ate them all up.
I am so glad to hear they turned out great! Yes, try a little less liquid then. Thanks!
Kara,
Wanted to make these ahead for Thanksgiving. Do you know if they freeze well? Do I put them in the freezer after shaping & then thaw them out for the final rise? Also, how long will they last in the freezer?
Yes, you can make and freeze before the second rise. The day before you want to bake them, put them in the fridge to thaw. Then 1-2 hours before baking put them on the counter to come to room temperature. Then bake as directed. The amount of time in the freezer depends on the strength of your yeast, but 1-3 months seems to be the average.
Alternatively, you can make them completely, and let them cool all the way after baking. Then freeze. Pull them out of the freezer 1-2 hours and placce on the counter to thaw. Both methods work, so however it fits into your schedule best. Happy Baking! 🙂