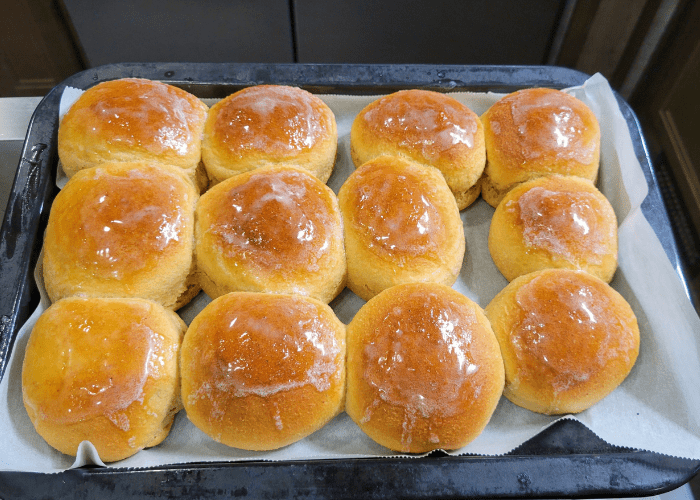
The Best Sweet Yeast Dinner Rolls With Fresh Milled Flour
These are The Best Sweet Yeast Dinner Rolls Made With Fresh Milled Flour! They are perfect for a dinner party or just for a nice family dinner. And, the come together pretty quickly while you are making dinner. Also, my very favorite way to make these dinner rolls is to make the dough the day before, let them rise, shape them, and then cover and pop in the fridge overnight. Pull them out 1-2 hours before dinner, and let them come to room temperature. Lastly, bake them! Fresh yeast dinner rolls warm and ready to go for you meal without very much effort! Win-win!
How Do I Make My Rolls Taste Yeasty?
The best way to make your rolls have a stronger yeast flavor, without adding any additional ingredients, is to give them time. But, too much time, and they will overproof quickly. So, I recommend making the rolls the night before you want to serve them. So, this is my little trick, step by step:
- Make the roll dough, and let it double in size for the first rise (about 1-2 hours.)
- Shape the rolls, and place them in a parchment paper lined 9×13 baking pan.
- Cover with cling film wrap, and place them directly in the refrigerator.
- Allow the rolls to do their second rise slowly in the refrigerator.
- The next day, get the rolls out of the fridge, and let them sit on the counter for 1 to 2 hours, until they are room temperature.
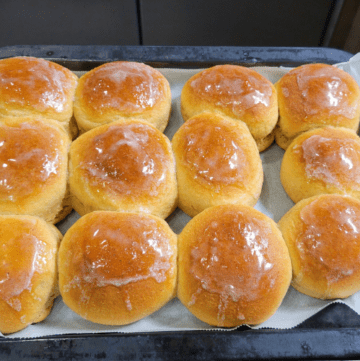
- Bake them at 350*F for 20-25 minutes.
- Then, right after they come out of the oven, brush them with butter.
- Enjoy that yeasty flavored goodness!
Why Are My Dinner Rolls Not Light & Fluffy?
There are a couple reasons why dinners rolls may not turn out light & fluffy. Here is a list to help you trouble shoot the problem.
- Your yeast was not good, or your liquid was too hot, killing the yeast.
- Too much flour in the dough causes a very dense roll. I like a higher hydration dough to give me a super light, fluffy, and airy roll.
- The dough was not kneaded long enough! Knead until it passes the window pane test! I have a short video HERE if you are interested showing a pass & fail of the window pane test.
- Another reason for dense rolls is over cooking them. Make sure to bake them only until they reach 190* F, so they don’t dry out!
- Lastly, they did not rise long enough.

Why Are My Dinner Rolls Bland?
One reason for bland dinner rolls, is either because too much flour was added, making the salt, flour, sugar ratio off. Another reason for bland dinner rolls is not enough salt or the salt was forgotten. Even on a sweet roll, salt is necessary for flavor, and proper rising. Thirdly, if the dough did not rise long enough, it would not develop the yeasty flavor we all love in our dinner rolls. See above, where I mention how to make your rolls have a strong yeast flavor.
Is It Better To Use Milk Or Water For Yeast Rolls?
This question depends on what you are looking for in a yeast roll. Most recipes say milk is better, because milk will make a softer roll, and it will also help with browning the roll. Milk will also sweeten the roll a bit. But, some will argue that milk affects the gluten structure of bread, so it will be slightly more heavy. I wrote this recipe with water, but feel free to sub for milk 1:1. Just make sure the milk is heated so it doesn’t affect the gluten development.
Ingredients For These Fresh Milled Flour Yeast Dinner Rolls
- 3&1/2 cups fresh milled flour (420g) (I milled 2&1/4 cup hard white wheat berries)
- 1 cup warm water (240g)
- 4 TBSP softened butter (56g)
- 1/3 cup brown sugar (74g)
- 2 eggs (room temperature)
- 1 tsp salt
- 2&1/2 tsp instant yeast
Instructions For Making These Sweet Yeast Dinner Rolls With Fresh Milled Flour
- Firstly, Mill The Flour
- Heat water in microwave for 60 seconds. (You could sub for milk if you prefer)
- Pour warmed water, softened butter, brown sugar, eggs, and salt in mixer, mix until combined.
- Then, add the flour & mix until incorporated. This is a sticky dough.
- Now, let the dough sit and rest for about 15 minutes for the fresh milled flour to start absorbing the liquids.
- After the rest, add your instant yeast, mix in.
- Knead dough until it passes the window pane test. (see video)
- Spray the dough ball with oil & cover for 1-2 hours, until dough has doubled.
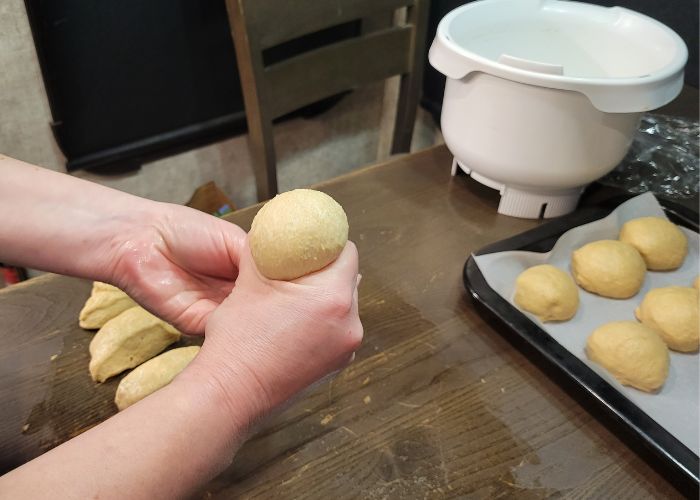
- On an oiled surface, divide dough into 12 equal pieces.
- Then, Roll & shape each pieces into a ball, making sure there is surface tension. (see video)
- Place in a parchment paper lined 9×13 baking dish.
- Then, cover. Now, you can make these the same day, or if you prefer a strong yeast flavor, make a day in advance.
- If making same day, let the dough rise for about 40 minutes until they appear “puffy”
- Preheat oven to 350*F during the end of the rise.
- Bake at 20-25 minutes
- Brush the rolls with butter after coming out of oven.
- Best enjoyed warm!
- **For a stronger yeast flavor – at step 12 put them covered in the fridge overnight. Then, the next day, get them out and let them come to room temperature. Bake, and enjoy that stronger yeasty flavor!

If You Want To Learn More About Milling Your Own Flour, I have a Fresh Milled Flour 101 post. I Recommend Starting With That Post.
Shop This Post
Checkout My Other Recipes:
Cinnamon Rolls with Dates (or Not)
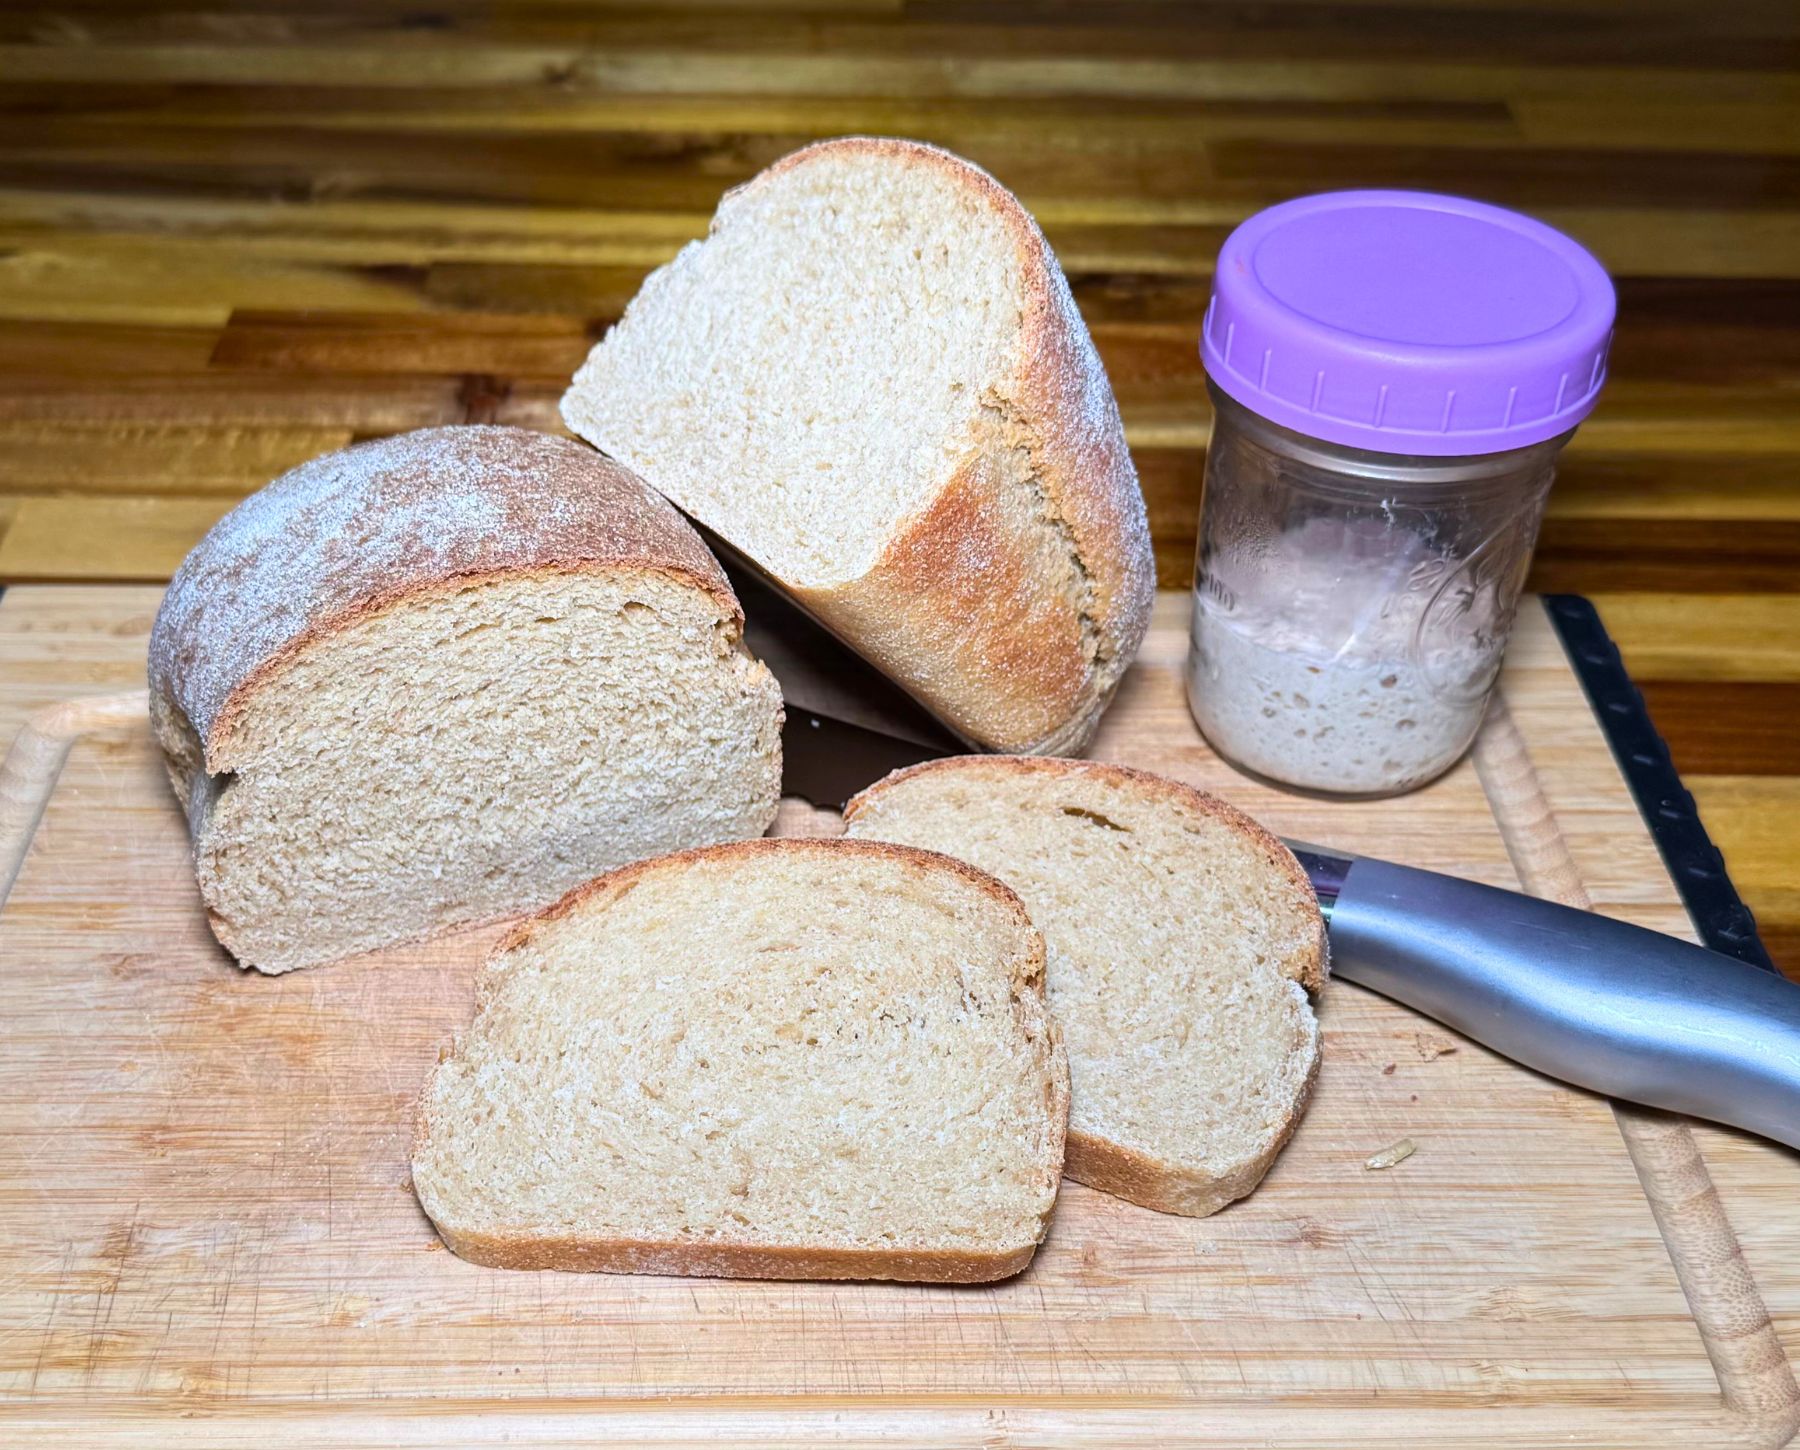
Sweet Yeast Dinner Roll – Whole Wheat – Yeasty Flavor Tip!

The Best Yeast Dinner Rolls Made With Fresh Milled Flour
Ingredients
- 3&1/2 cups Fresh milled flour (420g) (I milled 2&1/4 cup hard white wheat berries)
- 1 cup warm water 240g
- 4 TBSP softened butter 56g
- 1/3 cup brown sugar 74g
- 2 eggs room temperature
- 1 tsp salt
- 2&1/2 tsp Instant yeast
Instructions
- Mill The Flour
- Heat water in microwave for 60 seconds. (You could sub for milk if you prefer)
- Pour warmed water, softened butter, brown sugar, eggs, and salt in mixer, mix until combined.
- Then, add the flour & mix until incorporated. This is a sticky dough.
- Now, let the dough sit and rest for about 15 minutes for the fresh milled flour to start absorbing the liquids.
- After the rest, add your instant yeast, mix in.
- Knead dough until it passes the window pane test. (see video)
- Spray the dough ball with oil & cover for 1-2 hours, until dough has doubled.
- On an oiled surface, divide dough into 12 equal pieces.
- Roll & shape each pieces into a ball, making sure there is surface tension. (see video)
- Place in a parchment paper lined 9×13 baking dish.
- Then cover. Now, you can make these the same day, or if you prefer a strong yeast flavor, make a day in advance.
- If making same day, let the dough rise for about 40 minutes until they appear "puffy"
- Preheat Oven to 350*F during the end of the second rise
- Bake at 20-25 minutes
- Brush the rolls with butter after coming out of oven.
- Best enjoyed warm!
- **For a stronger yeast flavor – at step 12 put them covered in the fridge overnight. Then, the next day, get them out and let them come to room temperature. Bake, and enjoy that stronger yeasty flavor!
Video
Notes
*This post contains affiliate links, which means I make a small commission at no extra cost to you! As an Amazon Associate I earn from qualifying purchases


I’ve made these twice and they are the most large, fluffy, most delicious rolls I have ever made!! I love all your recipes. I’ve tried the pasta and your sandwich loaf so far!!! They’re both amazing too!! I’ve only been milling for a couple of months but absolutely love it!!! Thank you so much for your videos and sharing your recipes.
Thank you so much! I am so happy to hear that!
Thia is my go to roll recipe, they have great flavor and texture. Most important is my family devore them.
Yay! I am so happy to hear that! My family loves them too! Thanks so much!
Hi Vivian, do you sift your flour? Like to remove the bran? Also would this work with red fife wheat or khorasan?
Thanks!
These are amazing rolls!!! So easy too. We love them!!
Thank you so much! They are on our weekly rotation!
Ours too!! We also loved the pizza dough recipe, works up so easy and tastes amazing! Thanks again! Tortillas are my next adventure, can’t wait to try your recipe.
Awesome! Thank you! Let me know how you like the tortillas!
WOW! These are easy and taste amazing! I let them sit overnight. So good!
Yes! That is may favorite way to make them! Thanks! 🙂
I only have active dry yeast. If I add it to the warm water and brown sugar and let it activate before adding everything else, do you think that will work just as well? Thanks!
Yes! That will work great! I would take a little out of the recipe to activate the yeast during that first 15 minute rest. Then add it in and start the kneading process. Happy Baking!
Hello!! Have you tried making sourdough dinner rolls with fresh milled flour? I would be interested in that recipe. Do you know how to substitute the yeast with sourdough ?
Thank you!
Hi! So, you can either add in just a bit of sourdough for flavor without altering the recipe and rise times. However, if you are wanting to use only sourdough as your leavening agent, then you would omit the yeast, add about 1/2 cup heavily fed active starter (113g). Watch the rise times, because they can very greatly from home to home, and starter to starter. I hope that helps! Happy Baking!
Hi
If making sourdough, we might need to adjust the water and flour since we are adding both of them with the starter. What do you think?
I have just added the starter in, I just get slightly larger rolls, but they are delicious! 😊
I want to be able to make these so badly but my dough keeps coming out super sticky. How long do you knead it and on what speed? I’ve tried troubleshooting.
The dough should be pretty wet and sticky, just knead until the dough is nice and stretchy. Make sure you are using mostly a hard wheat variety. This video may be helpful as well. https://youtu.be/uvHXu3R6WH8
Can I still achieve the same windowpane test if I knead by hand? Thanks for the recipe! Can’t wait to try it
This dough is a very wet and sticky dough, it will make it pretty challenging to knead by hand. I would recommend to let all the ingredients sit for a couple hours then add in the yeast, and start kneading. That should help decrease the kneading time. But, the rise time will be a bit longer. Hope that helps!
What kind of mixer are you using?
Great question! I have been using my little Bosch Compact Mixer for a long time, and I did a review video on that mixer, however, it has since been discontinued. So, my newest mixer that I have been using and LOVE is the Ankarsrum mixer. Here is a link to that mixer, and on my channel, you can find other mixer reviews as well! I hope that helps! https://youtu.be/h-Ll6t1ob3c
Can you substitute honey for the brown sugar by chance?
Yes, you can! 🙂
Hi! Could you use a Zo bread machine to do the kneading and 1 rise, before shaping and baking? Thank you!
I don’t have a Zo, but I have heard from many others to do a double kneading cycle in it, and then let it rise. Let me know how it goes for you! Happy Baking!
I use my Zo on the dough setting and the rolls come out perfect every time! Delicious recipe! Can’t wait to try your others!
I am so happy to hear this! Thank you so much! Happy Baking!
Have you ever frozen the dough to be baked later? I’m doing rolls for a very large amount of people with fresh ground wheat.
That works, but they don’t rise quite as much. However, my favorite way to make and bake later is to make the dough the night before and shape them. Cover, and place in the fridge overnight. Then, let them come to room temperature (about 1-2 hours) then, bake as the recipe says. That way I can do all the work the night before, and stagger the baking the next day. I hope that helps!
Long story short they unfortunately have to be frozen, I doing a test batch right now to see how long I should let them rise after freezing, or if baking fresh and the freezing is better. Also just out of curiosity, about how long did it take you to mix with the dough hook?
Ahhh, gotcha. Let me know your results. I do this with my pizza dough with success. With my Bosch compact or Kitchen aid generally I knead for about 25 minutes. With the Bigger Bosch or Artiste it was closer to 15 minutes. And with the Ankarsrum it seems to be about 18 minutes or so. Of course this is on average, sometimes it is a bit longer, and sometimes it is a bit shorter. Try to resist adding extra flour, as I find this kind of adds time to the kneading process. Also, make sure to let the dough have it’s rest period before you put in the yeast to give some time for the fresh milled flour to absorb the liquid. I wish you great success! You can do this!
When using a kitchenaid mixer should it stay pretty sticky for a long time while kneading? I didn’t see this comment about not adding flour and added a tiny bit more to get it to pull together. I’m always afraid of over kneading but I definitely didn’t let it knead for 25 minutes. So it seems like I under-kneaded. What speed do you typically do when kneading?
Yes, I like to work with a wetter dough, and it will be very sticky. I knead on level 2 and it may take 25 minutes to come together in the kitchen aid. So, if you want to knead for 10, cover and let it rest 10, then knead longer so it doesn’t overwork the mixer, that seems to be successful. Over-kneading is a bit harder to do with fresh milled flour, like it is with white flour, especially with a kitchen aid. Once you see the dough transform, you will see what I mean. It is hard to explain in words, lol
So Ashley Hyer…. How did the whole freezing thing work out… I was hoping to put in baking dish after shaped and freeze for thanksgiving because I have to travel for a funeral the weekend before and time is limited when I get back… thanks for any info you can impart…
Do you let them rise before putting them in the fridge?
I let the dough do the first rise, then I shape them, cover and pop them right in the fridge. Hope that helps! Happy Baking!
I made and put dough in refrigerator last night. I had trouble tightening the dough balls; it would spread as I put it in the pan. Is that under-kneading? I thought as I take the cold dough out of the refrigerator I might try to shape the cold dough. Would that harm the final result?
When shaping them, you really have to put some tension on them so they stay firm. I like to work with a wet dough to get a nice fluffy end result. But, they are a little trickier to shape. I have a video to show this if you haven’t seen it yet, here is a link to it. https://youtu.be/4Km2ZwzHPfc
I watched and that was very helpful. I ended up reshaping as I took them out of the refrigerator and they rose back beautifully. They are so delicious! I love the yeasty flavor with the fresh milled taste!
I am so happy you were able to reshape them! Yay! I am so glad they ended up a success! Thank you for the update!
Hi there! We are a plant based family and don’t use eggs. I usually use flax eggs with success. Any chance you think that would work with these? I’m trying them now and after reading comments decided to knead longer because mine was super sticky and stuck to the sides mostly. I’m using a kitchen aide, but will upgrade in the near future to a better mixer! I’ll post an update if I feel that this worked! Just wondering what your thoughts are on this! Thanks!
I do think the flax seed egg would be a good choice, it is a very wet and sticky dough, and in the kitchen aid, you may need to scrape down the sides a few times. My kitchen aid typically had to knead for 25 minutes. So, you may need to knead for a bit, then cover and let it sit, then knead some more until you get that nice smooth & stretchy dough. Hope that helps!
Hey Brittany – I’d sure love to hear your results! 🙂
I didn’t realize I had some replies to this! Apparently I made these, but I’ve had a baby since then and my brain is mush! I think I did use a flax egg and they turned out fine! I also was wondering if an aquaphaba egg would work??
Yes, I believe it would! Let me know how it goes! 🙂 Congratulations on your baby! 🙂
My husband fell in love with me all over again when I served up these rolls!!😂. The way to his heart is thru his tummy!! They are absolutely delicious and so extra fluffy! Pizza dough is WONDERFUL also! Thanks for the recipes
I am so happy to hear that, thank you!
Could one use coconut oil in place of butter?
I would recommend using olive oil or avocado oil in place of the butter if you are looking for an alternative. Hope that helps! Thanks!
I only use sourdough for my baking and not yeast. How would I adjust to swap out yeast for sourdough starter? Is there a formula for this? Thank you so much.
To substitute yeast out for sourdough, I recommend using about 1/2 cup sourdough sourdough starter (110g). Then watch the rise time, typically somewhere between 3-6 hours. Hope that helps!
I made them the day before Thanksgiving, put them in the fridge, and was able to pop them in the oven after all the other cooking was done. They came out perfectly! Thank you!
That is wonderful to hear! Thank you! Happy Thanksgiving!
LOVED these rolls!! This is the first recipe I tried from your collection…wow!! So soft and PERFECT for Thanksgiving!
So happy to hear this! Thank you so much!
My dough won’t form.. it’s really grainy, I milled it three times…. It’s the texture of malt I meal after it’s warmed up without enough water
Oh no, what mill do you have? It sounds like it is too coarse, not all is lost though. I would recommend putting all the ingredients in except the yeast, and mixing until no dry flour is left. Then cover and let it sit in the fridge overnight for the flour to absorb the liquids and soften. Then, let the dough come to room temperature the next day (probably 2 hours) Then, add the yeast, and start the kneading. The rise times will be a bit longer, the colder the dough is. I would contact the manufacturer of your mill to see if there is an issue with it. I hope this is helpful! Don’t give up! You can do it! I had many bad loafs while I was first starting, and that is what inspired me to start this blog and my Youtube channel To help others that struggle in the beginning also!
These were so delicious! My bread-loving husband was in heaven!
I am so happy to hear that! Thank you so much!
I have tried to make these with sprouted wheat berries but I am not having success. Any suggestions on why sprouted wheat berries would perform differently than normal wheat berries?
I am assuming sprouted wheat has a higher moisture content, so maybe decrease the liquid just a bit. Also, it may ferment faster, so try shortening the rise time by just a bit.
I don’t know if you’ll see this or not, but I’ve struggled baking yeast breads with sprouted wheat berries because the gluten content has decreased so much. I cannot get a rise at all, and even though the breads taste delicious, they come out like flat little Lego bricks 😕 It’s very disheartening. The gluten really is the key for getting the rise, I think
These are the best rolls that I have made so far with hard wheat since I started milling almost 2 years ago. They are soft and squishy! I have had so much trial and error working with milled flour. I came across your videos a few months ago. Your recipes do not disappoint! I also made 3 batches of your English muffins recipe today. Amazing results, not round bricks lol Eggs really are milled flours best friend. Thank you so much for your blog and videos!
That is so wonderful to hear! Thank you so much! Happy Baking!
Where do you purchase hard white wheat berries? Thank you
I get them from several places. My favorite place is a local Amish grocery store in Ohio whenever I am passing through there. I also love Bread Beckers in Georgia, Pleasant Hill Grains and Palouse as well. I have also picked some up at Winco is you are near that grocery store. Hope That Helps!
Which Amish store in Ohio? What is the name and address please?
I have shopped at several. The Old Home Place in Frankfort, OH is one. Another is Hillside in Laurelville, OH. Yutzy’s in Plain City. Also, there are a whole bunch near Berlin, Walnut Creek area as well.