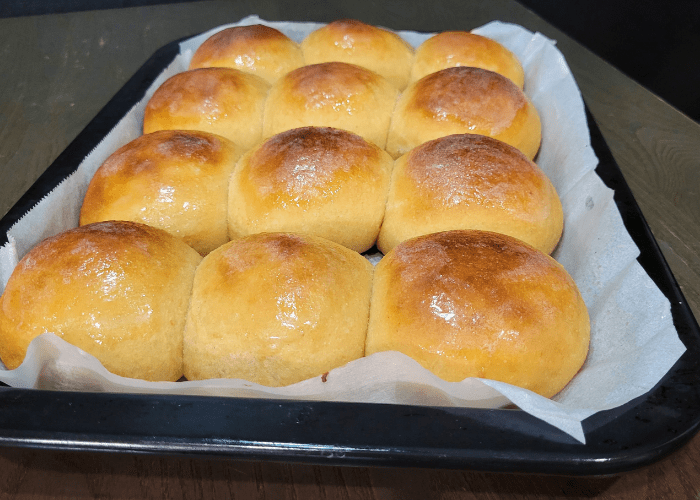
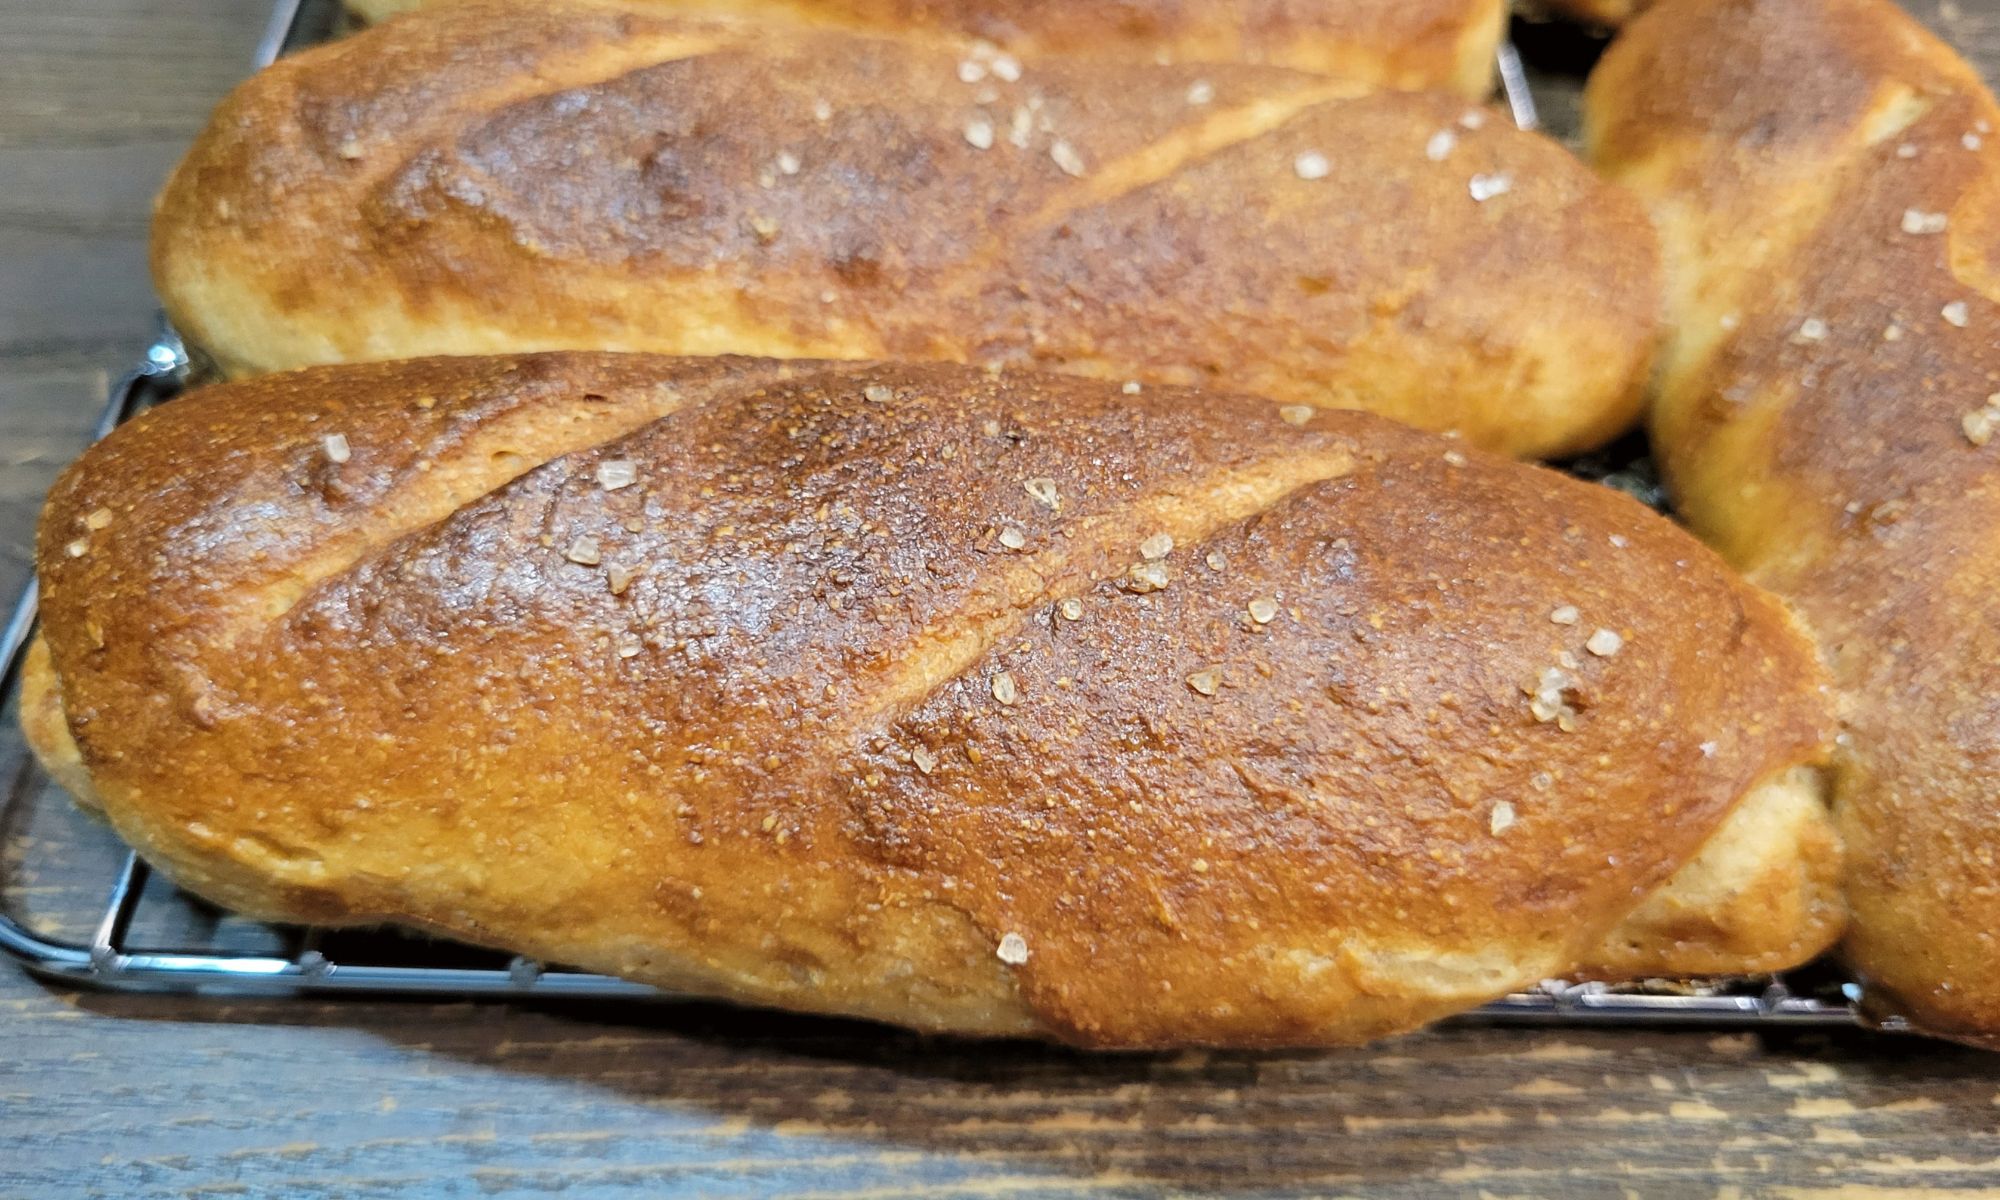
Whole Wheat Hawaiian Rolls made with Fresh Milled Flour – Outstanding!
I have to share how I make these Whole Wheat Hawaiian Rolls made with Fresh Milled Flour! They are outstanding, dare I say, even better than the name brand ones you buy in the store! And, they are so light & airy, they just peel apart. Basically, my mouth is watering as I type this!
Why You Need To Try These Dinner Rolls
These Sweet Hawaiian Rolls are a must try! They are the perfect combination of sweet with a “tang.” And, I think they are even better when I prepare the rolls the night before. Then put them in the refrigerator overnight covered. Next, get them out of the refrigerator 1-2 hours before you want to bake them. Bake them and enjoy warm & fresh! I can’t explain how soft, airy, and pull apart good they are!

What Is Different About Making These With Fresh Milled Flour?
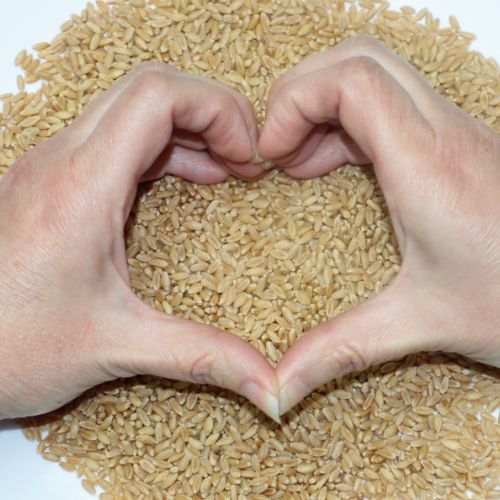
The main difference between making these Whole Wheat Hawaiian Rolls with Fresh milled flour vs regular commercial flour is the health benefits that fresh milled flour provides. Commercial Flours are processed and in doing so, the nutrients of the whole wheat are stripped. Also, fresh milled flour requires more kneading time. So, knead until it passes the window pane test. HERE is an example of that windowpane test.
Which Nutrients Are Lost When Flour Is Processed?
Processing Whole Wheat to make flour removes the most nutritious parts of the grain. When processed, the germ & bran are removed for the sake of spoilage and a longer shelf life. The Nutrients that are lost when flour is processed include, but not limited to:
- Protein
- Magnesium
- Dietary Fiber
- Vitamin E
- Vitamin B
- Iron
- Selenium
- Potassium
So, What Is Left After Commercial Milling & Processing Of The Flour?
After Flour is commercially milled and then processed, only the endosperm of the wheat berry remains. The Milling process grinds the whole wheat berry, and the commercial processing then removes the bran & the germ. The result is a soft fluffy white flour that contains little to no nutritional value.
What About Whole Wheat Flour From The Store?
Unfortunately, whole wheat flour from the store is not a whole lot better than white flour in the store. It is marketed as a healthier version of white flour, because it has some of the bran added back in. This too, is why it normally will have a bitter flavor, and needs to be sweetened to cover it up (hence, honey wheat being so popular, etc) So, when whole wheat flour is processed, it goes through the same processing steps as the white flour, completely stripping the flour of all the nutrients, then just adding a small percentage of only the bran back in.
Ingredients To Make These Whole Wheat Hawaiian Rolls
- 3&1/2 cup fresh milled flour 420g (I used hard white wheat, with a little Kamut)
- 2 eggs
- 1 cup pineapple juice (240g) (room temperature)
- 4 TBSP softened butter (56g)
- 1/3 cup brown sugar (75g)
- 1 tsp vanilla I love to make my own Vanilla Extract. HERE is my video how to make that.
- 1&1/2 tsp salt
- 2&1/2 tsp yeast
- *optional 1 TBSP butter to top after baking

Instructions To Making These Whole Wheat Hawaiian Rolls
- Mill the flour
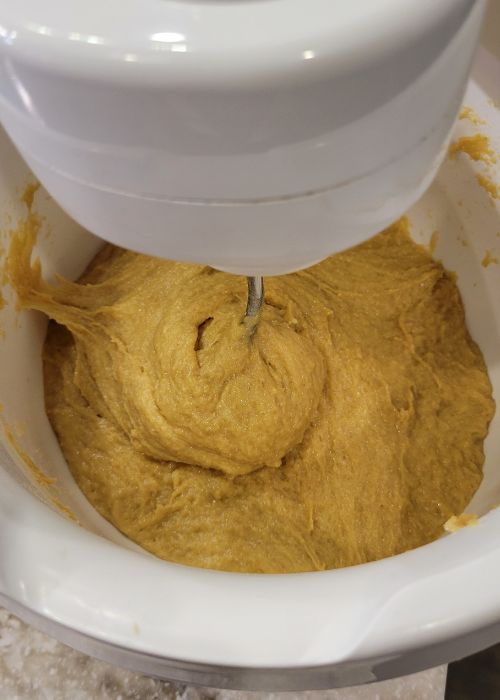
- Pour Pineapple juice, softened butter, brown sugar, eggs, vanilla, & salt into stand mixer bowl & mix until combined
- Add flour into bowl & Mix until cohesive & smooth. It will be a sticky dough.
- Let mixture sit covered for 15 minutes for the flour to absorb liquids.
- Then, add yeast and begin kneading dough until it passes the window pane test.
- Spray dough with oil & cover for 1-2 hours or until doubled.
- On an oiled surface, divide dough into 12 pieces.
- Roll each piece into a smooth ball.
- Oil or line a 9×13 baking pan with sides.
- Put 12 rolls into pan & cover – Let rise for 40 minutes until nice & puffy.
- Preheat oven to 350*F towards the end of the second rise.
- Bake for 20-25 mins until internal temperature is 190*F
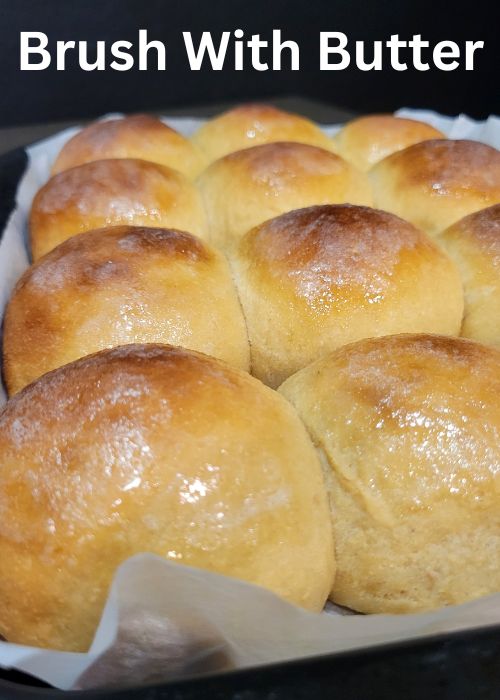
- After the rolls come out of the oven, brush with melted butter *optional
What Is The Window Pane Test?
The Window Pane test is a test to see if the dough is ready to rise (done kneading.) The dough should be stretchy, and you should be able to pull it gently to pull the dough so you can see through it like a windowpane. I made a very short video to show a window pane pass and fail test! You can watch that HERE

If You Want To Learn More About Milling Your Own Flour, I have a Fresh Milled Flour 101 post. I Recommend Starting With That Post.
Shop This Post
Checkout My Other Recipe
Tips & Tricks For Milling Your Own Flour
Whole Wheat Hawaiian Roll Video – Copycat King’s Hawaiian Rolls Recipe


Whole Wheat Hawaiian Rolls
Ingredients
- 3&1/2 cup Fresh milled flour 420g I used hard white wheat, with a little Kamut
- 2 eggs
- 1 cup pineapple juice 240g (room temperature)
- 4 TBSP softened butter 56g
- 1/3 cup brown sugar 75g
- 1 tsp vanilla
- 1&1/2 tsp salt
- 2&1/2 tsp instant yeast
- *optional 1 TBSP butter to top after baking
Instructions
- Mill the flour
- Pour Pineapple juice, softened butter, brown sugar, eggs, vanilla, & salt into stand mixer bowl & mix until combined
- Add flour into bowl & Mix until cohesive & smooth. It will be a sticky dough.
- Let mixture sit covered for 15 minutes for the flour to absorb liquids.
- Then, add yeast and begin kneading dough until it passes the window pane test.
- Spray dough with oil & cover for 1-2 hours or until doubled.
- On an oiled surface, divide dough into 12 pieces.
- Roll each piece into a smooth ball.
- Oil or line a 9×13 baking pan with sides.
- Put 12 rolls into pan & cover – Let rise for 40 minutes until nice & puffy.
- Preheat oven to 350*F towards the end of the second rise.
- Bake for 20-25 mins until internal temperature is 190*F
- After the rolls come out of the oven, brush with melted butter *optional
Video
Notes
*This post contains affiliate links, which means I make a small commission at no extra cost to you! As an Amazon Associate I earn from qualifying purchases


These rolls looks delicious. Are these rolls very sweet?
They are on the sweet side, but not sweet like dessert, if that makes sense. Our favorite way to eat them is as a bun for Sloppy Joe’s! The rolls complement savory very well! If you would like them slightly less sweet, you can decrease the amount of sugar. Enjoy!
I want to make these in my bread machine using hard red wheat berries. What do I need to do differently?
Bread machines vary, but generally they need a second kneading cycle. Just check for stretchy bread. I would hold back a little of the liquid and only add it if the dough seems stiff or dry.
If putting in the fridge overnight is that before the 40 mins proofing? I’m not familiar with putting things in the fridge, but I like the ease!
You make them, let the dough rise the first time. Then, shape them, cover them, then put them in the fridge overnight before that second rise. Then the next day pull them out. Set them on the counter (still covered) for 1-2 hours, or until they are room temperature. Then, bake as the instructions say. I love having this as an option!
I made these for Thanksgiving and they were great! I didn’t have time to finish them before Christmas dinner; so I shaped after the second rise and placed in the fridge. Should I bring to room temperature this morning before baking?
Yes, set them on the counter for about 1-2 hours to come to room temperature, then bake them. 🙂
Would you do anything different if you made this recipe into a sandwich load. My son loves the store bought version for his sandwiches?
I would just bake it longer, until the internal temperature of the loaf reaches 190*F. These are great as rolls, buns, and bread!
while the taste is fab – I have yet to get them to rise to fluff. I didn’t use my KA as I have a dough kneader. But this dough was extremely wet/sticky – what did I do wrong.
It is a very wet and sticky dough, yes. This kind of dough would be very hard to hand knead to get them soft and fluffy. I would recommend to let the dough sit, all ingredients except the yeast for 2 hours, then add the yeast, and start the kneading process. This will allow more time for the fresh milled flour to soften and absorb the liquids. Hope that helps!
First I used 110 g sourdough starter instead of yeast. I had to let my dough bf about 8 hrs, then put them in the fridge over night. I got them out and let them dough warm up about 30 minutes then shaped them into rolls. I left these rise about 3 hours in my proofed set to 79 degrees. They were much fluffier this time.
Yay! I am glad to hear that! And, this is great info for anyone else reading and wanting to convert to sourdough. Thanks for sharing!
Sweet & Sourdough bread!
Sounds like a great invention.
I was so excited to try this and prove to my family that fresh mulled can be as good or better than the processed stuff in the store but my first attempt was an epic fail 🙁 The dough was still more like a batter than a dough after I put all the flour in so I added little bit by little bit and it still wouldn’t hold together like in your video (I used hard white wheat berries and ground them fresh before mixing) – by the time it formed a dough that would hold together and be kneadable, I had probably doubled the amount of flour! I let it rise for two hours and it had hardly changed at all. When I picked it up to pull on it, it didn’t stretch at all, it just tore/broke apart. Ugh. It smelled so good – what did I do wrong? Yours looked so lovely! I know I can do it if we can figure out what’s going wrong 🙂 Thank you in advance! ❤️
Oh no! I am sorry to hear this. When I work with this dough it is a very wet dough. It takes a long time of kneading (like 15-20 minutes sometimes) before it will come together into a ball. It sounds like way to much flour was added. I recommend making them again, and if you can measure the wheat berries by weight it will give you more accurate results. Just go with the wet dough, and try to resist adding more flour. Keep kneading it, and you will see the dough change. Let me know how it goes! You can do this!
I’d like to try the dough setting on my Zo bread machine. Has anyone tried that?
If you decide to use the bread maker to knead, I would suggest running it through 2 kneading cycles. Happy Baking!
I wasn’t sure how they’d turn out because the dough was sticky like you said. LET ME TELL YOU WHAT, THEY WERE DELICIOUS 😋!! I have yet to try one of your recipes that weren’t! Please keep posting recipes👍❤️
Yay! I am so happy you loved them! Yes, the dough is sticky, but if you trust the process, you get amazingly soft and tender results! Nice job! Thanks so much!
I have tried this recipe 2 times and all I get is a runny mess. When I add all the liquid then the flour it does not look like what it does in the video. I even measured ingredients by weight!
It is a very wet and sticky dough. Are you using hard wheat? or soft wheat?
The recipe says 4 T but the video says 2 T of butter. Maybe those that use 4T it’s just a bit too wet to pull together like me. I have used your recipes before and they are Def wet and sticky but this was just a step above pancake batter. I used the 4 T like the recipe says.
I like the higher butter content, but some butter had more moisture in it than others, I would try holding back some of the liquid in the recipe and only add it in later if the dough seems stiff or dry.
I’ve made this 2 times and there is no possible way to make it into a ball. It is so wet and runny. I also watched the video and it says 2 tbs of butter and the recipe print out says 4. Not sure which one it actually is. Also did the kneading for 22 min and got a tiny window pane but it was just so much like cake batter. I used everything to a T in the recipe. 😭
Hmmmm, it sounds like you might be using a soft white wheat or a wheat that doesn’t develop much gluten. It is a very wet and sticky dough. It is also possible if you are in a very humid climate that you may need to add a bit more hard white wheat. I just made these 2 days ago again, and they turn out so soft and fluffy. this is because it is a wet and sticky dough. to shape, it does need quite a bit of surface tension. I hope that helps!
This is what I’m wondering too. Is it 2Tbs of butter or 4?
Anytime I mention an amount in the video, and then it is different in my blog post, the blog post will be the accurate one. I am unable to update and change recipes once I film them, but I can update my written posts.
One of our favorite roll recipes!
Awesome! Thank you so much!
Hey there! So excited to try this recipe. Could you tell me your soft white wheat to kamut ratio? I’ve just started adding in kamut to my recipes and I’m trying to get the ratios right. Thanks!
I like to use about 80% hard wheat and 20% Kamut for my breads, rolls, pizzas dough, etc. I hope that helps! Happy Baking!
These smell so good but I live in a humid climate (Georgia) and every time I make one of your recipes it’s super wet and just globs, and I do everything by weight as I’ve been told it gets the most accurate results – do you have any insight as to how much extra flour I should mill? It’s so sad seeing these recipes fail 😭
My recipes are pretty wet and sticky, But, you can try just adding 1/4 cup flour 30g. Also, make sure you are using mostly hard wheat. If you get a chance to watch a few of my videos if you haven’t already. I show how wet the dough is, and how it comes together. This focaccia video I really show this in several stages of mixing. https://youtu.be/3nDorxqEgaU?si=dC-oGGzu1cfAkT3K
Also, I have a super short video on shaping wet and sticky dough (I put a little olive oil on my hands and work surface to make this easier.) Here is that short. https://youtube.com/shorts/3s8ddDARaKo?si=ajQl_rw8pPpSWRZm
I hope that helps! Let me know. Thanks!
I just made these awesome rolls and they are Delicious! I live in a humid area and hurricane Beryl had recently visited, so I did have to add additional flour. I used sucanat instead of the brown sugar. Thank You for this recipe!
Awesome! I am so happy to hear that! I am also glad to hear you are safe from the hurricane. Thanks!
I have made this recipe twice, and I’m new to FMF baking, so I was a tad bit nervous! The first batch were delicious, although I had to knead much longer due to the humidity in Louisiana. I used regular measuring cups, too. The second time I doubled the recipe, because my family loves them, and I used a metric scale to measure all ingredients in grams. This seemed to cut down on the kneading time! I make them into hamburger buns, too. The only addition to the recipe I made is organic Sunflower Lecithin. Thank you for sharing your expertise and recipe! God bless you!
Awesome! I am so happy to hear that! Nice job! Thanks! 😊
I just made this recipe as a loaf bread and wanted to comment to thank you so much for sharing this. I followed recipe precisely, mixed in KA with everything except yeast for 15 minutes, added unbloomed yeast, mixed in KA with dough hook for 20 minutes. I let it rise covered in the bowl, mixed for 15-20 minutes with dough hook and and placed into regular loaf pan. Second rise brought it about 2/3 to top of pan and baked for 40 mins at 350. Came out with beautiful sandwich bread texture, tastes lovely! Thank you so much for the recipe.
Awesome! I am so happy to hear that! Thanks so much for sharing! 🙂
I have made these a couple of times and they are just delicious! We enjoyed these rolls with chicken salad on them for lunch today. Sooo gooood! Thank you for all of your recipes. I ordered your cookbook today!
Yay! I am so happy to hear they were a hit! I hope you love my cookbook! Happy Baking! 🙂
Made these yesterday for Thanksgiving and wanted to share my tips. I am vegan so I swapped out the dairy butter for a nondairy one and swapped the 2 eggs for 2tbsp tapioca starch + 4 tbsp warm water. I also accidentally melted the butter rather than using softened butter and it turned out just fine. The thing is it took FOREVER in my KitchenAid to reach window pane test, probably over 25 minutes. But once I finally got there I followed the rest of the recipe as written and they turned out perfectly, almost identical soft pull apart texture as the store bought ones. So for the commenters saying it never came together into a dough ball, just know it needs a LOT of mixing time. I think I added an extra 30g hard white flour but nothing more than that. Thank you for sharing this recipe, my family and friends loved them.
Thank you so much for sharing this! So happy to hear they were a hit, and thank you for the vegan tips! 🙂 Happy Baking!
For the 420 g of flour, is that 420 g of berries before milling or 420 g of flour after it’s milled? Thanks!
I weigh my wheat berries, then mill that into the flour. So, 420g of wheat berries will give me 420g of fresh milled flour. This does not work the same with volume. For example 1 cup of wheat berries will not give you 1 cup of flour, it will be more. I hope that helps! Happy Baking! 🙂
Thank you yes that helps a lot.
Welcome!
The nice thing about milling is that the weight of milled wheat is the same as that of wheatberry. The volume will change, but not the weight.
Can you use a hundred percent whole wheat flour?
You can use that, but it is not quite the same. you may need to play with the amount of flour a bit to get the right texture. I have a video on these so you can see what texture you are going for. I hope that helps! Happy Baking. https://youtu.be/cCWsI_nWRmI
Still have yet to make these, but I am making them in advance for a trip. Recommendations for reheating after frozen? I’m good to bake before hand, but would you recommend freezing before the second rise?
I would bake them, let them cool, then freeze same day. To thaw, we like to let them sit covered at room temperature for 1-2 hours.