Sourdough Bread With Fresh Milled Flour Made EASY
Sourdough Bread With Fresh Milled Flour Made EASY! If I can do it, you can do it. It is ok to fail, as long as you try again! Once you mix up the dough, this is a one day recipe. This recipe makes either 4 small bread bowls, or 1 larger sourdough artisan loaf.

Ok, I had to do it! I am by no means a professional sourdough baker. I am assuming you have also seen those beautiful crusty sourdough loaves that are scored so perfectly that look like a piece of art that should be in an art gallery! Yes, I have seen those too, and they are gorgeous!
Beginner Sourdough Bakers
But, What About the Rest Of Us?
Right? The rest of us home bakers that just want to put healthy food on the table, and don’t have years to perfect a loaf before we can serve it to our family. I hear you! I am one of you! So, I decided to share my recipe.
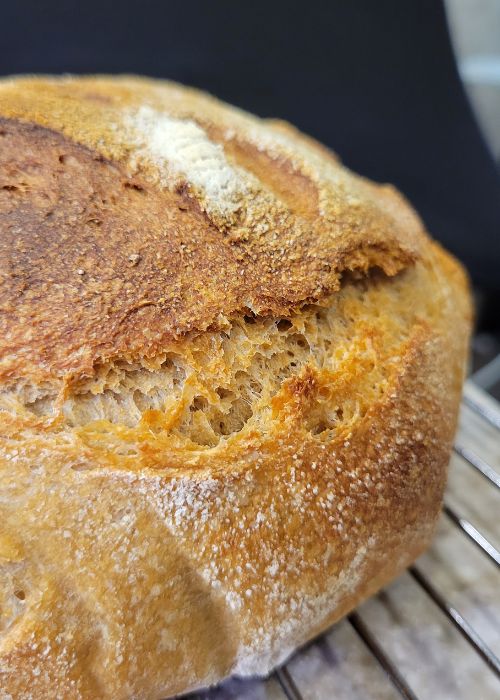
You can see where the sourdough loaf decided it wanted to rise more, even where I did not have it scored. I love when a loaf comes alive and makes it’s own decisions, even if this may be considered a flaw to some. Each Sourdough bread loaf is different, and they all have their own character!
My Sourdough Journey
In the beginning, I had a beautiful sourdough journey, But, it did start out with 100% commercial white flour. I was lucky to take a class several years ago back in 2017. And, I soaked in all the info I could! The teacher also shared some of her over 100 year old Authentic San Francisco sourdough starter. I was so grateful for this amazing free gift! I cherished it and cared for it for many years.
How I Killed My Original Sourdough Starter
Then…. I killed it. sad day. That is the day I learned that bleached flour can kill your sourdough starter. I tried to no avail to revive him. But, in the long run, it was ok. Because, this forced me to make my own starter from scratch. Which I did, and did again, and did again. Sigh… You know what I mean right? I tried and failed, tried and failed again, and finally success! It is frustrating to mess up so many times, but WOW the satisfaction you feel when it finally works out, and is bubbly and YOURS!
My Sourdough Starter Made With Fresh Milled Flour
Eventually, I had a 100% fresh milled flour sourdough starter, made from scratch, by me! And, you know what? I take so much better care of something that I put so much time and effort on! “Bubbles,” my sourdough starter, is kind of like a pet in our house. He comes out on the counter and makes delicious food for us, then he gets to go on “vacation” in the fridge for a week or so if we have travel days, or a busy schedule, and I know he will get neglected.

Here is Bubbles, my sourdough starter. He is made with 100% Freshly Milled Flour. I use a mix of different whole wheat flours. Whichever wheat berry I use that day is typically what Bubbles gets fed.
Struggling With Fresh Milled Flour Sourdough
I struggled with making a good sourdough loaf once I switched to fresh milled flour. It was very frustrating to me, and I felt like I was wasting so much! Either the loaf was too dense, or way too sour, just completely inedible. I almost gave up! And, I put my sourdough starter, Bubbles in “time out” in my refrigerator for awhile. Oh, I wanted to just cry! How could I have the most beautiful loaves of sourdough bread with regular flour, but not with fresh milled flour.
Don’t Give Up On Sourdough, Try & Learn Until You Succeed!
But, if you know me at all, you know I just could not give up! Every time I opened my fridge, there was “Bubbles” just looking at me, almost begging to give him another try. Well, I am so glad my determination paid off, and I had to give it another try.
Each time I had a failed loaf, I learned something. Actually, I am still learning things. Every time I bake bread, any kind of bread, I learn!

Tricks To Sourdough Bread With Fresh Milled Flour Making It Easy
There are a couple tricks to know when working with fresh milled flour to make Sourdough Bread. I can tell you there are 2 major things I noticed, and once I switched things up, I started having success! Are my sourdough loaves perfect? No, Are they delicious, and nutritious? YES!
The first thing I realized is that Fresh milled flour (the hard wheat varieties) are so much thirstier! I used to make 75% hydration loaves with white flour with no issues. I found that fresh milled flour needs to be at a minimum 80% hydration. Don’t worry, I will cover what the heck hydration level is, and what I am talking about next.
The second important thing I realized was that fresh milled flour seems to ferment much quicker. So, I realized that overnight fermentation that I always did with white flour sourdough wasn’t working with fresh milled flour, it was ending up WAY to sour, and that is coming from family members who love a sour bread. (Not me, I prefer a mild sourness.)

This day I was using Spelt. These everyday Grain Storage Bins are Amazing to have on hand! They completely seal for freshness and keep out moisture, and they have a nice wide opening so I can get a large measuring scoop in and out easily. You can grab some HERE
What Is Hydration Level In Sourdough Bread?
Hydration level is the moisture level in the bread dough. Ok, great… what does that mean?
The hydration level in Sourdough Bread (or any bread, really, just more commonly talked about with sourdough) is always based on the weight of the flour, generally in grams. So, for example, if I start with 1000 grams of flour, and I use 800 grams of water, then the bread is 80% hydration. I hope that example makes sense.
Bakers Percentage Made Easy
So, to elaborate more on the hydration level, this also ties into bakers percentages. This will also come up when adding salt. So, let’s take that same 1000 grams of flour, and add 800 grams of water, and 20 grams of salt. These numbers may change with different recipes, but the precents will always go off the weight of the flour. So, with our example loaf, we have 80% hydration, and 2% salt. (this ratio will actually give you 2 nice loafs.)
Why Do I Need To Weigh The Ingredients To Make Sourdough?
Ok, this one can be super controversial (well, sourdough in general seems to be a bit controversial, lol – This is why it took me this long to make a sourdough loaf post, it takes bravery to write a post on sourdough, lol)
Do you need to weigh the ingredients to make sourdough? The answer is yes, and no! How can it be both? Well, if you want a truly successful loaf, that has correct ratios, and the proper procedure, yes. BUT, can you do without measuring in a pinch, sure. (Please sourdough experts, don’t kill me here! lol) I understand not every baker wants to weigh, and was taught to bake exclusively by volume (i.e. cups, etc.) So, for you guys, my recipe has weight and volume.
Measuring your ingredients by weight is still recommended and will give you better results with more accuracy. When measuring by volume, the amounts can vary based on density of flour and how much each persons flour is fluffed, etc.

I try to keep it simple, but when baking, a small kitchen scale gives me more accuracy.
Kitchen Scale
The great thing is kitchen scales are fairly cheap, and you may find yourself happy to have it for other kitchen projects as well. HERE is a link to a fairly inexpensive kitchen scale like the one I have. I have found many uses for mine over the years!
Ingredients For Sourdough Bread Made With Fresh Milled Flour – Easy
Leaven Ingredients (The Night Before)
- 1 TBSP Sourdough Starter (15-20g) (Active, healthy, and bubbly) This is for the night before to make the leaven.
- 50g of Fresh milled hard wheat flour (about 1/2 cup)
- 50g room temperature filtered water (about 1/4 cup
Dough Ingredients (Next Day)
- 500 g of Fresh Milled Hard White Wheat Flour (I mill by weight, but it should be about 4&1/3 cups of total milled flour)
- 10 g sea salt (1&3/4tsp)
- 425 g room temperature filtered water – Divided (about 1&3/4 cups)
- Dusting of rice flour
Instructions For Easy Sourdough Bread Made With Fresh Milled Flour
I will try to explain this process in the best way possible. It may sound intimidating, but the process is not really as difficult as it may sound. I will put the volume and weight, but I HIGHLY suggest you use a scale and make this by weight! This recipe makes 4 small Bread Bowls, or 1 large sourdough Artisan loaf.
MAKE THE LEAVEN THE NIGHT BEFORE
- To make the leaven the night before, you use 1 TBSP of a hungry starter and mix it with 50g water(1/4cup) and 50g fresh milled hard white wheat flour (1/2cup). Mix to combine, and let sit covered at room temperature overnight.
THE NEXT MORNING
- Firstly, pour 400g of the room temperature filtered water into a medium bowl.
- Then, add all of the leaven you made the night before. Stir to combine. (the leaven may appear to lightly float)
- Next, add 500 g of fresh milled hard white wheat flour, mix until no dry flour is left. Cover and let sit for 30- 45 minutes. This is called the Autolyse.
- In a separate small bowl, add 25g room temperature filtered water(1/8cup) and 10g of sea salt(1&3/4 tsp), stir to start dissolving the salt.
- Then, after it had a chance to absorb the water, now add the salt & water mixture. and mix it in with your hands. You should see that the dough already is softer and not so shaggy. Cover, and let sit for 30-60 minutes. This is the beginning of the Bulk Ferment.
- Pull & fold dough in the bowl, turning the bowl a few times, Then cover.
- Repeat this Pull & Fold technique every 30-60 minutes until the dough rises about 20-30%. It should get bubbly, and stretchy over time. This phase should take about 4-6 hours.
Shaping The Loaf
- Then, take it to a clean flat work surface, start to shape the loaf. Use the cup & turn technique to form a round shape.
- Let the dough ball rest for 10-20 minutes. This is called the Bench Rest.
- Repeat shaping 1-2 more times, until the dough ball forms good surface tension. You should notice the dough ball “remembers” better each time you shape it.
- During this time, preheat oven to 480*F with Dutch Oven or a High Heat Proof Baking Vessel With Lid inside. (If you don’t have one, never fear, check the notes for an alternative.)
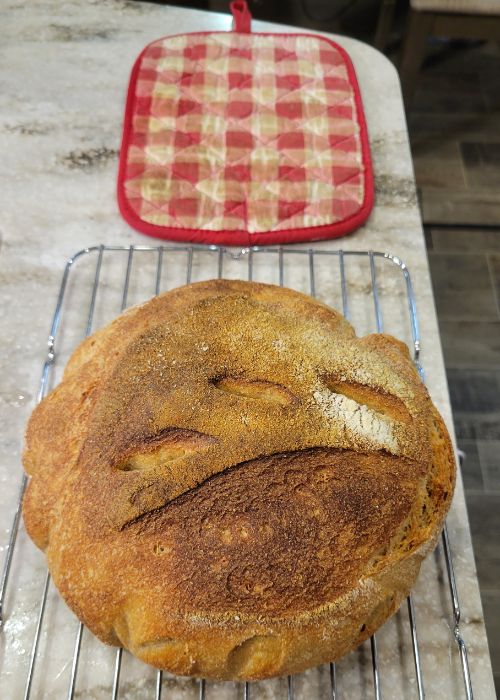
- Place dough on parchment paper, and coat dough ball with a little rice flour and score the loaf however you desire.
- Place loaf in preheated Dutch oven with lid on.
- Bake bread 30 minutes at the 480*F covered.
- Then, decrease oven to 450*F, remove the lid, and continue baking 20-25 more minutes.
- Check the temperature of the loaf, and bake until the internal temperature of the loaf reaches. 210*F
- Let the loaf cool completely before slicing into it.
What If I Don’t Have A Dutch Oven?
You don’t HAVE to have a Dutch oven to make Sourdough. It does make your loaf a little better, but I have an alternative method that won’t require you to purchase anything new… yet.
Alternate Sourdough Cooking Method Without A Dutch Oven
If you don’t have a Dutch Oven, the alternative method would be to use a heat save bowl, fill it with water, and preheat the oven with that water inside to create steam. Then, place loaf on parchment paper and on a baking sheet, and bake with the water in the oven for the first 20 minutes.

I also LOVE To make Sourdough bread bowls, you can find that recipe HERE
What If I Already Have A Sourdough Starter, But It Is Not Fresh Milled Flour?
Well, I have a whole post on how to transform your sourdough starter into 100% Fresh Milled Flour. HERE is that post. I also have a ton of sourdough Discard Recipes you can find HERE

Make Your Own Sourdough Starter From Scratch With Fresh Milled Flour
If you don’t already have a sourdough starter, but are wanting to make one with 100% fresh milled flour from scratch, I am here for you! I have a video resource that goes over how you can make your very own sourdough starter using only freshly milled flour. I also go over troubleshooting issues to help make this process a little easier for you, and I make a brand new sourdough starter right along side you! You can watch that video HERE.
I also have a written blog post that covers this information, if you would like to print it out and have it handy for when you are just getting started. You can do this, it is not as difficult as some on the internet have made it seem! You can checkout my blog post about it HERE.
Simple Way To Level Up Your Sourdough Bread
I have a great dipping oil recipe that tastes amazing with this sourdough bread. I make it with dried herbs and seasonings if that is what I have on hand, but I love to make it with fresh herbs whenever I have access to them. HERE is that recipe.

Shop This Post
Sourdough Whole Grain Recipe Book
Check Out Some Of My Other Recipes
Sourdough Chocolate Peppermint Cupcakes
Chocolate Sourdough Swiss Cake Roll
Pumpkin Roll From Sourdough Discard
Interested In Learning More About Milling Flour At Home?
I have a great beginner post HERE about Fresh Milled Flour : 101. It is a great place to start. I also have a whole video on Fresh Milled Flour 101 – Learn to mill flour at home video – HERE
More Fresh Milled Flour Recipes
Fresh Milled Flour Recipe list
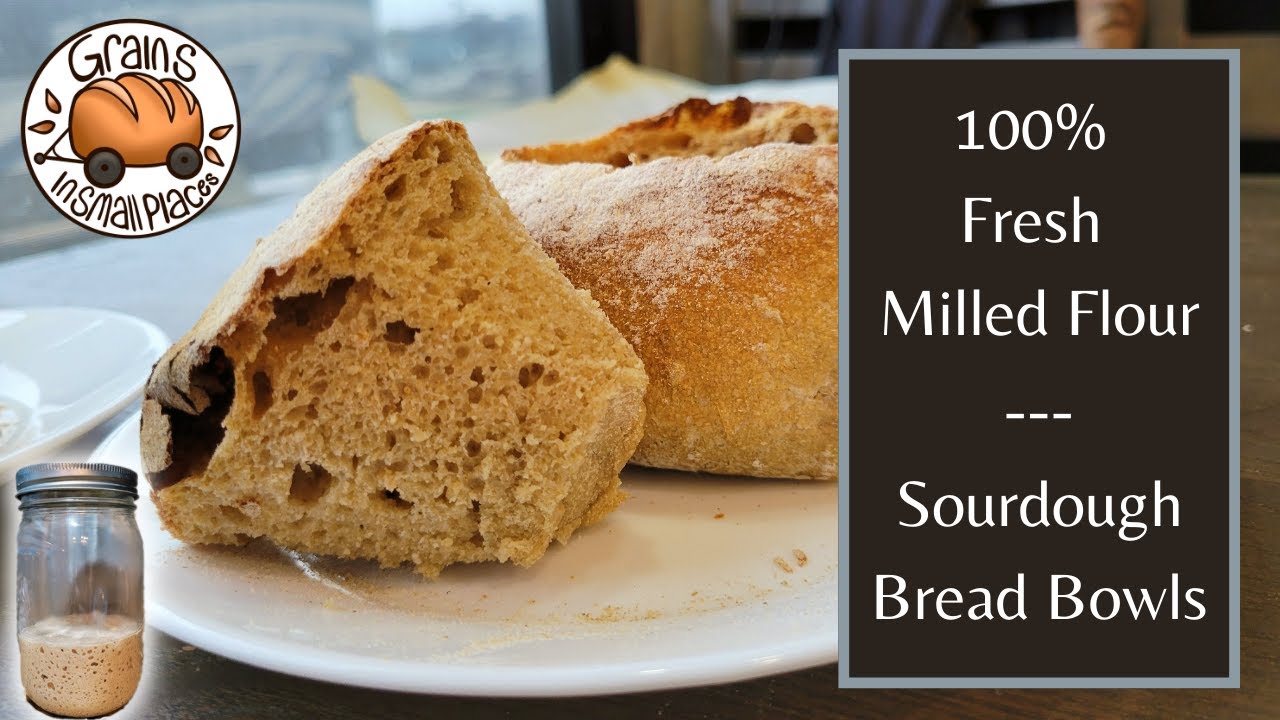
Sourdough Fresh Milled Flour Made EASY Video
This video is showing the process I use for sourdough bread, I am making smaller bread loafs for bread bowls here, however, the recipe and technique remain the same until it comes time to divide the loaf.
Sourdough Bread Made Easy With 100% Fresh Milled Flour Printable Recipe
Sourdough Bread Made With Fresh Milled Flour
Ingredients
Leaven Ingredients (The Night Before)
- 1 TBSP Sourdough Starter 15-20g (Active, healthy, and bubbly) This is for the night before to make the leaven.
- 50 g of Fresh milled hard wheat flour about 1/2 cup
- 50 g room temperature filtered water (about 1/4 cup
Dough Ingredients (Next Day)
- 500 g of Fresh Milled Hard White Wheat Flour I mill by weight, but it should be about 4&1/3 cups of total milled flour
- 10 g sea salt 1&3/4tsp
- 425 g room temperature filtered water – Divided about 1&3/4 cups
- Dusting of rice flour
Instructions
- I will try to explain this process in the best way possible. It may sound intimidating, but the process is not really as difficult as it may sound. I will put the volume and weight, but I HIGHLY suggest you use a scale and make this by weight! This recipe makes 4 small Bread Bowls, or 1 large sourdough Artisan loaf.
MAKE THE LEAVEN THE NIGHT BEFORE
- To make the leaven the night before, you use 1 TBSP of a hungry starter and mix it with 50g water(1/4cup) and 50g fresh milled hard white wheat flour (1/2cup). Mix to combine, and let sit covered at room temperature overnight.
THE NEXT MORNING
- Firstly, pour 400g of the room temperature filtered water into a medium bowl.
- Then, add all of the leaven you made the night before. Stir to combine. (the leaven may appear to lightly float)
- Next, add 500 g of fresh milled hard white wheat flour, mix until no dry flour is left. Cover and let sit for 30- 45 minutes. This is called the Autolyse.
- In a separate small bowl, add 25g room temperature filtered water(1/8cup) and 10g of sea salt(1&3/4 tsp), stir to start dissolving the salt.
- Then, after it had a chance to absorb the water, now add the salt & water mixture. and mix it in with your hands. You should see that the dough already is softer and not so shaggy. Cover, and let sit for 30-60 minutes. This is the beginning of the Bulk Ferment.
- Pull & fold dough in the bowl, turning the bowl a few times, Then cover.
- Repeat this Pull & Fold technique every 30-60 minutes until the dough rises about 20-30%. It should get bubbly, and stretchy over time. This phase should take about 4-6 hours.
Shaping The Loaf
- Then, take it to a clean flat work surface, start to shape the loaf. Use the cup & turn technique to form a round shape.
- Let the dough ball rest for 10-20 minutes. This is called the Bench Rest.
- Repeat shaping 1-2 more times, until the dough ball forms good surface tension. You should notice the dough ball “remembers” better each time you shape it.
- During this time, preheat oven to 480*F with Dutch Oven or a High Heat Proof Baking Vessel With Lid inside. (If you don’t have one, never fear, check the notes for an alternative.)
- Place dough on parchment paper, and coat dough ball with a little rice flour and score the loaf however you desire.
- Place loaf in preheated Dutch oven with lid on.
- Bake bread 30 minutes at the 480*F covered.
- Then, decrease oven to 450*F, remove the lid, and continue baking 20-25 more minutes.
- Check the temperature of the loaf, and bake until the internal temperature of the loaf reaches. 210*F
- Let the loaf cool completely before slicing into it.
Video
Notes
*This post contains affiliate links, which means I make a small commission at no extra cost to you! As an Amazon Associate I earn from qualifying purchases. But I will only suggest items I actually Love and Have Used!


Will it mess things up if a mixer is used? Right now I have a KitchenAid with a dough hook.
You can use a mixer if you wish.
Hi! Thoughts on why this dough would be incredibly sticky and dense after baking? I watched your video and mine is nowhere near solid as yours.
There could be a wide variety of things that can go wrong with sourdough, lol. It could be the starter wasn’t strong enough to rise, it could be under proofed or overproofed. Each starter acts a bit differently. It might help to see a picture, if you head over to the facebook group, you can post a picture. Or if you don’t have Facebook you can send me an email with a picture. Sometimes a picture helps. But it is not always clear what went wrong. Even experienced sourdough bakers have flops sometimes.
Facebook Group: https://www.facebook.com/groups/782667429899138
I made this loaf today and it was amazing!! I’ve tried other recipes with freshly milled flour and they just didn’t come out they way I wanted them too. I was to incorporate herbs and other add ins to the loaf. Would I do this when shaping or before the bulk rise? Every recipe is different and I don’t want to ruin this loaf by adding at the wrong time.
Yay! I am so happy to hear that! Thank you! It took me a long time to figure out that sourdough is a whole new ball game when it comes to using fresh milled flour! Yes, you can add the mix ins after your first couple pull and folds. Just add them in, and when you complete the rest of the pull and folds it will continue to distribute the herbs & mix-ins you choose. Just proceed like you would with a plain Sourdough loaf. Happy Baking!
What setting do you mill your flour at?
I mill mine by turning it on, pouring in the wheat, then tightening it a tiny bit more to make it fine. I have a short video to show it better here. https://youtube.com/shorts/GNOt93woIS8
Do you bake this after it has risen roughly 30%? I normally shape place in banneton and refrigerate to complete fermentation.
I bake this around 40-50% risen. I have found that the overnight fermentation with fresh milled flour will be extremely sour, and often will overproof. It just ferments so much quicker with fresh milled flour than white flour.
Thank you so much! This has been a wonderful recipe. Added lemon zest & blueberries and I may eat the whole loaf by myself by the end of the day! 🙂 Quick question(s): if I need to place in the refrigerator to bake later, at what point would you do that & what is the process after removing from fridge? Thanks in advance!
Yum! Lemon and blueberry sounds amazing! It is not advisable to put in the fridge for very long. Because it ferments so much quicker than white flour sourdough recipes, so the taste can be extremely sour. So, It would be once you shape into the loaf pan, cover then put in the fridge. (6-8 hours MAX, or less.) Then let it come up to room temperature and continue the directions from there. I hope this helps. Let me know how it turns out, and how long you ended up leaving it overnight. Thanks!
Thank you!
Hi – so glad to find a recipe that uses 100% freshly milled flour (FMF). I’ve gotten discouraged by the final loaves I’ve made from other recipes because they really aren’t meant to be used with FMF. But I’m back in the game and determined to get to a loaf I’m proud of.
Do you find there is a difference when using your leaven method–letting sit over night with a smaller amount of starter vs. the more traditional method of equal parts starter, warm water, and FMF and waiting roughly four hours for it to double in size? Does the overnight method create a more lively starter?
Yay! I am so happy you found me! I really depends on the recipe. I try to write my recipes for whichever method seems to work the best. If it is a discard recipe, I generally will just feed my starter the night before, and use the discard from the next day in a recipe, rather than throw it away. If I am making an artisan loaf that needs to be really strong, and hold itself up, I will generally make the leaven the night before. This is just what I have found works the best for me. I hope that makes sense!
I am wondering about the sour dough starter. Is there any reason that I cannot just use the sour dough starter I have without converting to fresh milled flour? I would like to use the starter I already have. Please advise.
Yes, you can use the starter you already have. I would suggest that the night before you want to bake something with fresh milled flour (like a loaf of bread) that you feed that portion with half the normal feeding flour, and half the flour you plan to use for the recipe the next day. This gives your sourdough starter a chance to get used to the new “food.” But, you can certainly keep your starter as is. I made these resources of making a fresh milled flour sourdough starter, because there was so much interest and requests for it. Either way, you are still making great food for you and your family. Happy Baking!
If I understand this correctly- your leaven (starter) measurement is 20g but before you feed it for an active ingredient. So would not be safe to say that when actually mixing the dough we are to use 120g of active starter?
Yes and no, lol. When I feed the leaven the night before, it is fed with a stronger ratio than a typical feeding. This is to get the starter stronger and prepared to raise a large amount of dough. So, if your starter is fed with a heavy ratio of feeding, then yes that would be the same. I hope that makes sense.
WOW! I’ve tried more times than I can count to make sourdough with freshly milled wheat and I’ve never been successful. I had given up and just resigned myself to the fact that I would make lots of awesome things with my freshly milled wheat, but for sourdough, I was sticking to good ol’ King Arthur. 🙂 Your explanation of the hydration level and all your other instructions have given me new hope! I said I was not going to try again, but here I go! I’m excited to try your method. I have a feeling this may be exactly what I’ve been looking for! 🙂 Thank you so much!
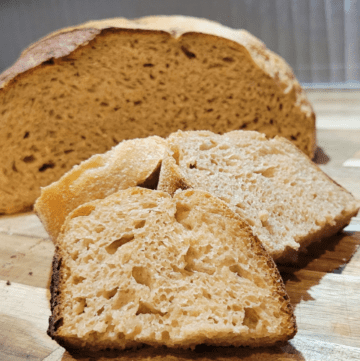
Yay! I am so excited for you! I understand, I was there too! That is what made me keep trying different non-traditional methods. It is just different with fresh milled flour. We have to kind of forget some of those hard an fast rules we learned baking with white flour sourdough. I also have a yummy sourdough sandwich bread as well! https://grainsinsmallplaces.net/sourdough-sandwich-bread/
I love seeded breads. Can I add seeds to this recipe, and if so at what point?
Yes, you can add seeds to the top right before baking. OR if you want to incorporate them throughout the bread as well, I would laminate them in before shaping like I do with my blueberry sourdough bread, directions for that here. https://grainsinsmallplaces.net/blueberry-sourdough-bread-made-with-fresh-milled-flour/
How are you using you Ank for this recipe? How long do you knead? What speed? Thanks!
I generally use the pull and fold method with this recipe, but you can use the Ank. I have a video showing how I make sourdough baguettes in the Ankarsrum mixer which would be very similar if interested. I typically knead between the 2 and 3 o’clock position. https://youtu.be/GaaNTRjfHx0
Hi Kara,
First I want to thank you for all your help and advise. I am new to fmf and sourdough, do I need a lot of help😃
My question right now is…I cut your recipe in half (my husband only wanted a small loaf😃) so, do I cut back the baking time or temp for a smaller loaf?
Thank you
Sherry
Thank you so much! I am happy to hear it is helpful! For half a loaf, I would cut back on the baking time. So, bake at the higher temp, covered for 25 minutes, then lower the temp, and start checking the internal temperature of the center of the loaf at maybe 10-15 minutes. You are looking for the center of the loaf to be at least 205*F – 210*F. Let me know how it goes! Happy Baking!
My dough ends up pretty shaggy/loose with this recipe. It’s very hard to work with and doesn’t rise very much. Any tips for me?
It could be your starter if it is not strong enough yet, or if the weather is humid or rainy out, you may need to increase the flour. Make sure you are feeding your sourdough starter the night before with a strong ratio of at least 1:2:2. (1 part starter, 2 parts flour, 2 parts water. EX. 25g starter, 50g flour 50g water). The last thing I would check the wheat you are using, make sure to use mostly a hard wheat. I hope that helps, let me know how it goes next time.
This turned out amazing. I used a parchment lined loaf pan for the first 20 min (450). with the pan of water in the oven. The. I took it out of the bread pan to finish and used the meat probe until it registered 205. It was pretty brown on the top but I buttered it well out of the oven so it softened it. I’m at a high altitude and my oven is broken and won’t heat higher than 450. The flavor is excellent. Not sour. Really great grain!
Awesome! I am so happy to hear that! Yes, higher altitudes take a little finagling to get it just right. Nice job!
Hi I’m trying to find a recipe that only uses fresh milled 100% rye flour, starter water and salt. Do you have any recommendations??
I don’t have any with 100% Rye flour, because it doesn’t really develop gluten to get nice stretchy bread. I would make this recipe with 80% hard wheat and 20% Rye to get delicious results. I hope that helps! 😊
Thank you for this recipe! I have been baking with sourdough for a few years, but never with fresh milled flour. I had gotten to the point that I didn’t measure anything, and just “eyeballed” for the right consistency. It would come out great every time, and was super easy. Then, fresh milled grain came into the picture and messed it all up! haha! I definitely had some flops! I was getting a little worried that sourdough just wouldn’t work like the flour I used before. Then, I came to your recipe!!! I made this yesterday with hard red wheat, and it came out beautifully! I can’t wait for my next azure order to try it with the hard white berries! THANK YOU!! My family was excited to have a loaf to dip in oil last night! It is their favorite way to eat it, as well! 🙂
I will say that the dough ball didn’t act “exactly” like my other dough balls… and didn’t seem to get as big during the rise. I was a little worried, because I thought I was going to end up with a brick. But, I trusted the process and followed your directions, and it rose beautifully! Not dense, whatsoever. 🙂
Thanks again!!
God Bless!
Yay! I am so happy to hear that! I was there once too. I went through that same thing where my white flour sourdough was so effortless. Then, switched and it took me a long time to figure out how different fermentation works with fresh milled flour. But, now we can enjoy it whenever we want! Thanks so much! 😊
I have been searching high and low for a 100% fresh milled flour sourdough bread recipe after being disappointed time and again. This is the BEST recipe…finally!
Thank you so much Kara! Can’t wait to try your other recipes!
Hilary from Houston, TX
Awesome! I am so happy to hear that! Nice job! Thanks so much! 😊
Hello, if my levain isn’t floating do I just let it sit longer? I made it around 11pm the night before and its 7am now. Thanks!
Often times the float test is not accurate with fresh milled flour sourdough starter. Essentially all the test is looking for is air bubbles in the starter, enough to make it float. However, fresh milled flour has the bran that tends to tear and pop the air bubbles as we are spooning or pouring the sourdough starter out of the jar. So, I just go by if the sourdough starter if consistently doubling with nice big air bubbles, then it is ready to go! I hope that helps! Happy Baking! 😊
Do you have a video on the cup and turn technique?
I believe it is in my sourdough bread bowl video. https://youtu.be/a7hM2Ti95Bc