
Everyday Sandwich Bread made with Fresh Milled Flour : Easy Recipe
This Everyday Sandwich Bread made with Fresh Milled Flour is an Easy, beginner friendly Recipe. I will walk you through each step of the way, and I have video instructions HERE where you can watch me make this exact bread along with some other goodies too! I believe that homemade is usually better, especially when it comes to bread. Also, I want to show you how to make a delightful everyday sandwich bread using fresh milled flour. By using this wholesome and nutritious ingredient, you’ll not only enhance the flavor and texture but also add an extra dose of nutrition to your sandwiches. So, Let’s get started!
*Updates To Post
*This post was updated to modify the original baking temperature and time, I find the slight cooler temp with longer bake time works better for most ovens. (The original bake time for this Fresh Milled Flour Sandwich Bread was 400*F, but I have updated it to 350*F for a longer bake time.)
*I also updated the post to include the alternative pan sizes, and how to alter the Fresh Milled Flour Sandwich Bread recipe for each size.

Can I Make This Fresh Milled Flour Sandwich Bread With Sourdough Instead Of Yeast?
Yes! This recipe can be made with sourdough rather than yeast. I have that recipe and method on my website as well! HERE is my Sourdough Sandwich Bread Recipe made with freshly milled flour.
Making Sandwich Bread With Fresh Milled Flour
Making Sandwich bread with fresh milled flour is no easy feat when you are first learning. Even if you are an experienced baker for many many years, fresh milled flour is a whole new ballgame! When I started baking with fresh milled flour, years ago, everything I knew about baking with white flour went out the window. All the tricks I thought I knew didn’t work. And all those “Golden Rules” I always abided by just ended in failure after failure. So, this made me even more determined to figure out why and what I needed to do to change this into success! I was determined that I could create light fluffy loafs just like the sandwich bread I bought at the store…..But better!

Learning To Master Fresh Milled Flour Sandwich Bread
When I was learning, there was very little information out there only a couple resources, and slim to no recipes written specifically for freshly milled flour. I had to figure out, all by trial and error how to master this! Once I began working with fresh milled flour more and more, I began to learn and grow. This is when I decided I should try to teach others everything I have learned. My inspiration bloomed into a Youtube channel, and Blog. I never thought I would do either of those (I am quite introverted), but the calling was just there I guess. So, I just needed to step out of my comfort zone!
I teach tips and tricks in most all of my videos, and blog posts. I am continuing to write new recipes often to share with the world. All of them with exclusively fresh milled flour. I have a passion to spread the word, and teach people how much healthier whole grains are. Also, I want to help people learn what they are putting in their foods, and in turn putting in their bodies.
Switching From White Flour To Fresh Milled Flour
Firstly, don’t start out changing everything at once! It will be difficult to do, as there is a learning curve, and tastebud curve as well. (If that is even such a thing.) Take it slow, and work on mastering one bread, and one or two other non bread recipes. Once you master one bread recipe you will start to develop a feel for how it should look, feel, and move. (*hint I will post a couple great starter bread recipes (other than this one, of course) at the end of this post.) I know it is exciting to try all sorts of new recipes, but often times when people do this, they just think they don’t like fresh milled flour, and stop using it. I promise it will all come to you in due time.

What Pan Size Should I Use?
My recipes call for the smaller 4×8 bread loaf pans, because I have a tiny oven! lol. Even the 4.5×8.5 pans are a bit larger, crazy how just that half inch each way can make such a difference! So, if you only have the larger pans, I recommend to x1.5 my recipes if you are looking for a large high rise loaf of bread. The large pans will definitely still work, the loafs will just be a bit smaller. HERE is a link to the smaller bread pans I use.

Ingredients To Make This Fresh Milled Flour Sandwich Bread
Bread Pan Size 4×8
- 4 cups Fresh Milled Flour 485g (I like to mill 405g hard white, and 80g Kamut)
- 3/4 cup water 180g
- 3/4 cup milk 180g
- 3 TBSP Butter 42g
- 3 TBSP Sugar or Honey 63g
- 1&1/2 tsp salt
- 1 egg 50g
- 2 tsp instant yeast
Medium Bread Pan Size 4.5×8.5
- 6 cups Fresh Milled Flour 728g (I like to mill 608g hard white, and 120g Kamut)
- 1&1/8 cup water 270g
- 1&1/8 cup milk 270g
- 4&1/2 TBSP Butter 63g
- 4&1/2 TBSP Sugar or Honey 94g
- 2&1/4 tsp salt
- 2 eggs 100g
- 3 tsp instant yeast
Large Bread Pan Size 5×9
- 8 cups Fresh Milled Flour 970g (I like to mill 810g hard white, and 160g Kamut)
- 1&1/2 cup water 360g
- 1&1/2 cup milk 360g
- 6 TBSP Butter 84g
- 6 TBSP Sugar or Honey 126g
- 3 tsp salt
- 2 egg 100g
- 4 tsp instant yeast
Instructions To Make Fresh Milled Flour Sandwich Bread
- Firstly, Mill the flour
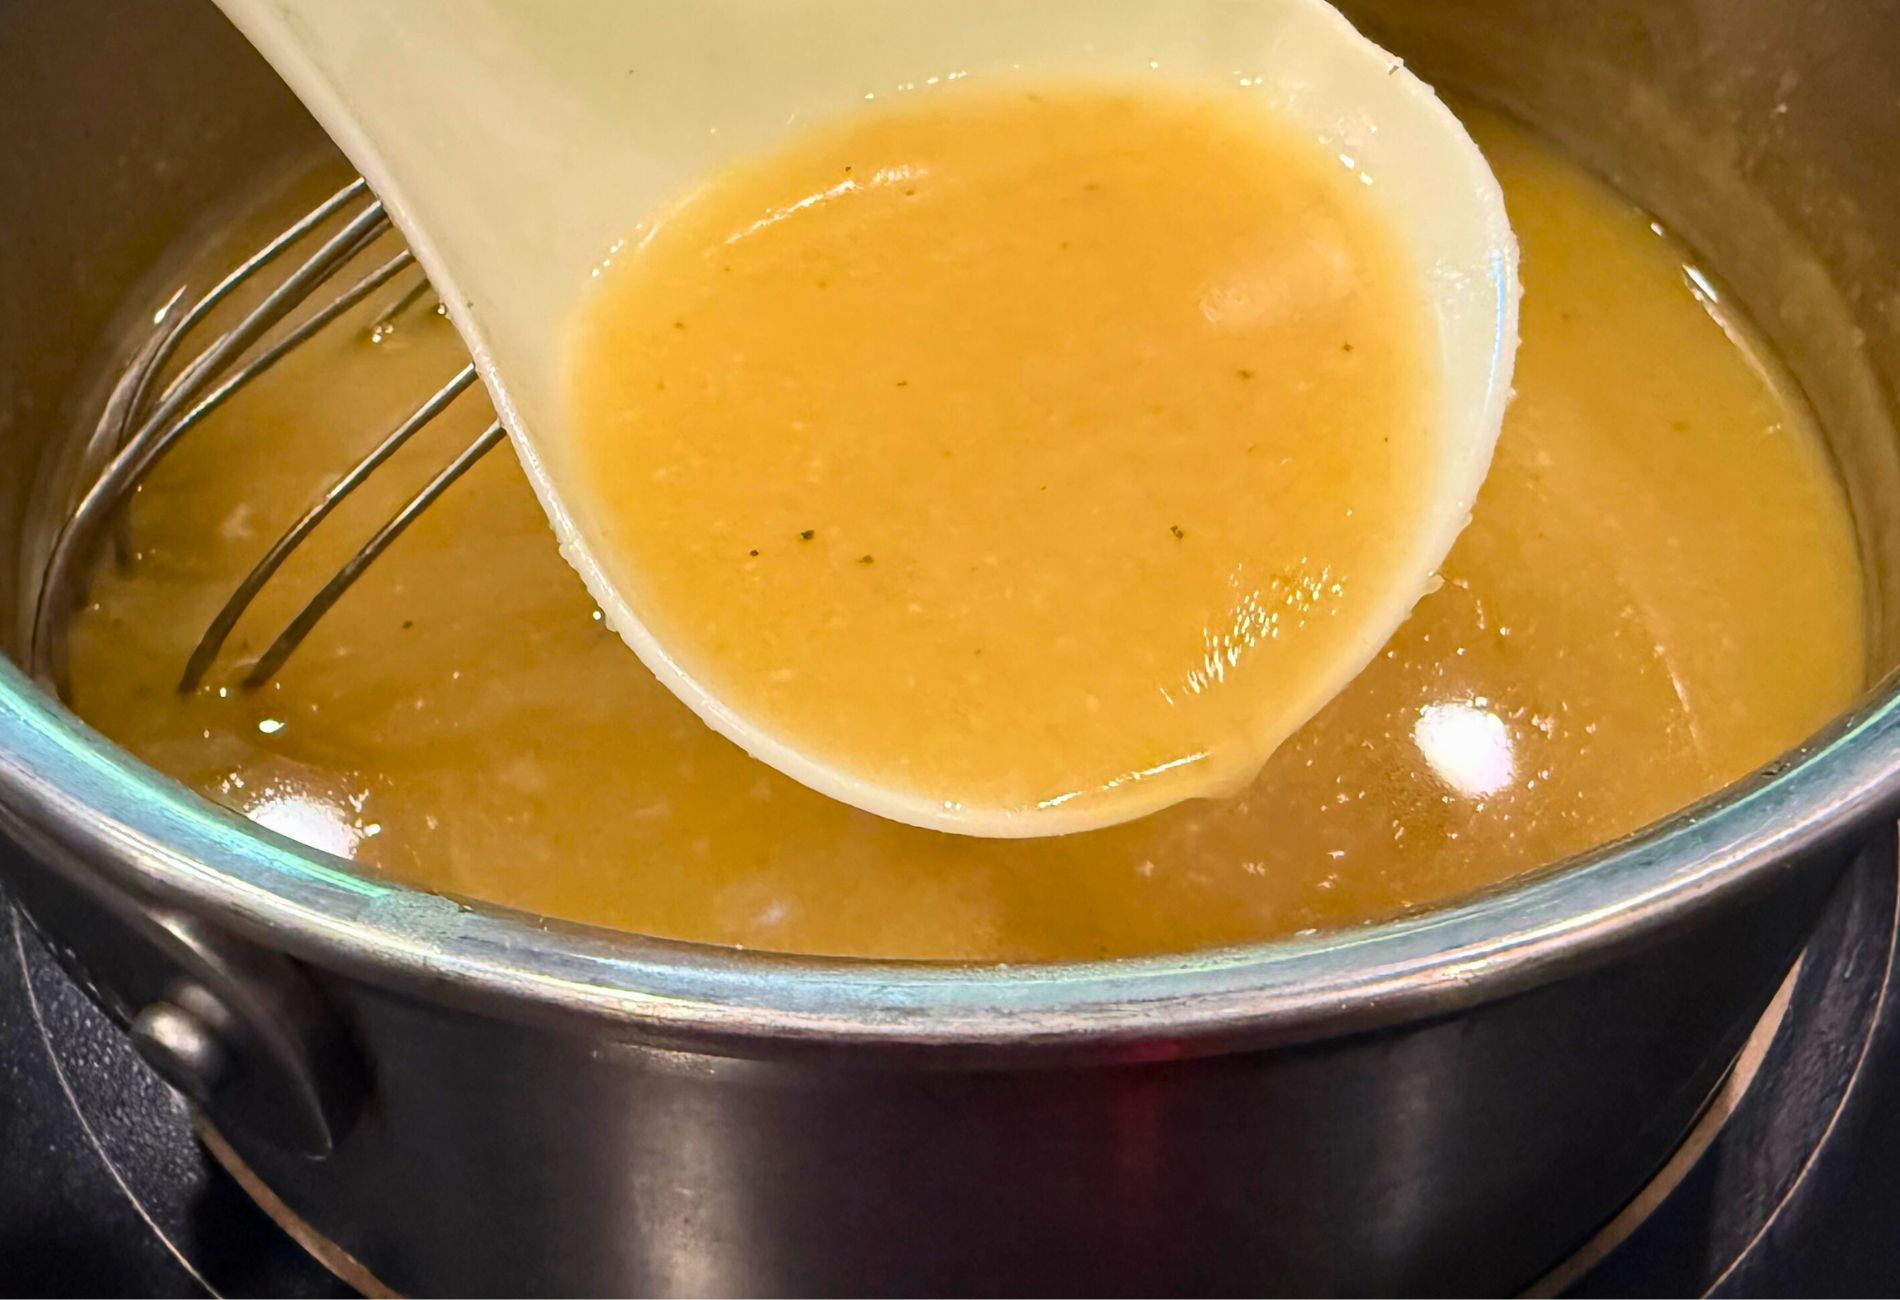
- Then, to a microwave safe bowl add water, milk, and butter and microwave until the butter is melted completely.
- Add water/milk/butter mixture to stand mixer bowl, then add sugar, egg, and salt. Mix to combine.
- Then, add flour to the stand mixer, and start to mix until all the dry flour is gone.
- Cover and let it sit at room temperature for at least 15 minutes, up to 2 hours to allow the fresh milled flour to absorb the liquid.
- Then, add the instant yeast. Start to mix the yeast in until combined.
- Start the kneading process. This could take 25 minutes with fresh milled flour, or less. This varies greatly, so the best way to check if the dough is done being kneaded, is to check for a window pane test. Window Pane Test Video HERE
- Once a successful window pane test is done, then, cover the dough and let it rise until doubled. This will typically take 1 to 2 hours.
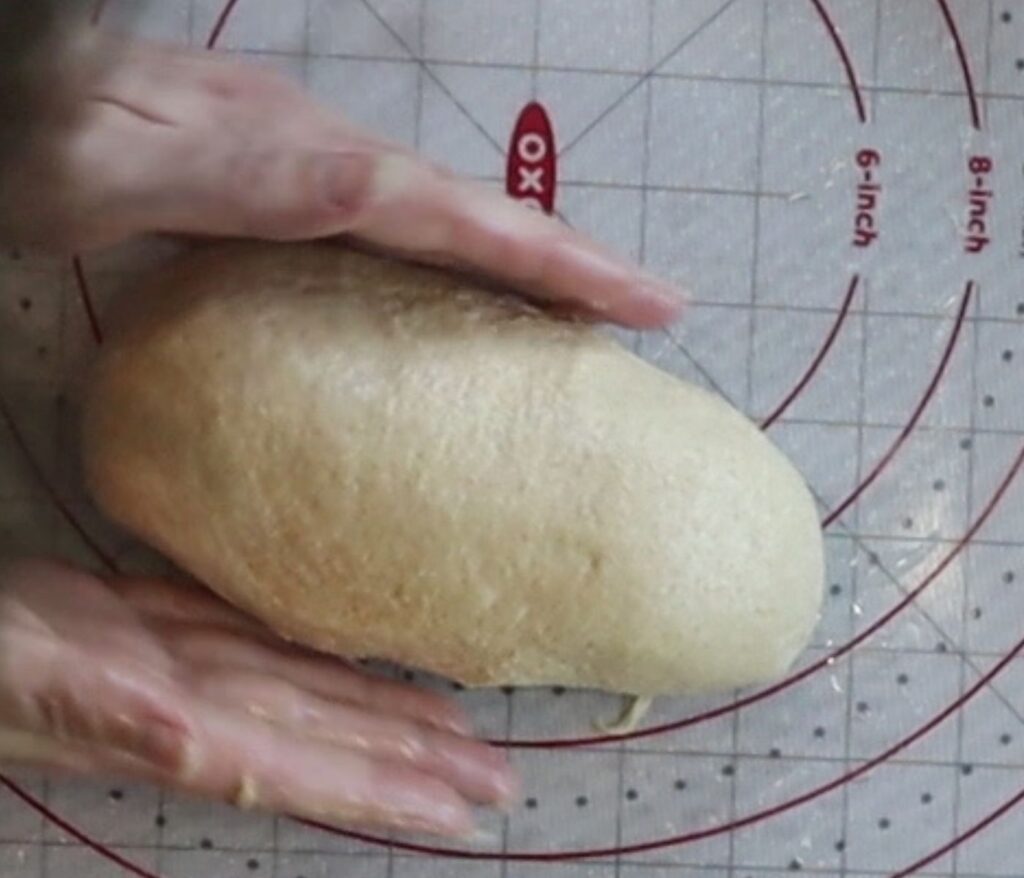
Shaping The Loaf
There are so many ways to shape a loaf of bread, but the most important thing is to make sure you have good surface tension.
- After the dough has doubled in size, then, divide the dough in half if you are making 2 one pound loaves. Press each piece flat, then roll up to shape. Make sure there is some surface tension, see my video for shaping if you are interested HERE
- I like to use some oil on my hands and work surface to help with the wetter stickier dough.
- Place in a parchment paper lined 4×8 bread pan, and cover for about 40 minutes until puffy looking.
- Preheat oven to 350*F towards the end of this second rise time.
- Bake for 30 to 40 minutes until the internal temperature reaches 190*F.
- Take bread out of the oven, and out of the bread tins right away, and place them on a wire cooling rack.
- Let cool for at least one hour before slicing.
- Slice to desired thickness, and enjoy!
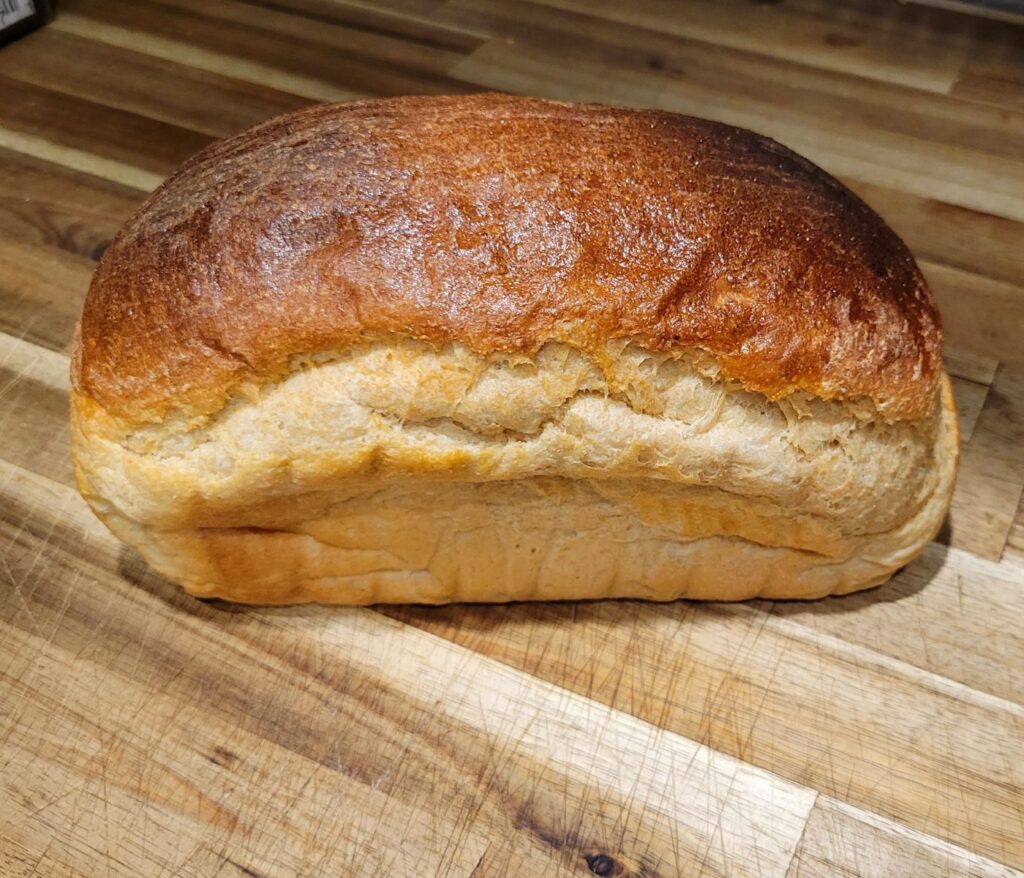
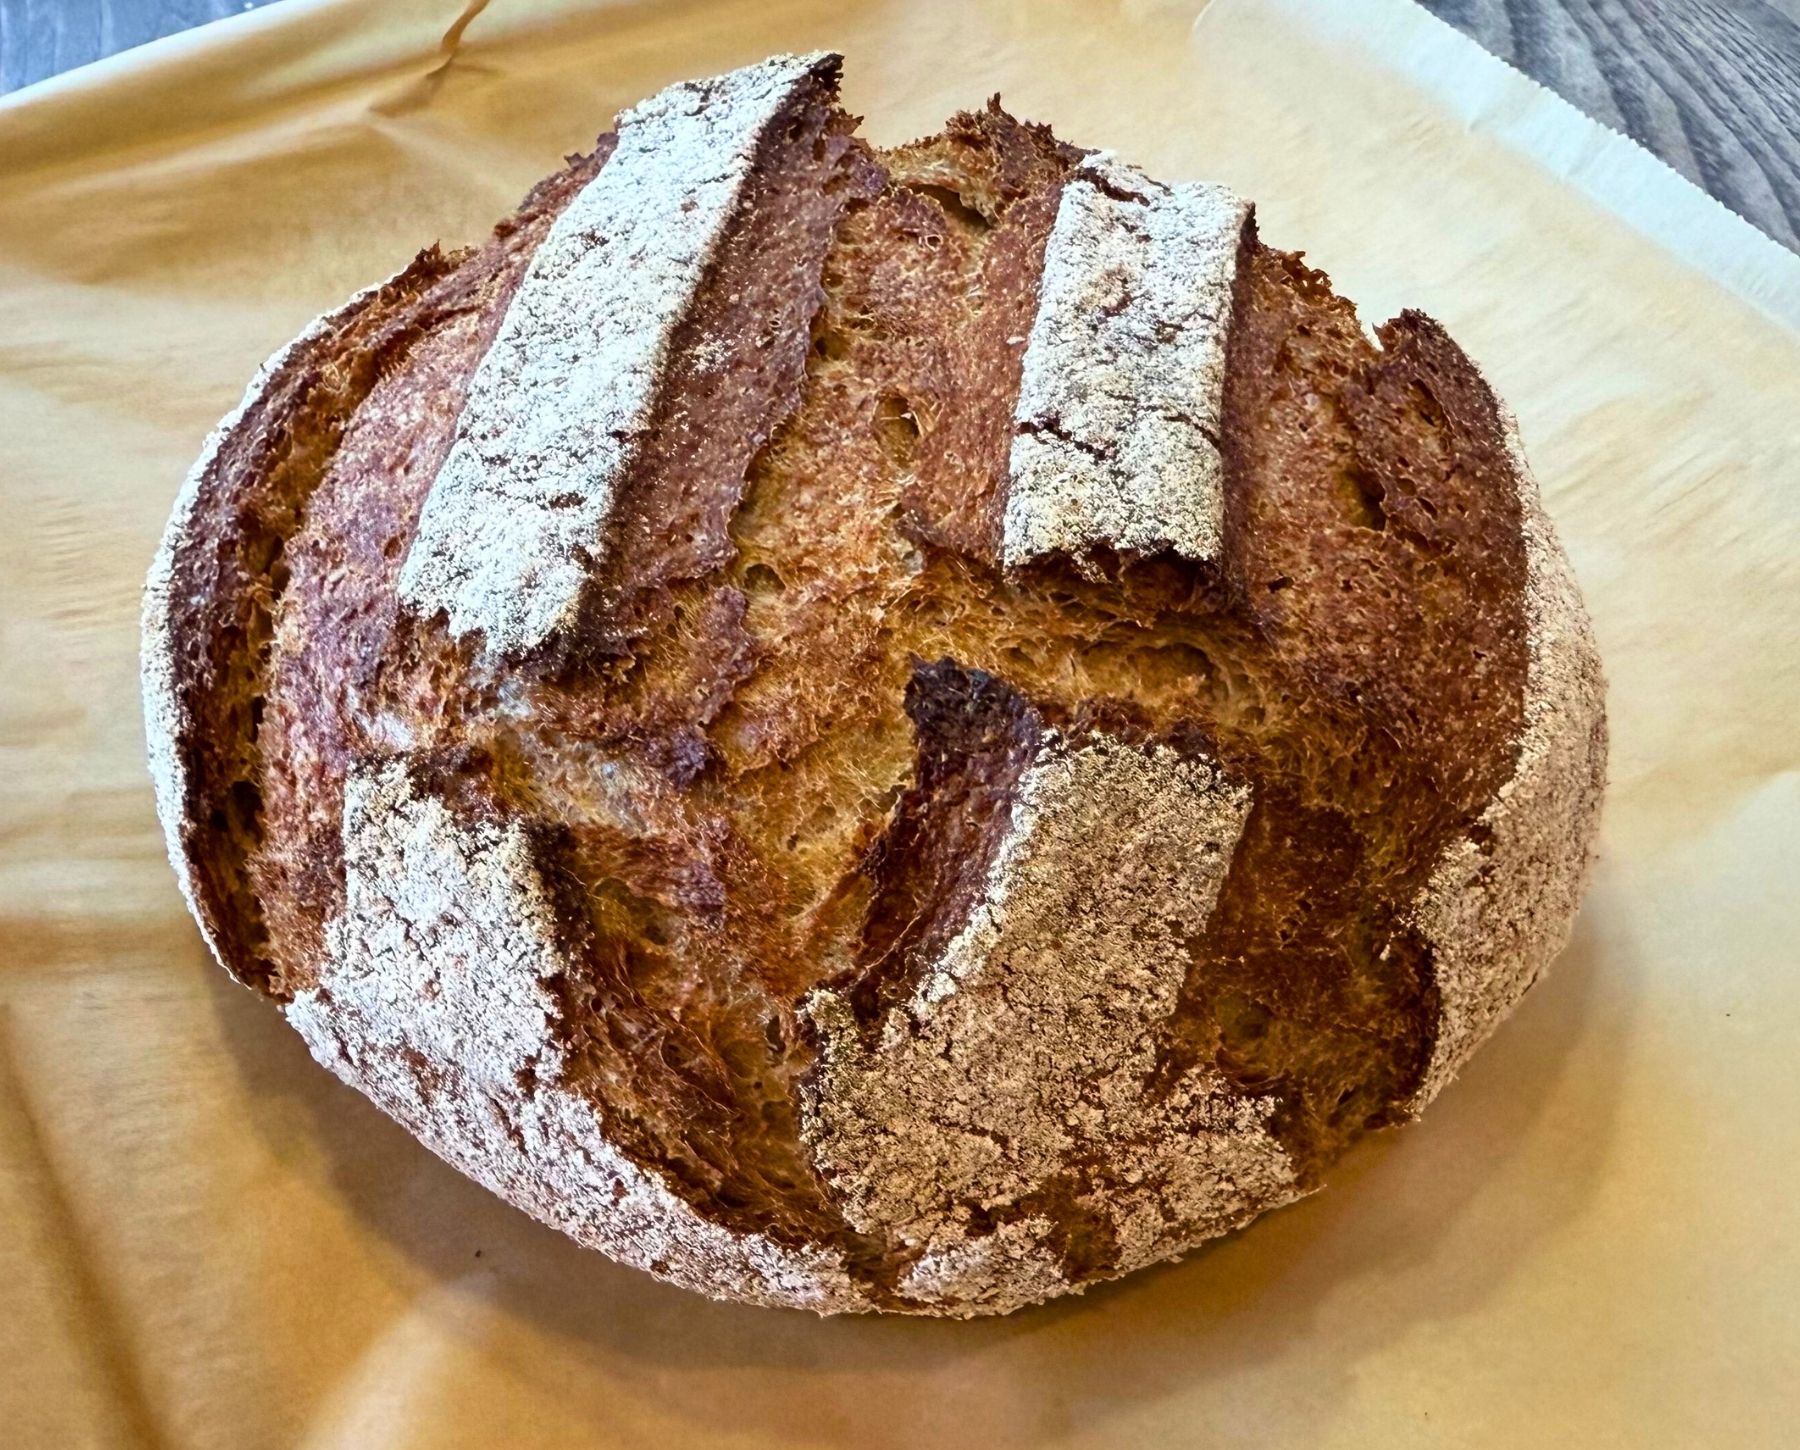
Using Hard White Wheat & Kamut To Make Sandwich Bread
Indulge in the epitome of homemade perfection with this captivating slice of bread. Expertly crafted using a combination of predominantly hard white wheat and a delightful hint of Kamut, this sandwich bread is a true marvel made with freshly milled flour. Prepare to experience the utmost softness and irresistibly squishy texture, all while savoring the wholesome essence of 100% whole grains. Brace yourself for a taste sensation that redefines what homemade bread can truly be

Enjoy That Bread!
With this simple and rewarding recipe, you can easily create a delicious everyday sandwich bread using freshly milled flour. The wholesome goodness and aromatic flavors will elevate your sandwiches to a whole new level. Say goodbye to store-bought bread and enjoy the satisfaction of homemade goodness. Happy baking!
How To Store Fresh Milled Flour Sandwich Bread
To store these fresh milled flour sandwich bread loafs, keep in an airtight container, or bag. Then, keep on the counter for 2-3 days. For longer storage, place in a freezer safe bag and freeze for up to 4 months. (Make sure the loaf has cooled completely before freezing, best results to freeze the same day as it is baked.) To thaw, sit on the counter, and let come to room temperature.
Shop This Post
Toaster Oven With Proofing Function
My Suggested Beginner Bread Recipes
Simple Sandwich Bread – No eggs, milk, or butter
No Knead Overnight Yeast Bread
My 4 Ingredient Bread – Italian Baguette Style (no loaf pan required)
Focaccia – If you are struggling to get the dough right for any Fresh Milled Flour Bread, or have questions, I highly recommend my FREE Masterclass on Youtube, HERE
Once These Are Mastered, I have some level 2 breads to try out!
Sourdough Sandwich Bread Made With Fresh Milled Flour
Cheesy Garlic Pull Apart Bread
And, here is My Fresh Milled Flour Recipe Index updating each week with new ones! You can find cookies, cupcakes, Sourdough, Pasta, muffins, waffles, and more all made with 100% fresh milled flour!

Fresh Milled Flour Everyday Sandwich Bread
Equipment
- 2 4×8 bread pans
Ingredients
For Smaller Bread Pans 4×8
- 4 cups Fresh Milled Flour 485g I like to mill 405g hard white, and 80g Kamut
- 3/4 cup water 180g
- 3/4 cup milk 180g
- 3 TBSP Butter 42g
- 3 TBSP Sugar or Honey 63g
- 1&1/2 tsp salt
- 1 egg 50g
- 2 tsp instant yeast
For Medium Bread Pan Size 4.5 x 8.5
- 6 cups Fresh Milled Flour 728g I like to mill 608g hard white, and 120g Kamut
- 1&1/8 cup water 270g
- 1&1/8 cup milk 270g
- 4&1/2 TBSP Butter 63g
- 4&1/2 TBSP Sugar or Honey 94g
- 2&1/4 tsp salt
- 2 eggs 100g
- 3 tsp instant yeast
For Large Bread Pan Size 5 x 9
- 8 cups Fresh Milled Flour 970g I like to mill 810g hard white, and 160g Kamut
- 1&1/2 cup water 360g
- 1&1/2 cup milk 360g
- 6 TBSP Butter 84g
- 6 TBSP Sugar or Honey 126g
- 3 tsp salt
- 2 egg 100g
- 4 tsp instant yeast
Instructions
- Firstly, Mill the flour
- Then, to a microwave safe bowl add water, milk, and butter and microwave until the butter is melted completely.
- Add water/milk/butter mixture to stand mixer bowl, then add sugar, egg, and salt. Mix to combine.
- Then, add flour to the stand mixer, and start to mix until all the dry flour is gone.
- Cover and let it sit at room temperature for at least 15 minutes, up to 2 hours to allow the fresh milled flour to absorb the liquid.
- Then, add the instant yeast. Start to mix the yeast in until combined.
- Start the kneading process. This could take 25 minutes with fresh milled flour, or less. This varies greatly, so the best way to check if the dough is done being kneaded, is to check for a window pane test.
- Once a successful window pane test is done, then, cover the dough and let it rise until doubled. This will typically take 1 to 2 hours.
- After the dough has doubled in size, then, divide the dough in half. I like to use some oil on my hands and work surface to help with the wetter stickier dough.
- Press each piece flat, then roll up to shape. Make sure there is some surface tension.
- Place in a parchment paper lined 4×8 bread pan, and cover for about 40-50 minutes until puffy looking.
- Preheat oven to 350*F towards the end of this second rise time.
- Bake for 30 to 40 minutes until the internal temperature reaches 190*F.
- Take bread out of the oven, and out of the bread tins right away, and place them on a wire cooling rack.
- Let cool for at least one hour before slicing.
- Slice to desired thickness, and enjoy!
Video
Notes
*This post contains affiliate links, which means I make a small commission at no extra cost to you! As an Amazon Associate I earn from qualifying purchases. But, I will only suggest items I actually Love and Have Used!


How did the bread come out looking so white? Do you sift the milled flour first? I am enjoying your site.
I did not sift, I used mostly hard white wheat and some kamut. When I knead long and get the window pane, it adds more air into the loaf, and it looks lighter!
I only have hard red wheat and active dry yeast. Could I make it work with any modifications? It’s been super tough to find any recipes with only hard red. Hoping to get some white in the future but need something to do with the milled red I have.
Yes, you can use hard red, occasionally you will need just a bit more flour with hard red than hard white. Active dry yeast, you can bloom with part of the liquid from the recipe plus a pinch of sugar during the Autolyse period. Then put the mixture in when the recipe calls for the yeast. Most all of my recipes you can change the hard white out for hard red. 😉
Hi. Do you have a video where you explain how to use the active dry yeast? I have only ever done instant, so I am unfamiliar with the terms “bloom” and “autolyse period.” Thanks in advance!
I explain using active dry yeast in this video. You can use it in any of my recipes that call for instant yeast. https://youtu.be/tzXPwaH1_CQ
You said below:
Bread Pan Size Tips: My recipes call for the smaller 4×8 bread loaf pans, because I have a tiny oven! lol. Even the 4.5×8.5 pans are a bit larger, crazy how just that half inch each way can make such a difference! So, if you only have the larger pans, I recommend to x1.5 my recipes if you are looking for a large high rise loaf of bread. The large pans will definitely still work, the loafs will just be a bit smaller.
… But then you also gave different amounts for different size pans. Are you saying to increase the 5 x 9 recipe by 1.5 if I’m looking for a large high-rise loaf? Or is the recipe for 5 x 9 good as is for a high-rise loaf in a 5 x 9 pan?
The different size pans in the recipe have already been calculated. I added those sizes. So, the regular recipe size is for the small 4×8 pans, then for the 4.5×8.5 that is 1.5x the small recipe to make two 4.5×8.5 loaves. Then, the larger size is calculated double the small recipe to make two 5×9 loaves. I hope that makes sense. 🙂
I’ve been using hard red only for a long while now. I get to a windowpane, but it seems to proof rather quickly and I think I’m overproofing it? The outside looks stunning, but inside is weak and crumbles when sliced…any tips?
It could be slight over proofing, if the holes are large near the top or if it sinks in at all, those are indicators of over proofing. Try shortening your second rise time, and that should take care of it. But, honestly, sometimes is also just comes down to the knife you are cutting the bread with. This is the knife we use, it is pretty affordable, and does a great job. https://amzn.to/4hCgL0N #ad
Are the recipes per ANY size for 2 loaves? Or only the small?
Each size is intended for 2 loaves in that size pan. For example – If you make the large pan loaf (5×9) it will make 2 5×9 loaves. If you just want to make one 5×9 loaf you can use the small recipe and just not divide it into 2 loaves. I hope that makes sense. 🙂
I think it would help if you put above each recipe how many loaves it will make. I find it a bit confusing but might just be me, I am old! Love your channel!
In general this is a 2 loaf recipe, but you can make one loaf in a large pan with my small recipe amount.
Hate to say it, and I’m only going to because perhaps you could update your post, but this is the ONE TIME I have ever wanted to peruse the post for additional information, except there wasn’t any to be had.
I’m not new to breadmaking, but I’m new to freshly milled flour and I’m just not sure how this is going to turn out. I’m about to knead it.
1. What is it supposed to look like just before kneading? I used a scale and measured to the exact gram, but my dough so far is really quite wet, even after letting it sit for an hour and a half. Is it supposed to be? I don’t know, because you didn’t photograph that portion and didn’t mention anything about it.
It’s too late to find another recipe.
2. You say knead for 25 minutes, but failed to mention if that is by hand or in a stand mixer? With normal flour, I typically use the dough blade in my food processor, but I’m worried it will be too heavy for the motor so my breadmaking experience isn’t terribly helpful here.
I guess I’ll just have to do the best I can and see what happens.
Hopefully you’ll be able to update for future readers at least.
I do have a very helpful tutorial style video for this recipe I recommend here- https://youtu.be/Ythxqi_gu0w
It is kind of a free masterclass to beginning baking with fresh milled flour. It is a wetter than you might think dough, but that is what makes it light and fluffy. If more flour is added, it will become a bit more dense. The dough comes together while kneading. I do highly recommend when you get a chance to checkout that video.
I was wondering the same thing! I think the US must have a different type of wheat than I get in the Netherlands… mine is definitely darker!
Each batch I get can vary in color.
Hi there!
I hope you are able to help me with my question.
I’ve been making your recipe for years now. I’ve been using and impact grinder, but I just recently purchased a stone mill from Nutramill and for some reason my dough looks watery. I normally autolyse it for 15 minutes. Now, I’m letting my flour rest for more than an hour and after adding the yeast it takes above 30 minutes to get window pane. I actually ended adding more flour. Help, please!
I am wondering if the flour isn’t being milled as finely. This can cause the wheat to take longer to soften. Try turning on the stone mill, tighten until you hear the ticking, then pour in the wheat. Then tighten just a tad more when you pour in the wheat. That should give you nice fine flour. Don’t tighten it too much where it is restricting the amount of flour coming out however. I hope that helps!
Thank you for listening to the calling! Love your down-to-earth style. Only just now, I am getting started but have always intended to mill and bake our bread for the longest. Finally I have retired my super-stress job, so here I go.
I am completely amazed and in awe, you were learning and perfecting this skill, all while recording a YouTube channel and raising kids on the road, all while camping in an RV.
Astounding!
Thank you so much! 🙂
This was my first use of Kumut, the grains smell and taste amazing. Loaf turned out amazing.
That is wonderful! Kamut is a great addition to many doughs! Thanks for letting me know!
Can you use einkorn instead of the kamut flour?
You can use a little Einkorn, but it may not give as soft and fluffy results.
Love your videos and website! I am making your everyday sandwich bread and kneading as well as fermenting in a Joydeem bread mixer. It is difficult to tell when dough is doubled tho. Will the hour and 30 min ferment cycle be about right? I don’t want to ruin it with wrong length of time.
Yay! Thank you so much! With a warm area to rise, and using instant yeast, I usually let it go pretty close to an hour.
My mind is blown. How have I never oiled my work surface to keep from having to add too much flour. This is genius and has changed how I handle dough forever!
Yes! Such a game changer! 🙂
I don’t have a mixer. I’ve heard you can let mix and let the dough sit overnight then just do some stretch and fold as if it was sourdough and it still works. Have you heard of or done this? Kneeding by hand for 25 min is a lot!
I have had a lot of people have success with this method and hand kneading. Give this one a try and see what you think. https://youtu.be/uvHXu3R6WH8
Can you make this recipe vegan?
You can omit the egg, and use water in place of milk, and sugar for the sweetener, and oil for the butter.
I subbed the eggs for flax eggs and it turned out great.
Awesome! I am so happy to hear that! Thanks 🙂
Do you have to use yeast?
I like have never used yeast.
OK. That explains why I have WAY more dough than I was expecting. That’s OK. Just pull out the second 2-lb pound. Problem solved!
Hi I have tried this recipe a few time, I am struggling to get the gluten activated. I put the dough in my mixer for about 20 minutes and it seemed to dry out. Then I hand kneaded for about a half hour. I tried to add moisture by wetting my hands and working it in. But I could never get the window pain. The dough rises but the bread ends up very dense and doesn’t really hold together. I live in Arizona about 3500 elevation. Do you have any suggestions. Thank you.
It sounds like the dough needs more hydration, I would try adding a little less flour and see how it goes. If the dough is too dry, it won’t develop the nice stretchy dough. I hope that helps. Also, this new method for bread is pretty amazing, and hydrating if you want to give it a try, I have been loving it. https://youtu.be/uvHXu3R6WH8
Can spelt be used in place of kamut?
Yes, I love to alternate with spelt and Kamut! Let me know how you like it!
I have the classic nutrimill, but I am considering switching to the model you have. Do you know how they compare?? Thanks.
Hi! I used to have the classic, and I think each person has different preferences, but I actually did a whole video on my mill review, and the differences of it and the classic. I will post a link to the video if you are interested. Thanks!
https://youtu.be/U4l3gfkttAM
Love this recipe!!! On a side note, what can be used instead of egg?
Yay! I am so happy to hear that, you can use a flax seed egg, or even sub for lecithin if you wish. But I have made it with a bit of leftover mashed potatoes and no egg, and yum! It was delicious! 🙂
When I split my dough and a half and put them into the 4 x 8 pans, they never rise to the rim of the pan/taller than the pan. Do I need to put all the dough in the 4 x 8 pan for this to happen? Or am I doing something wrong so that it is not rising enough. I am getting window pain after my knead.
Possibly, they need to rise a bit longer the second rise. Mine do not fill up and over the sides, if you want to take a look at my video, I show me making this every day sandwich loaf and a cinnamon swirl bread with the same dough. Hope this helps! Thank you! https://youtu.be/Ythxqi_gu0w
I made this bread tonight and it is amazing. This is my first time using Kamut, and I love the flavor. It’s also the first time I’ve shaped with oil instead if flour, and I’m wondering if that made a difference. My loaves are flat. I kneeded it for about 10 minutes and it came away the sides of the bowl and it was very stretchy. I then let it rise for an hour, shaped and let it rise another hour in the bread pans. I noticed it was not keeping its rounded shape on top. It didn’t seem to rise at all in the oven. Any ideas how to make have a higher rise? Thank you. J love your videos and blog.
It is possible that they overproofed. Which would cause them to be flat, and not rise in the oven. But, also, I have small bread loaf pans because of my small oven. So, this recipe is for Two 4×8 bread pans. If you have the 9×5 bread pans, you may need to double the batch, or just make 1 loaf with the larger loaf size. I hope that helps!
Will this work with just hard white? I don’t have any kamut but want to make a sandwich type loaf.
Yes, you can use all hard white! Let me know how it goes! Happy Baking! 🙂
We tried using all hard white, and the dough was way too wet! Turns out kamut absorbs more than hard white. So, use more hard white than this recipe calls for otherwise you will have runny dough…
This video may be helpful when working with a wet dough. But, I do like to work with a wet dough, that is what gives the light fluffy bread. https://youtu.be/tdnCrbOsVag
Making this right now! I prefer sour dough, but my kid and mom prefer store bought, so here’s hoping they like this!
On a side, what mixer are u using?
I hope it is a hit! I have videos with me using different mixers like the Ankarsrum and the Bosch, lately I have been gravitating to my Bosch mixer. This one- https://collabs.shop/qdyike
I had the same situation beautiful tasty light fluffy bread. Maybe I need to double check the measurements of my bread pan but I think next time I’ll put the whole thing in one pan bonus note my kids love the spread.
I do use the smaller 4×8 bread loaf pans, because I have a tiny oven! lol. Even the 4.5×8.5 pans are a bit larger, crazy how just that half inch each way can make such a difference! So, if you only have the larger pans, I recommend to x1.5 to x2 my recipes if you are looking for a large high rise loaf of bread. The large pans will definitely still work, the loafs will just be a bit smaller.
I am new to using fresh milled flour and only have regular yeast not instant. Should I just make the same and let it proof longer? I have tried a few recipes and don’t get good rise from my loaves. They’re more like a banana loaf would be in size. I also feel like I’m adding much more flour than the recipes call for and can never get to the window pane test. My dough is so soft and doesn’t get elastic…it stays like a cookie dough almost
Yes, you can use active dry yeast, with a bit longer rise time. I recommend giving this video a watch, maybe even pause it along the way so we can make it together. I show what the dough should look and feel like at each stage. https://youtu.be/VYOZsbspepE
I followed directions exactly and my dough is so wet. Any ideas?
I do like a very wet dough, but you may need to add a bit more flour if it is not coming together. I have a video for it so you can see what consistency I have when I start, it does seem very wet at the beginning. If you are interested, here is that video. I make this every day sandwich bread and cinnamon swirl bread with the same dough. Hope that helps! Thanks! https://youtu.be/Ythxqi_gu0w
I don’t have instant yeast but I’d really love to try this bread. Is it possible to adapt it? I just bought a lb of regular yeast🫤
Yes, you can bloom your yeast during the first autolyze period (The first rest period.) Just use a bit of the water from the recipe, and a pinch of sugar with the yeast. Allow it to sit for about 15 minutes, it should get nice and foamy. Then, when the recipe calls for putting in the yeast, add that mixture, continue the recipe. I hope that helps! Happy Baking!
I failed on this because I didn’t let it pass the windowpane test nor rise first before shaping. Whoops. But I will try again because even still it was edible so that in itself shows a good recipe lol. I also love that all your recipes call for you to let the grains soak for 15 minutes! I’ve always heard that but never saw a recipe actually call for that. And I’m definitely getting better results that way!
Thank you so much for sharing your experiences, it helps other people realize what can go wrong. But, once you see it go right, it helps so much for future bakes! Thank you for your support!
I made the large recipe for 9×5 loaf pan exactly as written. First rise was probably 50%, then shaped and put into pan. Second rise was about an inch below the edge of the pan. It baked so high above the pan! The slices will be too high for my toaster. It does taste very good though. Next time u may bake it in my 13” Pullman pan.
Yes, the large batch does make a pretty large loaf. You can try in the 13 inch pullman, or the medium size batch in your pans. I am so happy to hear it was a hit! Thanks so much! 🙂
First I want to say that I absolutely LOVE this recipe. I don’t venture from it. I just bought a 4x 11.6 Pullman pan. Would a one 5×9 size work, or what would you recommend for adjustments?
Yay! So glad to hear that! You can do the larger 5×9 recipe and not split it for the long pullman pan without the lid. With the lid, I would only do the middle size and not split the dough into 2.
Hi, I wanted to ask if you have made Sue Becker’s basic yeast bread recipe. If so, how did you come to this recipe and adding milk and butter? Is it simply to add more moisture to the recipe? Also, how long does your bread stay ‘fresh’ and not dried out? I have not tried this recipe yet, but when I make your rolls recipe, they turn out fantastic, but they dry out very quickly. Any tips? Or is it just because we are eating real food and not adding preservatives? Thanks!
Yes, I have made her sandwich loaf bread. It makes a nice sandwich loaf. The recipe for this bread is just enriched a bit differently. We like the flavor and softness added to it. I have several different bread recipes. I also have one that doesn’t have any milk or eggs. If interested in that recipe it is here. https://grainsinsmallplaces.net/how-to-make-bread-without-eggs/
To answer the storage question- You are correct in thinking preservative free food doesn’t stay fresh as long. However, if I wrap my bread in cling film or a air tight bag it will stay good for about 3-4 days. Of course, the first day it is the softest. If you aren’t going to go through the loaf or even rolls. I find if I let them cool all the way, then put the rest in a freezer safe bag or container the same day they are baked. And, Freeze. Then, when I go to thaw them out, they are soft and fresh. Hope that helps!
I am making this now with my kitchen aid. I used the dough hook and the mixture just went round and round in the middle. So I added more flour (before watching your video). Now I see that your dough is as wet as mine was before adding the flour. My question is, should I use the flat beater instead of the dough hook next time?
I made a video on working with wet dough recently, and in the video I talk about tricks using the Kitchen Aid mixer. Some say the beater is good to use in the beginning then switch to the dough hook. Here is the video https://youtu.be/tdnCrbOsVag
Thank you for sharing this recipe! My loaves turned out perfect! I used hard white and spelt and this bread is so soft and light. My husband ate half the loaf before it was even fully cooled. I’ll try the cinnamon swirl next!
You are so welcome! Thank you! Lol, yes it is hard to resist fresh baked goods! Let me know how you like the cinnamon swirl bread!
How can I adapt this if I only have active dry yeast, not instant yeast?
Great question. Just take a small amount of the liquid in the recipe and proof the active dry yeast with it and a pinch of sugar during the first rest of the dough before the kneading begins. Then, after the dough rests to let the fresh milled flour start to absorb the liquids, put in the bloomed yeast, and begin the kneading cycle. Continue the recipe as directed. Hope that helps! 😀
Help! I’m so perplexed. The first time I made this they turned out perfectly! I’ve never had such a successful rise in a bread before. This is my 5th attempt, and while the bread is good it’s just not rising like the first time or as yours are? What am I doing wrong?
Following all instructions – 25 mins on stir KitchenAid mixer; window pane seems successful, etc. I keep the dough in my oven closed with the light on. It’s just not rising! 🥲
The first thing I would think if not rising is the yeast. So, either the yeast is not as viable as before. (To test, you can put some in a small bowl of warm water with a tiny bit of sugar and let it sit. It should get very foamy after about 10 minutes. If not, I would say get new yeast. The other possibility is that the water going into the mix is too hot, and that could kill the yeast, which would cause it not to rise. I hope that helps!
I found you on YouTube and really liked how you made using milled flour pretty easy. I would try different recipes and didn’t have success with the kitchen aid but now that I got an Ankarsrum mixer I decided to try and make this bread. It turned out amazing and I realized what I was doing wrong all along in my previous bread making recipes. In my previous recipes the dough didn’t have enough liquid. It wouldn’t be sticky to the touch. Now I know that it has to be quite sticky. Grains in small places, thank you for making amazing recipes and giving so many good tips. 💛
Aww, thank you so much! I agree, a wet dough is the way to go with fresh milled flour! I am so happy to hear this! It made my day! Thanks again!
Any ideas on how to use this recipe in a zojirushi? E.g, recommended settings? Thanks!
I don’t have a bread maker, but maybe it is something I will look into for the future. But, I have heard others have great success with a bread maker if you do one kneading cycle, then let the dough rest for 15-30 minutes, then do a second kneading cycle and continue as normal from there. I hope that helps!
Hi Erin, did you figure out the best bread maker settings for this recipe? I have the same bread maker and have failed at making this recipe in the machine 3 times. I’ve made the recipe with a mixer and then baked it in the oven, and it came out perfect. However, I’d like to be able to use the bread machine for the convenience.
I’ve tried the following settings:
Attempt 1 – rest 15mins, knead 25 mins, rise 1 60mins, rise 2 60mins, bake 35mins
Attempt 2 – rest 15mins, knead 25mins, rise 1 60mins, rise 2 40mins, bake 35mins
Attempt 3 – rest 15mins, knead 25mi s, rise 1 60mins, bake 35mins
All 3 attempts ended with bread that fell/dipped in the middle.
Any suggestions on the correct bread machine settings would be appreciated, cause at this point I feel like I’m wasting the ingredients.
So this is the first time trying your bread recipe. I have just started milling my own grains. I have not had a successful bread yet. I kneaded the bread for about 33 minutes and still did not get the window pain. My dough felt cool to the touch could my house be to cold? Please help I am getting discouraged very fast
You can do it! Fresh milled flour can be tricky, and there is definitely a learning curve to it. But, once you get it you won’t want to go back! I suggest watching this video about the window pane. Usually the 3 main problems are 1. too much flour 2. not enough kneading or 3. the wrong kind of wheat, or wheat that is not very strong in gluten. But, I find usually it is one of the first two. Here is that video about the window pane. https://youtu.be/G7dWEzCWkgU
There is also a video for this sandwich bread recipe if you haven’t seen it yet, you can see the texture and consistency of the dough when I am working with it and kneading. I hope these help! Keep trying, you will get it, and you learn something each time you bake! Happy Baking!
My experience with that bread machine is that it doesn’t do “milk” well–only dried milk. Have you tried increasing the water and adding dry milk instead of wet milk?
Ok so I tried this recipe three times today. First time my husband wanted the flour sifted because he can’t handle the taste. I have used Hard white wheat berries. I do not have Kamut until next week. 2nd try I could not get it to make the window pain test after 35 minutes but I did have to much flour. 3rd time I kneaded again for almost 40 minutes with 1/2 cup less flour and still did not get stretchy. I am using honey because my husband can not have sugar. I’m not sure if I can knead it longer then 38 minutes. Please help Could it be my mixer? I have a Bosch new version
Ok so after watching the video on the window pain I think the third time was to much flour again. I added more flour because the dough was staying on the bottom of the bowl. I will try again tomorrow. We did bake the bread and the flavor was amazing now just need the window pain
Hey Kara
So I took a deep dive into looking at why I am not getting the window pain after kneading. And after 3 times of trying the bread recipe along with listening to the video on window pain. A light bulb went off and had me research soaking to remove the lectins. I have to soak to remove the out lectins because my husband can not eat them due to the Colon Cancer. But as I soap to remove them I am also removing most of the gluten. So I am going to try and add the Vital gluten back into the milled flour and see what happens next. Your bread recipe is the first one I have tried and my husband actually like. Thank the Lord because I have tried several. I will let you know what happens. Sorry for being a pain.
I am sorry to hear about your hubby, hopefully this will hep him! Yes! that soak really seems to help for sure! Thank you so much, I am so glad to hear he likes it! You are not a pain at all! I love to help people with fresh milled flour!
So do you soak your wheat berries over night? Am I wrong on thinking that soaking them is also taking out the gluten? I am trying to make sure I am doing this right. If you soak how long do you soak for?
I don’t soak my grains overnight. I have some videos that might be helpful showing the method that I teach. Which is to mill the flour, mix everything except the yeast, and let it sit for at least 15 minutes, so the fresh milled flour can soak up the liquids. Then, I add the yeast, and start the kneading process. This video of my Honey Oat bread might be helpful in showing this better. Here is that link. https://youtu.be/KU9GtzBEkB8
Right now mine is rising… It really looks more like one loaf. I followed the recipe exactly, I don’t want to have two really tiny loaves haha
I have a tiny oven, so I have to use the 8×4 bread pans. My recipes for bread are based on the smaller size. Even the 8.5×4.5 pans need a bit more dough, crazy how just that little half inch can affect it. Typically if your pans are a bit larger, most have great success with 1.5 my recipe for bigger loafs. The recipe will still work in the larger pans, but the loafs will be a bit smaller. Hope that helps! Happy Baking!
I love this recipe! I’ve made it twice. I’m measuring out the flour on a scale after milling the berries and I can’t get the window pane even after 40 minutes. I have an anaskarum mixer. Any tips? I’m using hard white and a little spelt. Just not sure why I’m not getting a window pane even though the measurements are the same as yours .
When using the Ankarsrum is the dough all conglomerated into a ball of dough, or is the dough opening up and making a ring around the roller ball while kneading?
I just wanted to say I’ve really enjoyed your recipes! I’m new to milling and so far all the recipes of yours that I’ve tried have turned out so well! Thank you 🙂
I am so happy to hear that! Thank you so much!
Hi there! Any help you could give me on how to make this in 13 in loaf pan? Thank you!
Use the small size , and put all the dough into one pan (instead of dividing it into 2 loaves.)