Tangzhong Rolls Made With Fresh Milled Flour
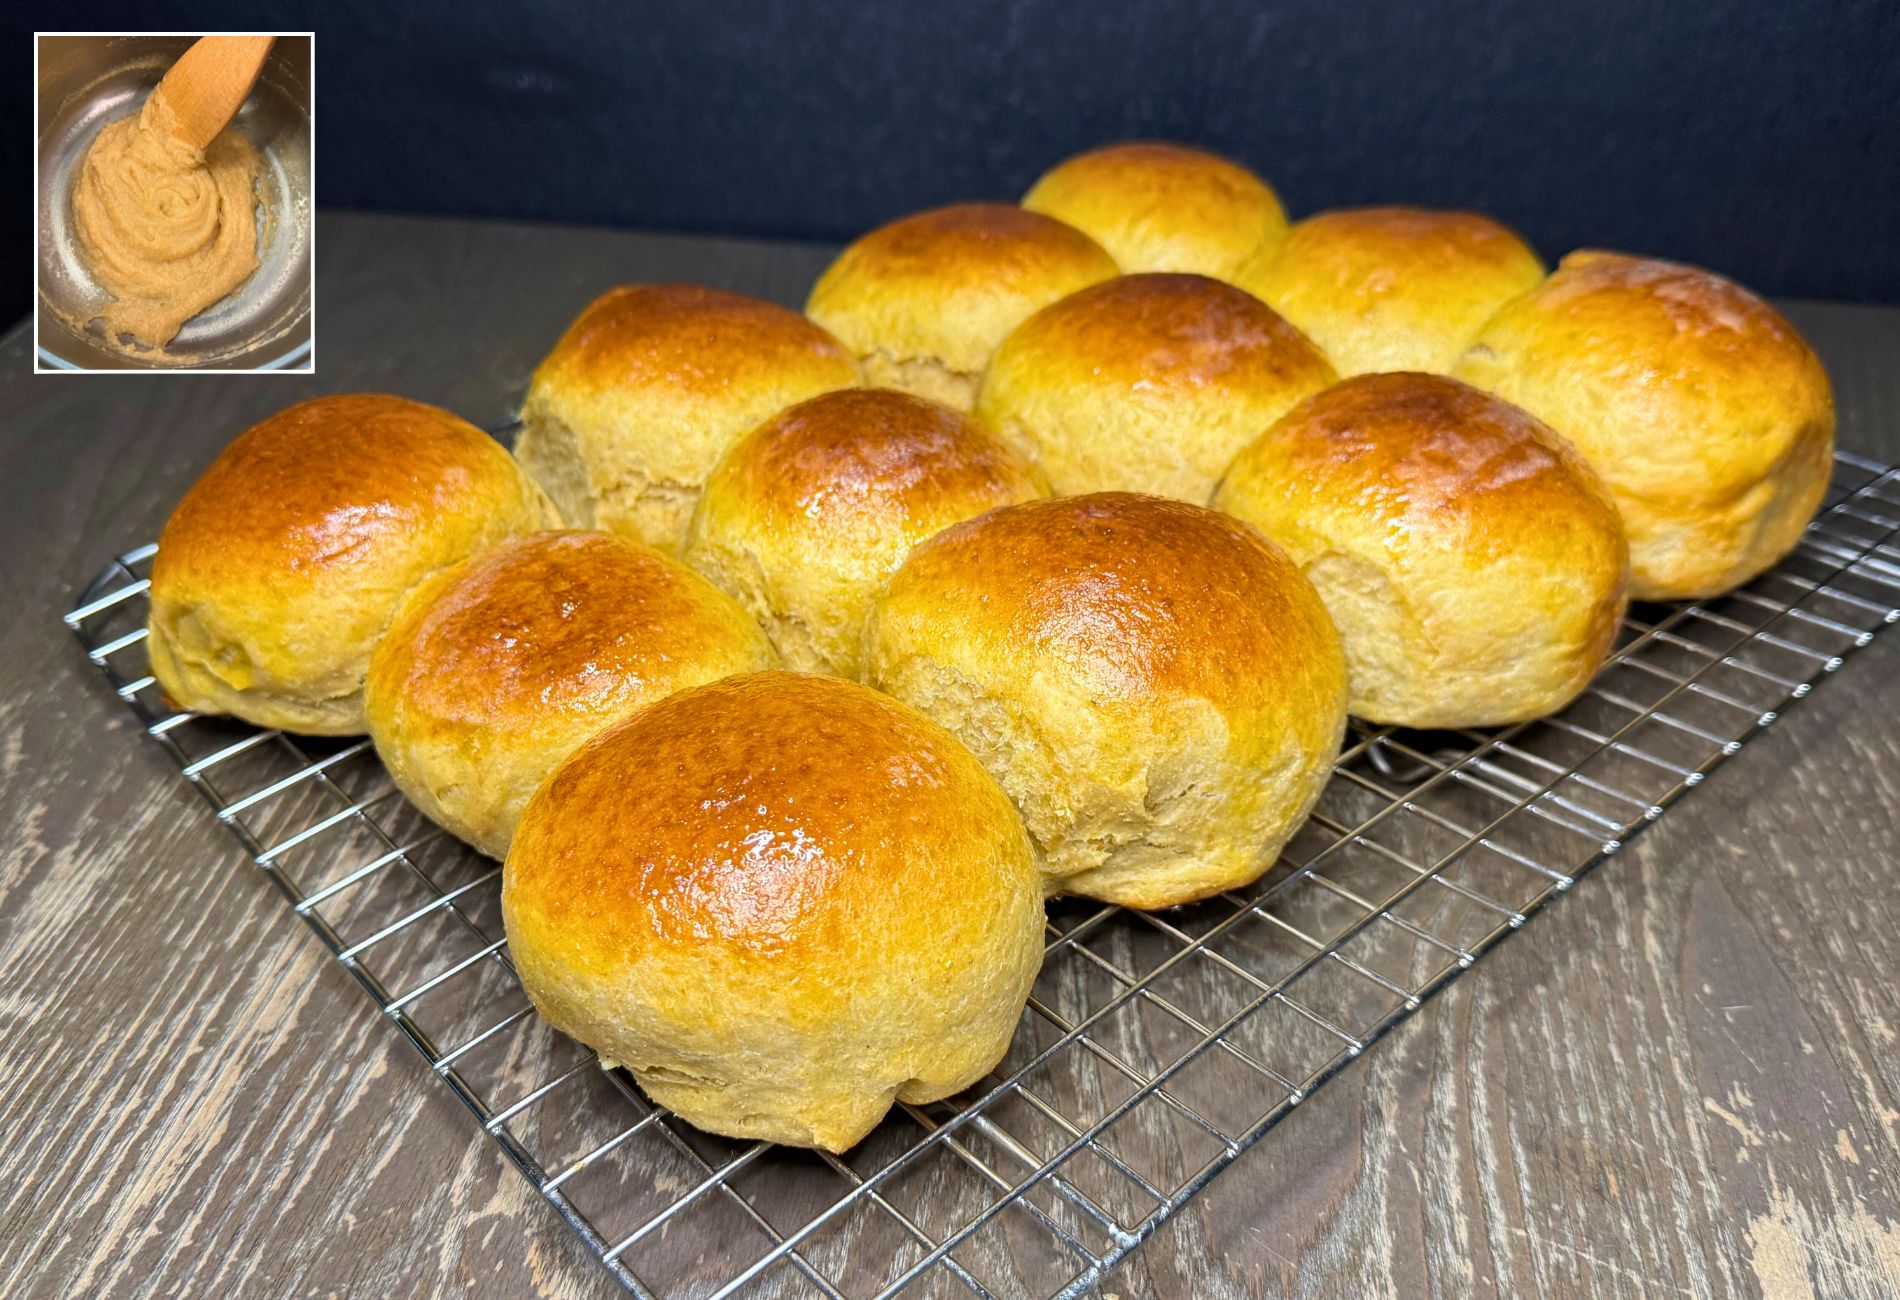
These Tangzhong Rolls, made with fresh milled flour, are an even softer, fluffier version of my popular Sweet Yeast Dinner Rolls recipe. Just this one extra step makes them amazingly delicious! Also, if the Tangzhong method is scary or intimidating to you, don’t let it scare you! I show you in my video how easy it is to add this step in my FMF Tangzhong Sandwich Bread Recipe HERE.
I have had so many of you tell me how much you love the Tangzhong Method, so I decided to share it in one of my most popular recipes. However, if you are looking for my tried and true Sweet Yeast Dinner Roll Recipe, without the Tangzhong Method, HERE it is!
Tangzhong Video

What Is The Tangzhong Method?
The Tangzhong Method is a Chinese method of making bread softer, fluffier, and that will last longer. The method involves cooking a small amount of the fresh milled flour in a bread type recipe with some milk or water into a paste, then allowing it to cool a bit. After it has cooled, then you put that paste into your dough, and wow what a difference!
How Does The Tangzhong Method Work?
Cooking the small amount of flour before hand, allows the starch in the freshly milled wheat flour to gelatinize. This allows the flour to be able to absorb more liquid than normal, which results in the softer fluffier rolls. Also, this Tangzhong method allows your dinner rolls to last longer after baking. So, it is a method of preservation without adding artificial preservatives.
When To Use The Tangzhong Method With Fresh Milled Flour?
I have been experimenting with this method for a while, and I recommend using the Tangzhong method for your fresh milled flour breads, rolls, and buns. But, I do think just about any FMF recipe could benefit from this “paste.” So, basically, any dough you want to be softer and fluffier.
Ingredients To Make Fresh Milled Flour Rolls With The Tangzhong Method
- 3&3/4 cup Fresh Milled Flour, divided 450g (This should be mostly a hard wheat, I like to use 330g Hard White Wheat plus 120g Kamut.) *See Notes for alternatives
- 1/2 cup milk 120g can sub for water if needed
- 1/2 cup water 120g
- 4 TBSP softened butter unsalted 57g (can sub for oil)
- 1/3 cup brown sugar 74g (can sub for honey, maple syrup, or sucanat)
- 2 eggs room temperature
- 1 tsp salt
- 1 tsp lemon juice (can sub for vinegar)
- 2&1/2 tsp instant yeast
Instructions To Make Fresh Milled Flour Rolls With The Tangzhong Method
Make The Tangzhong Paste
- Firstly, mill the flour. I mill 450g total of wheat berries to get my fresh milled flour. But, this flour will be used in two different places in the recipe.
- So, let’s use part of the flour to make the paste.
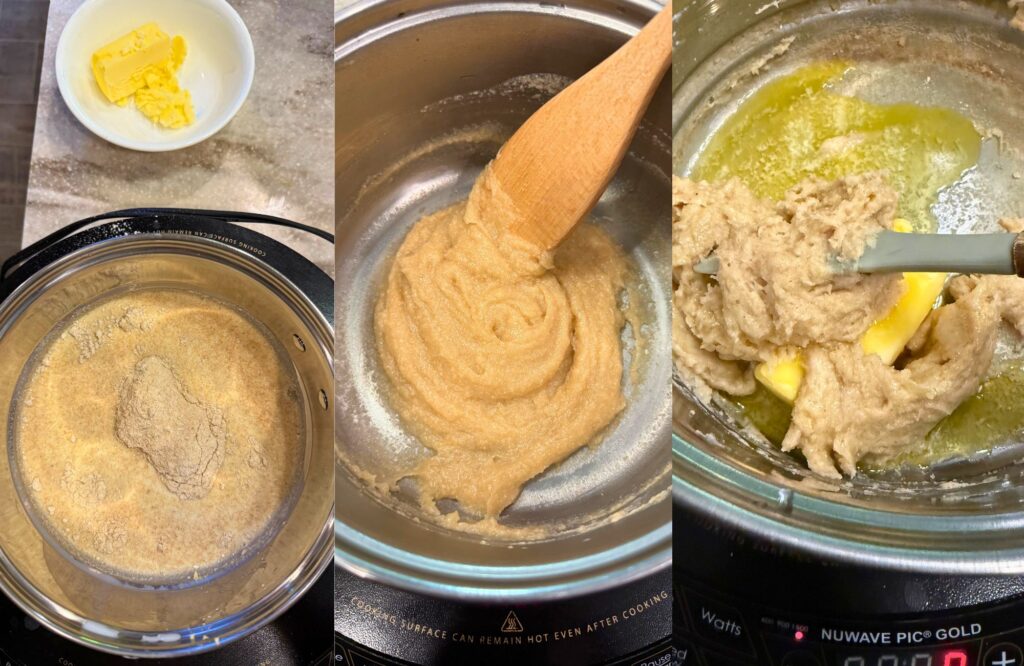
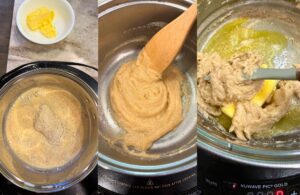
- Put 1/3 cup of fresh milled flour (36g) and 1/2 cup milk (120g) into a sauce pan, stir to combine.
- Heat this mixture on medium-high heat until it forms a paste. This should only take about 3-5 minutes. Once it forms a paste, remove from the heat, and allow it to cool at room temperature. (*Tip- I like to put my butter in while the paste is cooling so it will start to soften and melt.)
Mix The Dough
- While that mixture is cooling, put the water, softened butter, brown sugar, salt, eggs, and lemon juice into your mixer.
- Mix these ingredients to incorporate. Then add in the paste mixture.
- Then, add the remaining flour into the mixer bowl, and mix to combine until no flour is left. Cover, and let this mixture sit for about 15 minutes. This is the autolyse period and it allows the fresh milled flour to absorb the liquid and the bran to soften. Because the yeast is not in the mixture yet, you can do this autolyse period for longer if you prefer.
- After the autloyse period, then put in the yeast, and mix to incorporate.
- Once the yeast is added, Start the kneading process. Make sure not to knead the dough with the cover on your mixer, this will overheat your dough, and cause it to break down.
- Knead until the dough is nice and stretchy. Typically, 6-8 minutes in a Bosch style mixer, 16-20 minutes in an Ankarsrum style mixer, or 25-30 minutes in a Kitchen aid mixer (allow extra time for a Kitchen Aid style mixer to have breaks in between kneading to prevent overheating of the mixer.) These kneading times will vary for everyone, this is just the most common times for these style of mixers.
- Once the dough is nice and stretchy, and doesn’t easily tear. Then, cover and allow it to rise until double. This can take somewhere between 1-2 hours. (Instant yeast or warmer rooms will be closer to 1 hour. Active dry yeast or cooler rooms will be closer to 2 hours.)
- While the dough is rising, prepare your 9×13 baking sheet with parchment paper, or grease with softened butter.

Shape The Rolls
- Once the dough has doubled in size, place some olive oil on your counter, and hands. Then, divide the dough into 12 equal parts. (I just guesstimate the dough amount, but you can weigh them if you prefer for accuracy.)
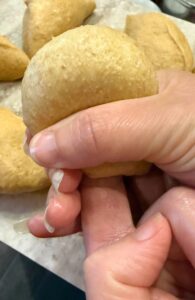
- Shape the dough into 12 rolls with some surface tension. I like to flatten each piece of dough, then fold all the edges to the middle pressing the air out between the dough layers. Then, lightly push my finger up through the bottom of the roll (not so tight that it rips the dough) to create surface tension on the top of each roll. Then, pinch the bottom together. After shaping, the top should have a tight tension on the top of the loaf, this helps with the rise also.
- Put each shaped roll onto the prepared pan, cover, and then allow to rise a second time. 35-45 minutes. (*Tip- usually the second rise time is close to half the the first rise time.)
Bake The FMF Rolls
- During the end of the second rise, preheat the oven to 350*F.
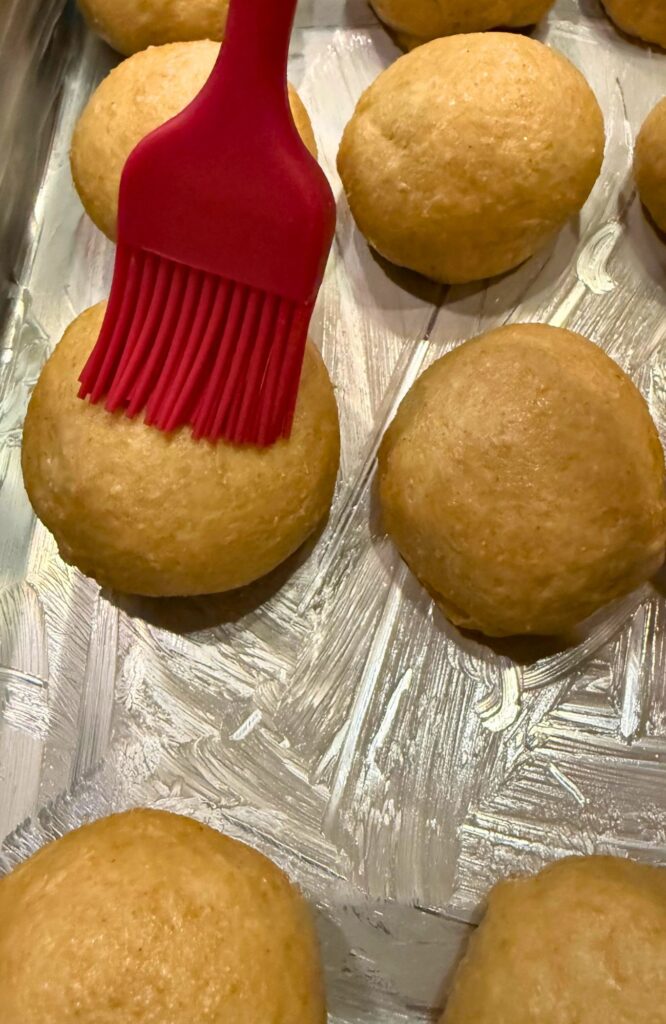
- *Optional- If you like a browned shiny top to your rolls, you can brush the tops of the dough with a simple egg wash before baking. (1 egg mixed with a dash of water or milk.)
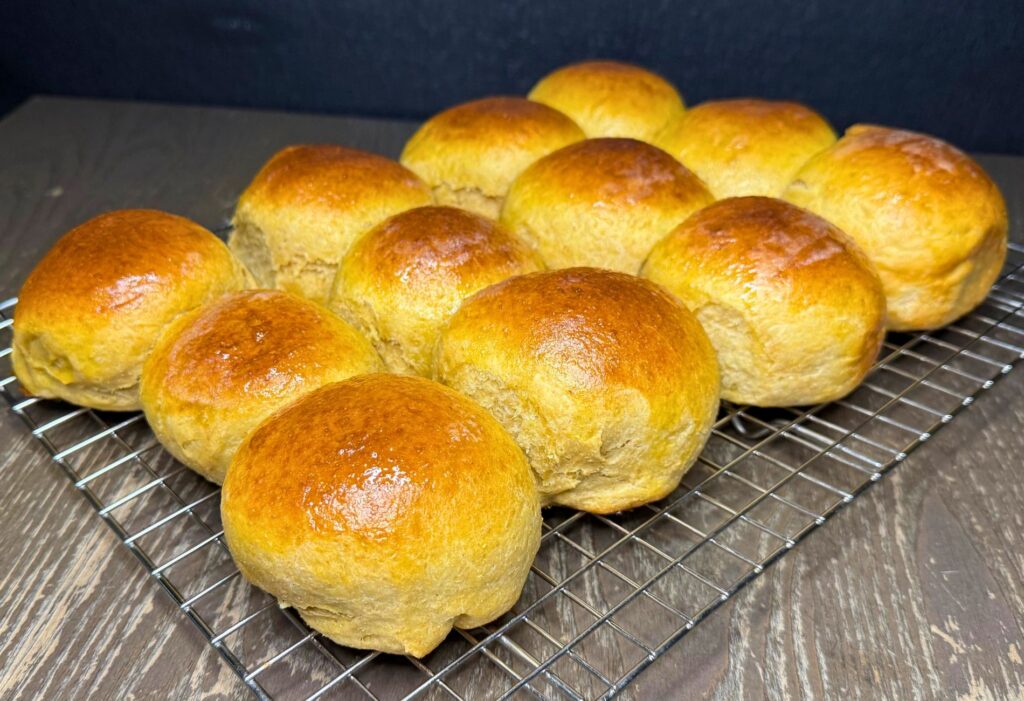
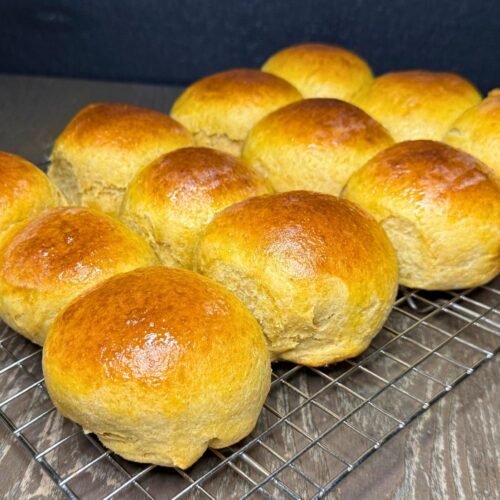
- Once the rolls have risen, they should appear smooth and puffy, then bake for 20-25 minutes. Check the center of the rolls to make sure they are done. The internal center should be at 190*F for yeast rolls.
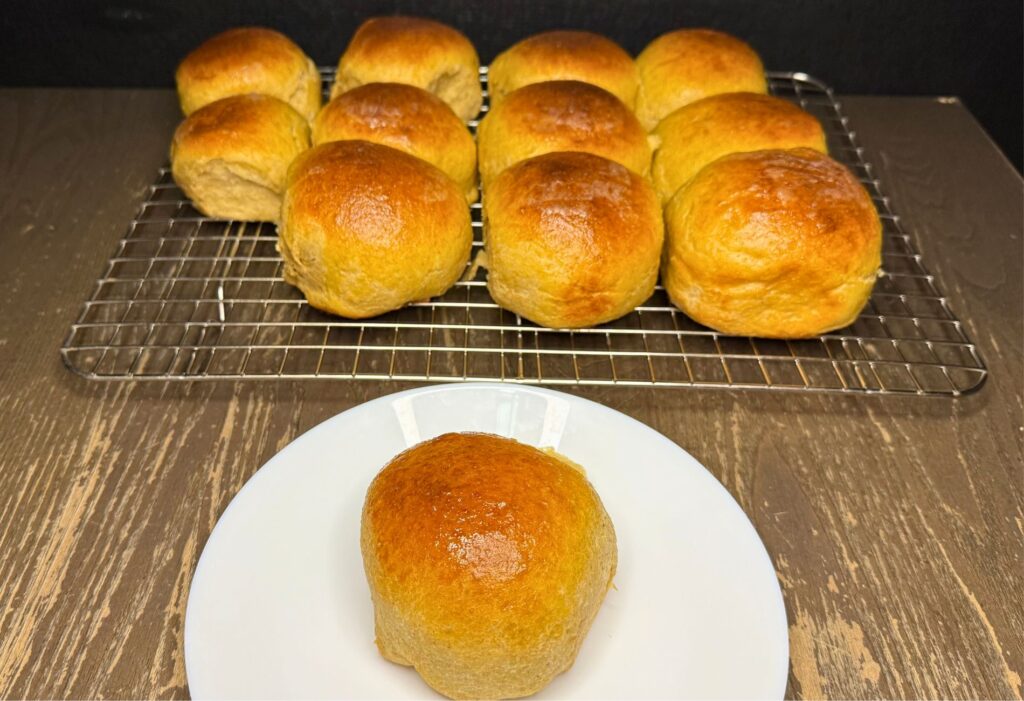
- Brush the rolls with butter after coming out of oven.
- Best enjoyed slightly warm!
- **For a stronger yeast flavor – at step 15 put the covered rolls in the fridge overnight. Then, the next day, get them out and let them come to room temperature (1-2 hours). Then, bake, and enjoy that stronger yeasty flavor!

How To Store Fresh Milled Flour Rolls Made With The Tangzhong Method
To store fresh milled flour rolls made with the Tangzhong method, place in a sealed container, and they will last a little longer on your counter than rolls without using this method. However, we still love to allow the rolls to cool completely, then place them in a freezer safe container or bag. Freeze for up to 4 months. To thaw, just place however many rolls you want on the counter to come to room temperature, usually about an hour or so.
How To Freeze Unbaked Tangzhong Fresh Milled Flour Rolls
Also, another great way to make these fresh milled flour rolls ahead of time when your schedule is busy is to freeze the unbaked FMF rolls. To do this, you would make the dough as directed, let it rise once. Then, shape the rolls and place in the freezer before the second rise. I like to put the tray of shaped rolls on a baking sheet and freeze for a few hours until they are solid, then you can put them in a freezer safe container or bag for easier storage.
To Thaw the frozen rolls, put them in the fridge covered the night before you want to bake them. Then, the day you want to bake the rolls, put them on the counter covered. Allow them to come to room temperature, which normally takes somewhere between 1-2 hours. Then bake the fresh milled flour Tangzhong rolls as directed in the recipe. Enjoy!

Shop This Post
Shop Nutrimill/Bosch ($20 OFF Coupon Code: Grainy)
Grain Bin Label Stickers (save 10% OFF with coupon code- GRAINY)
Wheat Conversion Chart Fridge Magnet (save 10% OFF with coupon code- GRAINY)
9×13 Stainless Steel Baking Pan With Lid
Shop My Site Wheat Berries & Coupon Codes
Baja Gold Salt SAVE 10% OFF with Coupon Code: Grainy
Checkout Some Of My Other FMF Recipes
Fresh Milled Flour Recipe Index
Fresh Milled Flour Rolls Made With The Tangzhong Method Printable Recipe
Fresh Milled Flour Rolls – Tangzhong Method
Ingredients
- 3&3/4 cup Fresh Milled Flour, divided 450g This should be mostly a hard wheat, I like to use 330g Hard White Wheat plus 120g Kamut. *See Notes for alternatives
- 1/2 cup milk 120g can sub for water if needed
- 1/2 cup water 120g
- 4 TBSP softened butter unsalted 57g can sub for oil
- 1/3 cup brown sugar 74g can sub for honey, maple syrup, or sucanat
- 2 eggs room temperature
- 1 tsp salt
- 1 tsp lemon juice can sub for vinegar
- 2&1/2 tsp instant yeast
Instructions
- Firstly, mill the flour. I mill 450g total of wheat berries to get my fresh milled flour. But, this flour will be used in two different places in the recipe.
- So, let’s use part of the flour to make the paste.
- Put 1/3 cup of fresh milled flour (36g) and 1/2 cup milk (120g) into a sauce pan, stir to combine.
- Heat this mixture on medium-high heat until it forms a paste. This should only take about 3-5 minutes. Once it forms a paste, remove from the heat, and allow it to cool at room temperature. (*Tip- I like to put my butter in while the paste is cooling so it will start to soften and melt.)
- While that mixture is cooling, put the water, softened butter, brown sugar, salt, eggs, and lemon juice into your mixer.
- Mix these ingredients to incorporate. Then add in the paste mixture.
- Then, add the remaining flour into the mixer bowl, and mix to combine until no flour is left. Cover, and let this mixture sit for about 15 minutes. This is the autolyse period and it allows the fresh milled flour to absorb the liquid and the bran to soften. Because the yeast is not in the mixture yet, you can do this autolyse period for longer if you prefer.
- After the autloyse period, then put in the yeast, and mix to incorporate.
- Once the yeast is added, Start the kneading process. Make sure not to knead the dough with the cover on your mixer, this will overheat your dough, and cause it to break down.
- Knead until the dough is nice and stretchy. Typically, 6-8 minutes in a Bosch style mixer, 16-20 minutes in an Ankarsrum style mixer, or 25-30 minutes in a Kitchen aid mixer (allow extra time for a Kitchen Aid style mixer to have breaks in between kneading to prevent overheating of the mixer.) These kneading times will vary for everyone, this is just the most common times for these style of mixers.
- Once the dough is nice and stretchy, and doesn’t easily tear. Then, cover and allow it to rise until double. This can take somewhere between 1-2 hours. (Instant yeast or warmer rooms will be closer to 1 hour. Active dry yeast or cooler rooms will be closer to 2 hours.)
- While the dough is rising, prepare your 9×13 baking sheet with parchment paper, or grease with softened butter.
- Once the dough has doubled in size, place some olive oil on your counter, and hands. Then, divide the dough into 12 equal parts. (I just guesstimate the dough amount, but you can weigh them if you prefer for accuracy.)
- Shape the dough into 12 rolls with some surface tension. I like to flatten each piece of dough, then fold all the edges to the middle pressing the air out between the dough layers. Then, lightly push my finger up through the bottom of the roll (not so tight that it rips the dough) to create surface tension on the top of each roll. Then, pinch the bottom together. After shaping, the top should have a tight tension on the top of the loaf, this helps with the rise also.
- Put each shaped roll onto the prepared pan, cover, and then allow to rise a second time. 35-45 minutes. (*Tip- usually the second rise time is close to half the the first rise time.)
- During the end of the second rise, preheat the oven to 350*F.
- *Optional- If you like a browned shiny top to your rolls, you can brush the tops of the dough with a simple egg wash before baking. (1 egg mixed with a dash of water or milk.)

- Once the rolls have risen, they should appear smooth and puffy, then bake for 20-25 minutes. Check the center of the rolls to make sure they are done. The internal center should be at 190*F for yeast rolls.
- Brush the rolls with butter after coming out of oven.
- Best enjoyed slightly warm!
- **For a stronger yeast flavor – at step 15 put the covered rolls in the fridge overnight. Then, the next day, get them out and let them come to room temperature (1-2 hours). Then, bake, and enjoy that stronger yeasty flavor!

Video
Notes
*This post contains affiliate links, which means I make a small commission at no extra cost to you! Also, as an Amazon Associate I earn from qualifying purchases. But, I will only suggest items I actually Recommend!


Kara… as usual, this is a keeper recipe! My first tangzong. So easy to follow your directions. The rolls are soft and squishy and delicious! I don’t normally make dinner rolls but I’m practicing for Thanksgiving dinner. Next I will try my usual bread-loaf flavor modifications using Italian flavored evoo and maple syrup. Thanks for another fantastic fmf bread recipe!
When you say at step 15 you can put them in the fridge overnight, is that before or after the second rise?
Also, do you think these could be in the fridge for longer than overnight?
Put them in the fridge before the second rise. Then let them come to room temp before baking (about 1-2 hours) I have had them in the fridge for 2 days, at day three they still are good, but the rise is not as big. So, they start to get a little more dense each day after 2 days in the fridge.
I may have gotten distracted by the kiddos and let my paste get quite thick. It ended up in clumps pretty much but it wasn’t burnt so I continued on. The only problem I think, is most of the milk dissipated so my end dough was dry. I added a couple tablespoons of milk and am hoping for the best – mixing now as I type this. Is this dough supposed to be wet like your sandwich bread and it’ll come together as the gluten forms? I’m hoping so. 😅
If the dough ends up too dry, just add a splash of water until it comes together, a little at a time. This dough is a little less wet and sticky like my sandwich bread. The Tangzhong paste allows for the fresh milled flour to hold onto more of the liquid, so it will give the soft and fluffy results without it being super wet.
Can you use a sourdough starter instead of yeast?
Thank you.
Yay! I am so happy to hear that! Those modifications sound amazing! Thank you so much!
The rolls turned out wonderfully. This is my new go to recipe and one I plan to share with other friends using freshly milled flour. I definitely would like to check out more of your recipes. Thank you for the detailed instructions and the video showing how to fold in the bread for use with the rolls was so helpful!
Yay! I am so happy to hear that! Thanks so much! 🙂
Thank you for sharing. Would this also work for your Hawaiian Roll recipe? That’s what our Thanksgiving crew enjoys.
Yes, you can make the paste the same way, and take the flour and liquid you use for the paste away from the flour and liquid from the Hawaiian Roll recipe. 🙂
I’m loving experimenting with your tangzhong method!:) I like to make cinnamon rolls this way, and I was curious how it would work to freeze them before the second rise! is that something you’ve done with cinnamon rolls?
Yay! So glad to hear that! yes, you can freeze once shaped and before the second rise. The night before baking, put them in the fridge to thaw overnight. Then the day of baking, put them on the counter to come to room temperature. (Usually 1-2 hours) then bake as directed.
I’m a beginner with milling flour and tried this recipe yesterday. The rolls turned out amazing and I plan to make them again for Thanksgiving dinner. I am a big fan of the tangzong method. Thank you so much for sharing your recipes!
Yay! I am so happy to hear they were a hit! 🙂
Could you double this recipe? Or should it be mixed in each individual batch?
Yes, you can double this recipe. 🙂 If you triple or more, I would only go a little over double the yeast max, or it rises too quickly.
I’d love to try this recipe. It looks delicious! Would this recipe work with sourdough starter? If so, how much should I use?
Yes, you can add 1/2 cup active sourdough starter 115g and omit the yeast, the rise times will be about double. Make sure the paste is cooled to room temperatrure before adding the sourdough starter, because if it is too hot, it will kill the starter, and the dough won’t have any rise.
I asked the same question. Please ignore my question earlier about subbing with sourdough starter. Thank you!
I just tested this recipe and oh my 😱 these are sooo good!!! Soft, chewy and perfect sweetness. Definitely making these for Thanksgiving. Mods: I used spelt instead of Kamut and I brushed the rolls before baking with a honey and milk mixture. Other than that I followed the recipe and it all worked perfectly for me here in North Florida. Thank you for this recipe!!
Yum! Great alterations! Thanks for sharing! 🙂
You say that you put your butter into the paste while it’s cooling to soften your butter, but then the next step calls for placing the softened butter in with other ingredients to blend. The picture shown shows the butter already mixing into the paste. So how do I mix the softened butter in with the other ingredients after it’s been in the paste? I hope that question makes sense.
You can do this either way. I will pop the butter into the paste after I remove it from the heat. So as the paste cools, the butter softens. It is kind of a win win situation, it’s just a short cut that I have started to do. But, you can have already softened butter, and put it into the mixer as well.
I have another question. You give the measurements of 1/2 c milk and 1/3 c flour to make the paste. However, that made a thick glob in a minute or less. Seems like there should have been more milk or less flour. In your video, it looked like the ratio was less flour to the liquid.
Also, you show the measurements for flour in the recipe, but in your video, you measure out the berries and use all of that flour. Which should I be going by?
The video is for 2 loaves of bread, so the recipe is for more dough. This roll dough is for a smaller amount of dough, so the paste is less. If it clumped too quickly, try using a lower heat setting while stirring.
I’ve made these multiple times in the last few weeks for family and friends, and everyone loves them.
Awesome! I am so happy to hear this was a hit! Thanks! 🙂
Baked this for Thanksgiving with my family this year! My young teenage brother made it a point to compliment them – they were really fluffy and quishy. They were a hit! Thank you for an easy how to guide and video. I will be making these again and again and applying this method to more baked goods!
Awesome! I am so happy to hear they were a hit! They were a hit here too! 🙂
Wow! Amazing! Love the Tangzhong Method Dinner Rolls . Made for Thanksgiving, prepared the day before, shaped and covered in the refrigerator overnight, baked Thanksgiving morning. Delicious, Rave reviews.
Yay! Glad to hear it was a hit! That’s my favorite way to make rolls too! Thanks! 🙂
Kara these were fantastic! I used hard white & kamut as you suggest. They were great despite my mistake. I got a window pane, set it aside for the first rise, then realized I didn’t add the yeast! I mixed in the yeast for a few minutes and continued on, GRATEFUL that we still ended up with beautiful, soft, great tasting perfectly risen rolls.
Thank you Kara for such a great recipe!
Yay! Glad it was still a hit! Thanks so much! 🙂
This is really delicious. Thank you so much for your detailed recipes and tips. Do you happen to have a recipe? That’s not a sweet roll? I’m more of a savory gal. And would like some spicy savory fillings to go inside of these rolls, like sliders.
Thank you so much, you can actually use this same recipe, but decrease the honey/sugar to only 1 TBSP for a more savory roll. If the dough seems a little dry, you can add a tiny bit more water to offset that. Let me know how it goes! 🙂
How and when to incorporate the Tangzhong Method with your sourdough bread recipe?
Do you still add yeast?
Do you still get the window pane?
I received FMF sourdough starter, and I Love it!
Great recipes and have gotten great results with them All.
Thanks
You can make the paste, then make sure it cools to room temperature before adding your sourdough starter, if it’s too hot, it can kill your starter. If you are wanting a traditional sourdough bread, you can use this after making the paste (remove the amount of liquid and flour for the paste from the recipe)- https://grainsinsmallplaces.net/fresh-milled-flour-sourdough-bread/
OR for a softer sourdough sandwich bread you can use this one.https://grainsinsmallplaces.net/sourdough-sandwich-bread/
So so good! A perfect dinner roll.
Yay! So glad it was a hit! Thank you! 🙂
What is a substitute for the eggs? I do not eat them. Do I add more liquid instead?
Yes, you can add a tad more liquid, it won’t be quite as soft, but still pretty amazing. If you use sunflower lecithin, it can help replace the softness the egg adds.
Hi SD, our family find ground flaxseed and water a fabulous substitute.
1 TBSP ground flax
3 TBSP water
Mix, let sit for 5 minutes
This makes one regular sized egg.
Hi Kara,
I’v been loving your Artisan bread recipe. I make it with delicious add ins–raisins and cinnamon, walnuts and dates, apricots and almonds, and just plain. We love it. I make it in pullman loaf pans and it bakes and slices beautifully.
Your recipes are so clear and you give so much great info. Thank you!
Now, I’ve fallen in love with these dinner rolls. I want to double the recipe. Do I double the tangzhong?
Thank you so much, I am so happy to hear that! Yes, you double the whole recipe, if you also double the yeast, the rise time may be a bit faster than before.
Would this dough be good to use for cinnamon rolls?
Yes! You can use for rolls, cinnamon rolls, bread, etc.
Me and my family rarely use whole wheat flour, but when i saw this, I was like, we gotta try this…EVERYONE LOVED IT!!!!!!! Currently, we’re working on a recipe using TANGZHONG method… your rolls are soo soft and delicious….
LB
Yay! So glad to hear that! Thanks! 🙂