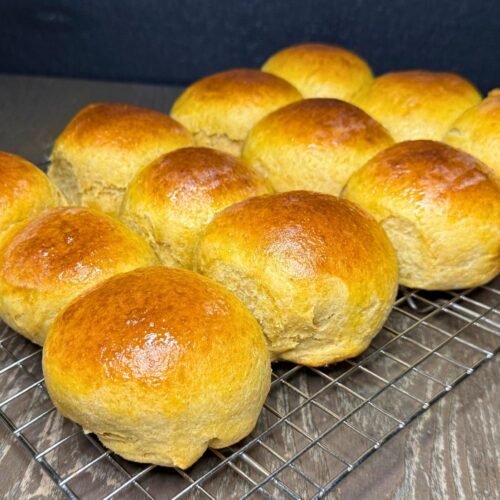
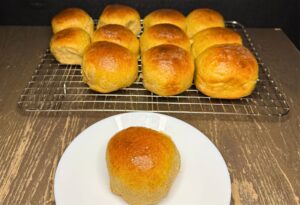
Fresh Milled Flour Rolls - Tangzhong Method
These Tangzhong Rolls, made with fresh milled flour, are an even softer, fluffier version of my popular Sweet Yeast Dinner Rolls recipe. Just this one extra step makes them amazingly delicious! Checkout my Tangzhong FMF Bread video if this method is a bit intimidating. I promise it's not as scary as it might seem. You got this!
Ingredients
- 3&3/4 cup Fresh Milled Flour, divided 450g This should be mostly a hard wheat, I like to use 330g Hard White Wheat plus 120g Kamut. *See Notes for alternatives
- 1/2 cup milk 120g can sub for water if needed
- 1/2 cup water 120g
- 4 TBSP softened butter unsalted 57g can sub for oil
- 1/3 cup brown sugar 74g can sub for honey, maple syrup, or sucanat
- 2 eggs room temperature
- 1 tsp salt
- 1 tsp lemon juice can sub for vinegar
- 2&1/2 tsp instant yeast
Instructions
- Firstly, mill the flour. I mill 450g total of wheat berries to get my fresh milled flour. But, this flour will be used in two different places in the recipe.
- So, let's use part of the flour to make the paste.
- Put 1/3 cup of fresh milled flour (36g) and 1/2 cup milk (120g) into a sauce pan, stir to combine.
- Heat this mixture on medium-high heat until it forms a paste. This should only take about 3-5 minutes. Once it forms a paste, remove from the heat, and allow it to cool at room temperature. (*Tip- I like to put my butter in while the paste is cooling so it will start to soften and melt.)
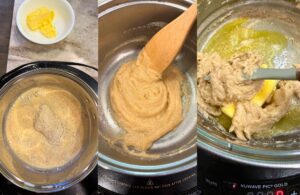
- While that mixture is cooling, put the water, softened butter, brown sugar, salt, eggs, and lemon juice into your mixer.
- Mix these ingredients to incorporate. Then add in the paste mixture.
- Then, add the remaining flour into the mixer bowl, and mix to combine until no flour is left. Cover, and let this mixture sit for about 15 minutes. This is the autolyse period and it allows the fresh milled flour to absorb the liquid and the bran to soften. Because the yeast is not in the mixture yet, you can do this autolyse period for longer if you prefer.
- After the autloyse period, then put in the yeast, and mix to incorporate.
- Once the yeast is added, Start the kneading process. Make sure not to knead the dough with the cover on your mixer, this will overheat your dough, and cause it to break down.
- Knead until the dough is nice and stretchy. Typically, 6-8 minutes in a Bosch style mixer, 16-20 minutes in an Ankarsrum style mixer, or 25-30 minutes in a Kitchen aid mixer (allow extra time for a Kitchen Aid style mixer to have breaks in between kneading to prevent overheating of the mixer.) These kneading times will vary for everyone, this is just the most common times for these style of mixers.
- Once the dough is nice and stretchy, and doesn't easily tear. Then, cover and allow it to rise until double. This can take somewhere between 1-2 hours. (Instant yeast or warmer rooms will be closer to 1 hour. Active dry yeast or cooler rooms will be closer to 2 hours.)
- While the dough is rising, prepare your 9x13 baking sheet with parchment paper, or grease with softened butter.
- Once the dough has doubled in size, place some olive oil on your counter, and hands. Then, divide the dough into 12 equal parts. (I just guesstimate the dough amount, but you can weigh them if you prefer for accuracy.)
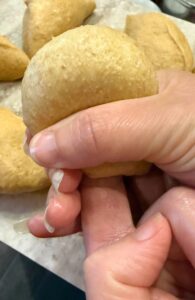
- Shape the dough into 12 rolls with some surface tension. I like to flatten each piece of dough, then fold all the edges to the middle pressing the air out between the dough layers. Then, lightly push my finger up through the bottom of the roll (not so tight that it rips the dough) to create surface tension on the top of each roll. Then, pinch the bottom together. After shaping, the top should have a tight tension on the top of the loaf, this helps with the rise also.
- Put each shaped roll onto the prepared pan, cover, and then allow to rise a second time. 35-45 minutes. (*Tip- usually the second rise time is close to half the the first rise time.)
- During the end of the second rise, preheat the oven to 350*F.
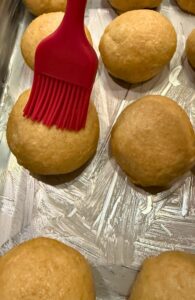
- *Optional- If you like a browned shiny top to your rolls, you can brush the tops of the dough with a simple egg wash before baking. (1 egg mixed with a dash of water or milk.)
- Once the rolls have risen, they should appear smooth and puffy, then bake for 20-25 minutes. Check the center of the rolls to make sure they are done. The internal center should be at 190*F for yeast rolls.
- Brush the rolls with butter after coming out of oven.
- Best enjoyed slightly warm!
- **For a stronger yeast flavor – at step 15 put the covered rolls in the fridge overnight. Then, the next day, get them out and let them come to room temperature (1-2 hours). Then, bake, and enjoy that stronger yeasty flavor!
Video
Notes
Make sure you are using mostly a hard wheat for this recipe. You can use all hard white wheat if you don’t have Kamut (Khorasan,) but I highly recommend using a little Kamut. You can sub hard red in for the hard white, or part of the hard white, but you may need to increase the amount of flour by just a bit if so.
*To store fresh milled flour Rolls made with the Tangzhong method, place in a sealed container, and they will last a little longer on your counter than rolls without using this method. However, we still love to allow the rolls to cool completely, then place them in a freezer safe container or bag. Freeze for up to 4 months. To thaw, just place however many rolls you want on the counter to come to room temperature, usually about an hour or so.
*To Freeze Unbaked Rolls- Make the dough as directed, let it rise once. Then, shape the rolls and place in the freezer before the second rise. I like to put the tray of shaped rolls on a baking sheet and freeze for a few hours until they are solid, then you can put them in a freezer safe container or bag for easier storage.
To Thaw the frozen rolls, put them in the fridge covered the night before you want to bake them. Then, the day you want to bake the rolls, put them on the counter covered. Allow them to come to room temperature, which normally takes somewhere between 1-2 hours. Then bake the fresh milled flour Tangzhong rolls as directed in the recipe. Enjoy!