
Fresh Milled Flour Brioche Bread With The Tangzhong Method
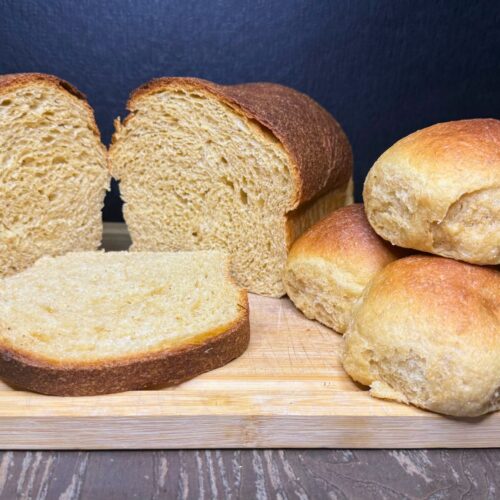
This Fresh Milled Flour Brioche Bread Made With The Tangzhong Method has quickly become my family’s FAVORITE bread dough for everything! It makes the most delicious, heavenly rolls, buns, and bread! This dough is also perfect to use for cinnamon rolls as well.

I adapted my Tangzhong Sandwich bread recipe to get this recipe. If you want that regular sandwich bread instead of this Brioche, you can find that recipe HERE.
More Ways to Use This Fresh Milled Flour Tangzhong Brioche Dough
This Fresh Milled Flour Tangzhong brioche dough is one of those recipes that earns a permanent place in my kitchen. Its soft, enriched crumb makes it incredibly flexible, meaning you can shape it far beyond a simple loaf. Once you make this dough, you’ll find yourself reaching for it again and again for all kinds of bakes, including:
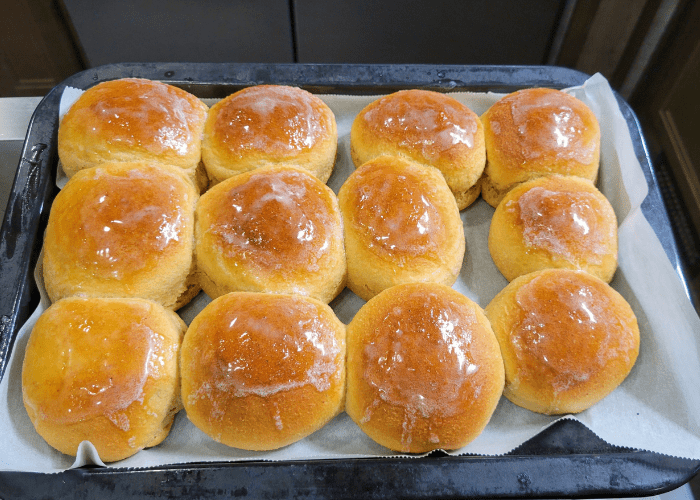
- Soft dinner rolls – pillowy and perfect for holidays or everyday meals.
- Burger or sandwich buns – sturdy enough to hold fillings, yet tender with every bite.
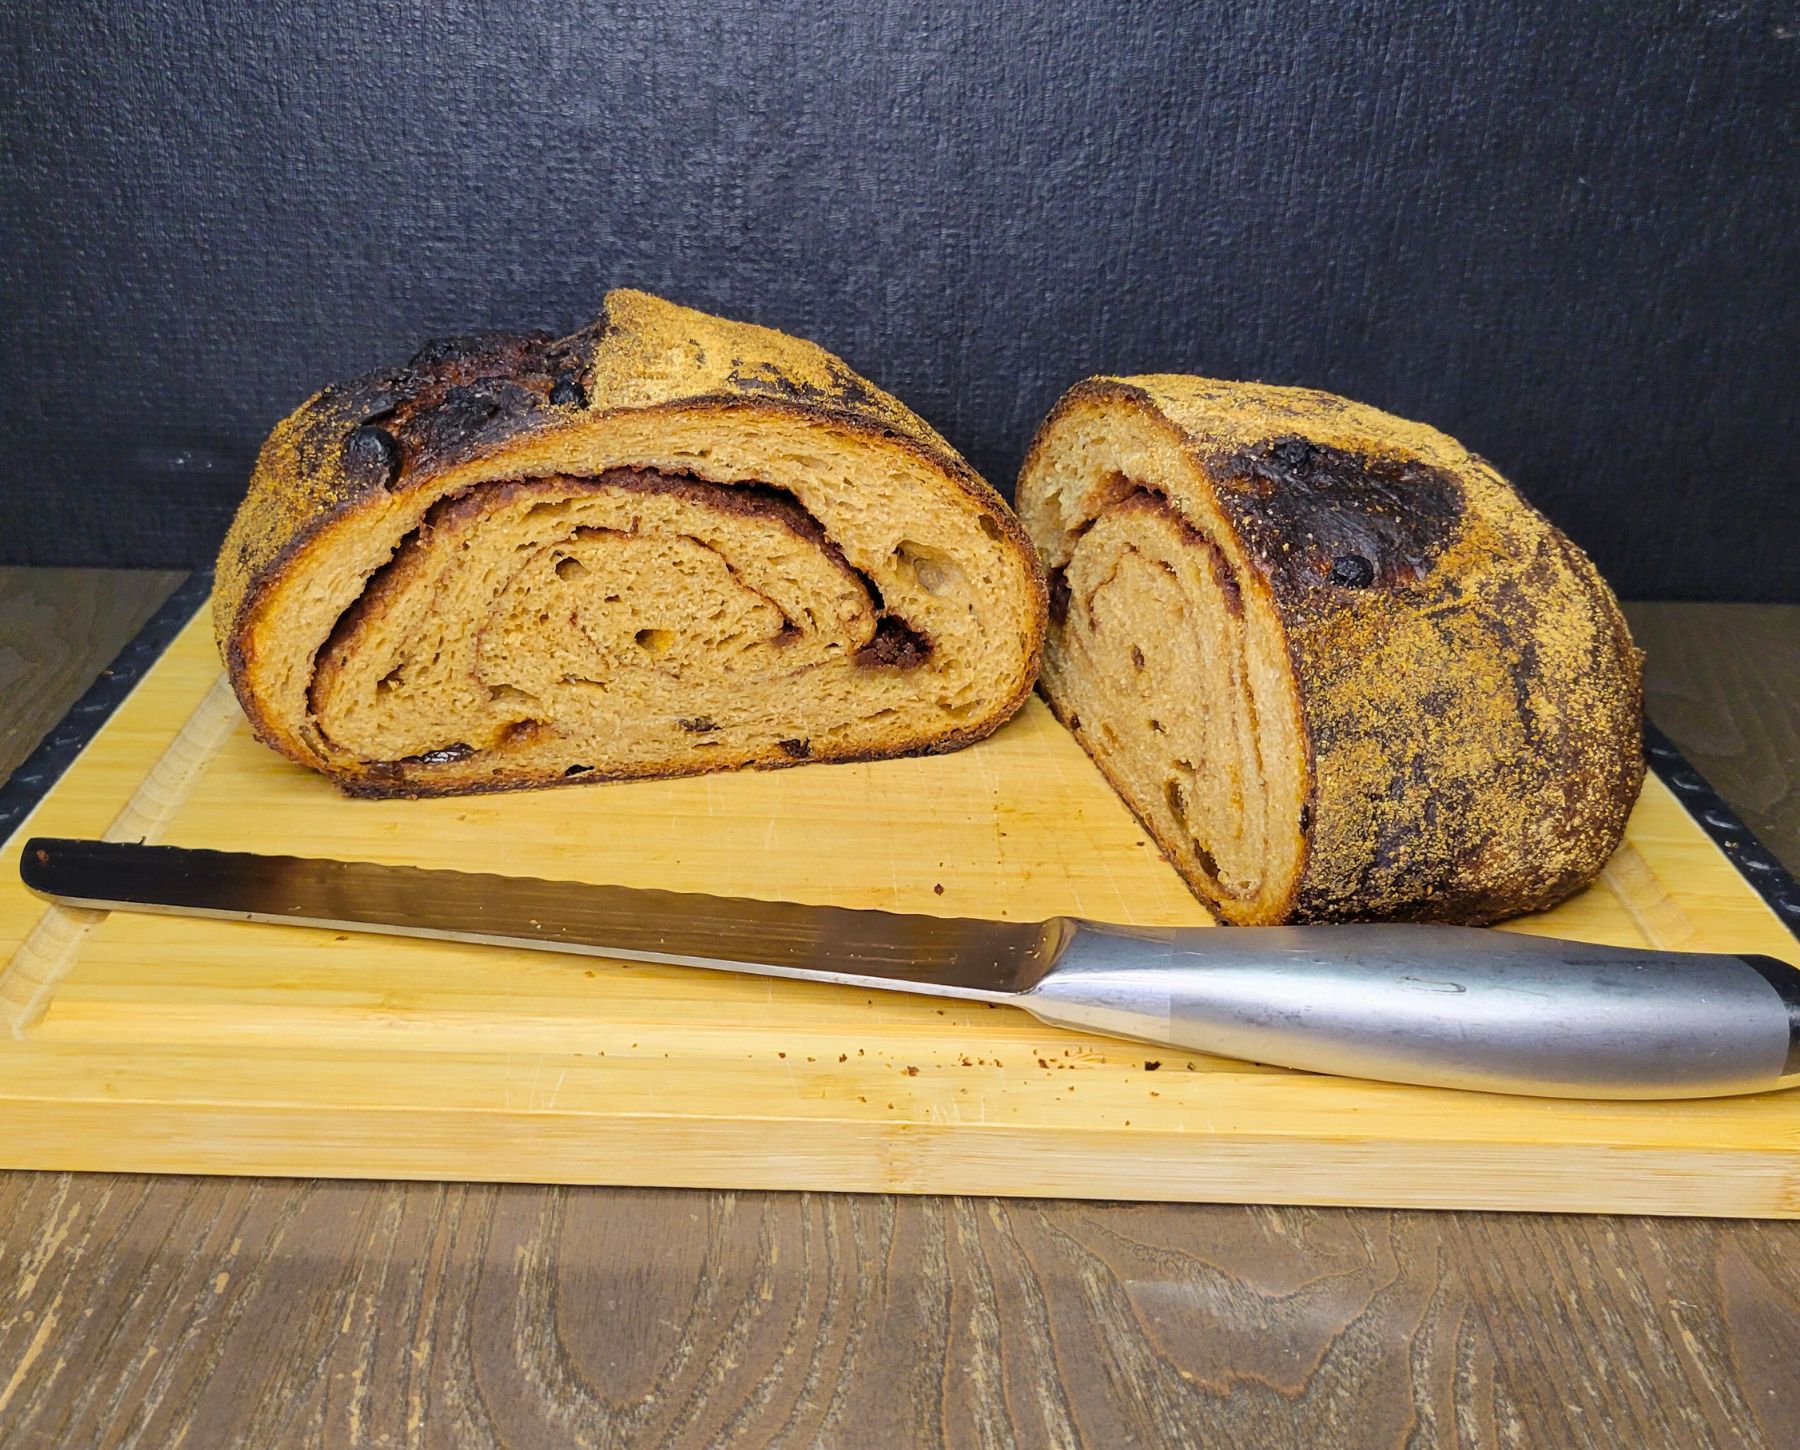
- Cinnamon rolls or sweet rolls – rich, fluffy, and ideal for swirls and fillings.
- Pull-apart bread – great for sharing, whether sweet or savory. HERE is my instructions for a garlic and cheese loaf. Also, I have a sweet option- monkey bread recipe HERE you can use the instructions for this dough.
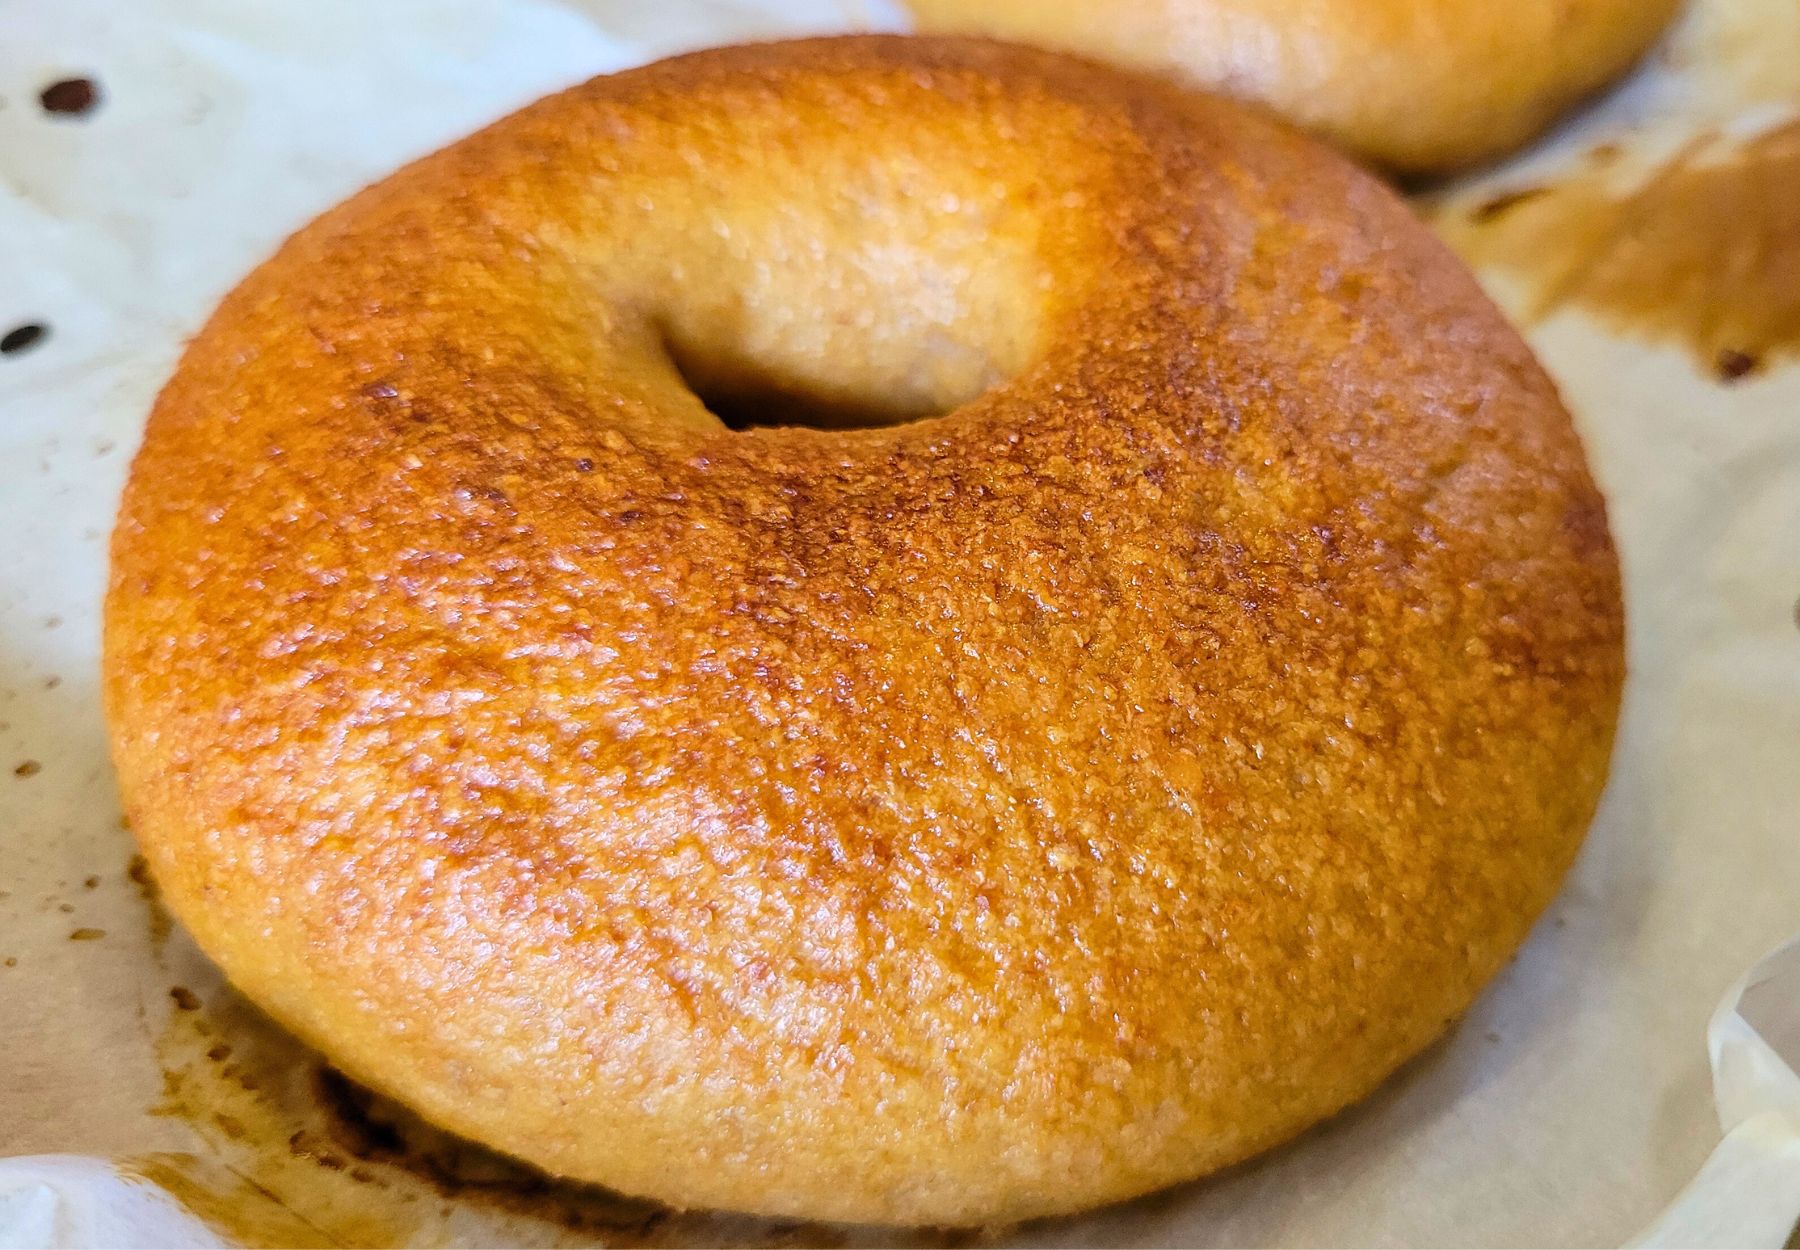
- Brioche-style hot dog buns – way better than store-bought in both texture and flavor.
- Savory herb rolls – add garlic, herbs, or cheese for a dinner-table favorite.
- French toast bread – baked specifically to slice thick for making French Toast.
This dough truly adapts to whatever you need, making it a reliable, go-to base for everyday baking, working for both sweet or savory ideas.
Ingredients To Make Fresh Milled Flour Brioche With The Tangzhong Method
- 6&1/8 cup fresh milled flour, divided 735g (Hard wheat for this. I use 615g hard white wheat and 120g of Kamut.) *See notes for alternatives
- 1 cup milk 250g (can sub for water if needed)
- 2/3 cup water 160g
- 8 TBSP softened butter, unsalted 113g (1 stick)
- 4 TBSP Honey 84g (can sub for sugar)
- 2&1/2 tsp sea salt (If using salted butter, decrease to 2&1/4 tsp salt)
- 4 eggs 200g
- 1 TBSP lemon juice 15g
- 4 tsp instant yeast (Use 4&1/2 tsp if using active dry yeast)
Instructions To Make Fresh Milled Flour Brioche With The Tangzhong Method
Make The Tangzhong Paste
- Firstly, mill the flour. I mill 735g total of wheat berries to get my fresh milled flour. But, this flour will be used in two different places in the recipe.
- So, let’s use part of the flour to make the paste.
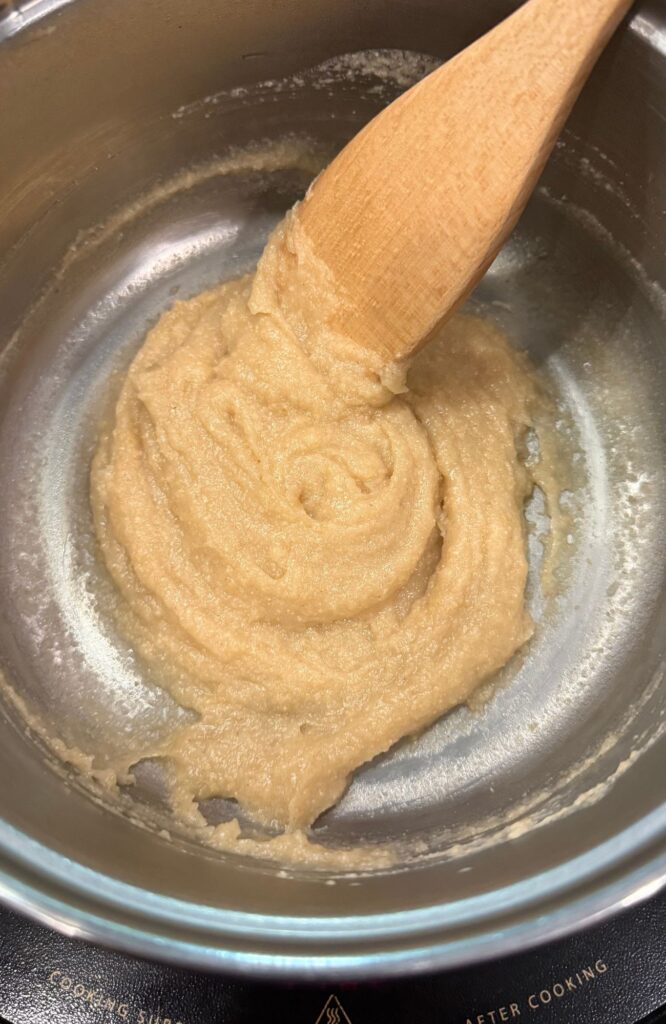
- Put 1/2 cup of fresh milled flour (60g) and 1 cup milk (250g) into a sauce pan, stir to combine.
- Heat this mixture on medium-high heat until it forms a paste. This should only take about 3-5 minutes. Once it forms a paste, remove from the heat, and allow it to cool at room temperature.
- I like to add the butter to the paste to softened the butter, and also to help the paste to cool down a bit quicker.
Make The Dough
- While that mixture is cooling, put the water, honey, salt, eggs, and lemon juice into your mixer. (If you don’t have lemon juice, you can sub for vinegar. This helps the loaf to last on the counter a bit longer, and softens the loaf as well.)
- Mix these ingredients to incorporate. Then add in the paste mixture with butter after it has cooled a bit.
- Then, add the remaining flour into the mixing bowl, and mix to combine until no flour is left. Cover, and let this mixture sit for about 15 minutes. This is the autolyse period and it allows the fresh milled flour to absorb the liquid and the bran to soften. Because the yeast is not in the mixture yet, you can do this autolyse period for longer if you prefer.
- After the autloyse period, then put in the yeast, and mix to incorporate.
- Once the yeast is added, Start the kneading process. Make sure not to knead the dough with the cover on your mixer, this will overheat your dough, and cause it to break down.
- Knead until the dough is nice and stretchy. Typically, 6-8 minutes in a Bosch style mixer, 16-20 minutes in an Ankarsrum style mixer, or 25-30 minutes in a Kitchen aid mixer (allow extra time for a Kitchen Aid style mixer to have breaks in between kneading to prevent overheating of the mixer.) These kneading times will vary for everyone, this is just the most common times for these style of mixers.
- Once the dough is nice and stretchy, and doesn’t easily tear. Then, cover and allow it to rise until double. This can take somewhere between 1-2 hours. (Instant yeast or warmer rooms will be closer to 1 hour. Active dry yeast or cooler rooms will be closer to 2 hours.)
- While the dough is rising, prepare your bread pans with parchment paper, or grease them with softened butter.
Shape & Bake The Loaves
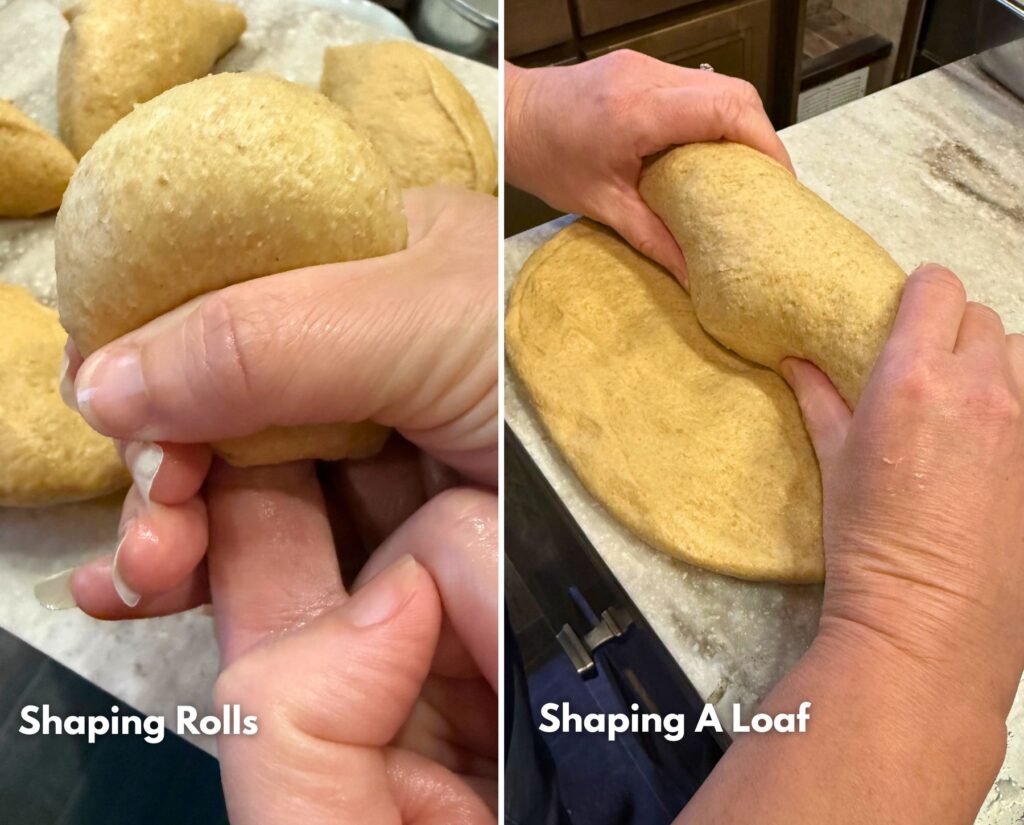
- Once the dough has doubled in size, place some olive oil on your counter, and hands. Then, divide the dough in half. This will make two large loaves, OR you can make one loaf and a batch of twelve rolls with the other half of the dough.
- Shape the dough into 2 bread loaves with some surface tension. I like to flatten each piece of dough, then fold two corners into make a triangle tip. Then, lightly pull (not so tight that it rips the dough) to create tension, and roll the triangle into the dough all the way up until it forms a loaf. You can pinch the ends together. After shaping, the top should have a tight tension on the top of the loaf, this helps with the rise also. *see video
- Put each shaped loaf into each prepared bread pan, cover, and then allow to rise a second time. 40-50 minutes. (*Tip- usually the second rise time is close to half the the first rise time.)
- During the end of the second rise, preheat the oven to 350*F.
- Once the loaves have risen, they should appear nice and puffy, then bake for 38-43 minutes. Check the center of the loaf to make sure they are done. The internal center of the loaf should be at 190*F for yeast breads.
- Once they have finished baking, remove from the oven, and carefully dump them out of the bread pans onto a cooling rack. I like to place mine on their sides as the cool.
- Once the loaves have cooled, you can slice and enjoy. If you slice into them while they are still hot, this can cause them to be crumbly the next day or gummy. So, try to resist cutting them while hot.
How To Store Fresh Milled Flour Brioche Bread Made With The Tangzhong Method
Fresh milled flour brioche bread made with the Tangzhong method will last a little longer on your counter than bread without using this method. However, we still love to allow the loaf to cool completely, then slice it and place it in a freezer safe container or bag. Freeze for up to 4 months. To thaw, just place however many slices you want on the counter to come to room temperature, usually about an hour or so.
Shop This Post
Shop Nutrimill/Bosch ($20 OFF Coupon Code: Grainy)
Grain Mill Harvest Nutrimill (Save $20 OFF with coupon code: GRAINY)
Walnut Harvest Grain Mill (Save $20 OFF with coupon code: GRAINY)
Bosch Universal (Black & Stainless) ($20 OFF Coupon Code: Grainy)
9×13 Stainless Steel Baking Pan With Lid
Grain Bin Sticker Labels (Save 10% OFF with Coupon Code- GRAINY)
Shop My Site Wheat Berries & Coupon Codes
Baja Gold Salt SAVE 10% OFF with Coupon Code: Grainy
Checkout Some Of My Other Recipes
Fresh Milled Flour Recipe Index

Fresh Milled Flour Brioche Bread Made With The Tangzhong Method Printable Recipe
Fresh Milled Flour Brioche Made With The Tangzhong Method
Ingredients
- 6&1/8 cup Fresh milled flour, divided 735g (Hard wheat for this. I use 615g hard white wheat and 120g of Kamut.) *See notes for alternatives
- 1 cup milk 250g can sub for water if needed
- 2/3 cup water 160g
- 8 TBSP softened butter, unsalted 113g 1 stick
- 4 TBSP Honey 84g can sub for sugar
- 2&1/2 tsp sea salt If using salted butter, decrease to 2&1/4 tsp salt
- 4 eggs 200g
- 1 TBSP lemon juice 15g
- 4 tsp instant yeast Use 4&1/2 tsp if using active dry yeast
Instructions
Make The Tangzhong Paste
- Firstly, mill the flour. I mill 735g total of wheat berries to get my fresh milled flour. But, this flour will be used in two different places in the recipe.
- So, let’s use part of the flour to make the paste.
- Put 1/2 cup of fresh milled flour (60g) and 1 cup milk (250g) into a sauce pan, stir to combine.
- Heat this mixture on medium-high heat until it forms a paste. This should only take about 3-5 minutes. Once it forms a paste, remove from the heat, and allow it to cool at room temperature.
- I like to add the butter to the paste to softened the butter, and also to help the paste to cool down a bit quicker.
Make The Dough
- While that mixture is cooling, put the water, honey, salt, eggs, and lemon juice into your mixer. (If you don’t have lemon juice, you can sub for vinegar. This helps the loaf to last on the counter a bit longer, and softens the loaf as well.)
- Mix these ingredients to incorporate. Then add in the paste mixture with butter after it has cooled a bit.
- Then, add the remaining flour into the mixing bowl, and mix to combine until no flour is left. Cover, and let this mixture sit for about 15 minutes. This is the autolyse period and it allows the fresh milled flour to absorb the liquid and the bran to soften. Because the yeast is not in the mixture yet, you can do this autolyse period for longer if you prefer.
- After the autloyse period, then put in the yeast, and mix to incorporate.
- Once the yeast is added, Start the kneading process. Make sure not to knead the dough with the cover on your mixer, this will overheat your dough, and cause it to break down.
- Knead until the dough is nice and stretchy. Typically, 6-8 minutes in a Bosch style mixer, 16-20 minutes in an Ankarsrum style mixer, or 25-30 minutes in a Kitchen aid mixer (allow extra time for a Kitchen Aid style mixer to have breaks in between kneading to prevent overheating of the mixer.) These kneading times will vary for everyone, this is just the most common times for these style of mixers.
- Once the dough is nice and stretchy, and doesn’t easily tear. Then, cover and allow it to rise until double. This can take somewhere between 1-2 hours. (Instant yeast or warmer rooms will be closer to 1 hour. Active dry yeast or cooler rooms will be closer to 2 hours.)
- While the dough is rising, prepare your bread pans with parchment paper, or grease them with softened butter.
Shape & Bake The Loaves
- Once the dough has doubled in size, place some olive oil on your counter, and hands. Then, divide the dough in half. This will make two large loaves, OR you can make one loaf and a batch of twelve rolls with the other half of the dough.
- Shape the dough into 2 bread loaves with some surface tension. I like to flatten each piece of dough, then fold two corners into make a triangle tip. Then, lightly pull (not so tight that it rips the dough) to create tension, and roll the triangle into the dough all the way up until it forms a loaf. You can pinch the ends together. After shaping, the top should have a tight tension on the top of the loaf, this helps with the rise also. *see video
- Put each shaped loaf into each prepared bread pan, cover, and then allow to rise a second time. 40-50 minutes. (*Tip- usually the second rise time is close to half the the first rise time.)
- During the end of the second rise, preheat the oven to 350*F.
- Once the loaves have risen, they should appear nice and puffy, then bake for 38-43 minutes. Check the center of the loaf to make sure they are done. The internal center of the loaf should be at 190*F for yeast breads.
- Once they have finished baking, remove from the oven, and carefully dump them out of the bread pans onto a cooling rack. I like to place mine on their sides as the cool.
- Once the loaves have cooled, you can slice and enjoy. If you slice into them while they are still hot, this can cause them to be crumbly the next day or gummy. So, try to resist cutting them while hot.
Video
Notes
*This post contains affiliate links, which means I make a small commission at no extra cost to you! Also, as an Amazon Associate I earn from qualifying purchases. But, I will only suggest items I actually Recommend!


Can I use a refined coxonut oul instead of butter?
I am not sure you would get the same results. Brioche really needs the richness of the butter. You can use any oil in place and still get good results, but the brioche flavor partly comes from the butter.
I made this and it turned out so well! It also freezes really nicely. When you thaw it you can’t even tell it was frozen.
I wanted to do a Japanese sweet potato version – is it possible to add mashed sweet potato? I’m not sure how to attempt to modify the recipe.
Can I substitute spelt for Kamut? If so would it be same ratio of grams?
If using spelt in place of Kamut, you may need to hold out a bit of the water in the recipe, and increase the spelt amount a bit. Kamut is a very thirsty grain, so it needs more liquid than spelt does.
Can I double this recipe? If I can do I also double the yeast?
Yes, you can double the recipe including yeast. But, anymore than double, I wouldn’t use too much yeast, it tends to rise really quickly
This recipes looks so good! Unfortunately I don’t have a mixer but I do have a Zojirushi Virtuoso. Could I use one of the courses to make this? Thank you!
I don’t have a bread maker to do a course. But, you could use the bread maker to knead the dough. Just knead until nice and stretchy
How do I go about making cinnamon rolls with this dough?
You can use the filling ingredients from my sourdough cinnamon rolls here- https://grainsinsmallplaces.net/fresh-milled-flour-sourdough-cinnamon-rolls/
Then bake any 350*F for about 20-25 minutes.
Could I use 115 g of sourdough in place of the yeast?
Yes, you can, just make sure the paste has cooled enough before adding it to the dough so it doesn’t kill your sourdough starter.
When adding sourdough starter instead of yeast, do the flour and water amounts need to be adjusted?
Hello!! I made your sourdough sandwich bread regularly!! Can you come up with this recipe using sourdough?
Thank you,
Keilla
I agree thank you
She posted online to omit yeast and add 1/2 c sourdough starter
Same question as Keilla Jones, can you make it with sourdough starter please?
You can omit yeast and add 1/2 c sourdough starter, just make sure the paste isn’t too hot when you add it to the dough, or it can kill your sourdough.
For two loaves would I use 9×5 bread pans?
This recipe makes two 4.5×8.5 loaves, but it will work in two 5×9 pans, just slightly smaller.
Has this recipe been adjusted to make two normal sized 9×5 loaves? It’s a great recipe but I can only get one loaf and 8 cinnamon rolls out of a recipe
I make two nice size loaves in my 4.5×8.5inch pans.
This recipe is spot on.. wow… perfect!!!
THANK YOU!!! Next time I will try making with sourdough starter
Yay! So glad to hear that! Let me know how it goes! Thanks! 🙂
Made 2 loafs, but only used 1 dessertspoon of honey. (Because for regular sandwiches I’m not a fan of sweet bread.) They came out great! So I gifted 1 to my neighbour. She texted me later to thank me and ask for the recipe :-).
Oeh, nice idea about swapping the yeast for sourdough! Will try that the next time.
Many thanks and greetings from Purmerend, Holland.
Linda
Yay! So glad to hear they were a hit! So nice to share with others too! Thanks! 🙂
Can you share the bake time / temp you use for rolls with this recipe? Thanks!
Yes, I bake my rolls at 350*F for 18-20 minutes. Until the center reaches at least 190*F
Can you omit lemon juice and add vital wheat gluten?
You can add vital wheat gluten if you prefer. You can also omit the lemon juice, but the lemon juice helps with the softness, and allows the loaf to last a bit longer on the counter. You can sub for white vinegar in place of the lemon juice if you prefer as well.
Can I knead by hand if I don’t have a stand mixer? Going to try hard red wheat.
kneading by hand can be challenging with fresh milled flour, and this recipe is a pretty wet and sticky dough. I would suggest letting the dough sit for much longer during that autolyse period, and holding back just a little of the liquid to the dough to hand knead. Let me know how it goes! 🙂
Dear Kara,
Thank you very much for developing this dough recipe. I made this today! I followed your directions to the tee. Beautiful dough that is so incredibly soft and delicious. I made one loaf and one pan of dinner rolls. Tomorrow, I am going to make buns with this dough for Sloppy Joes and home made tater tots!
Blessings to you and yours.
Misty
My pleasure! I am so happy to hear it was a hit! Yum that sounds delicious! 🙂
Did this recipe change? I have it printed out (from an earlier time) and now-on here-it has twice as much butter, 2x the eggs & less water than the previous one I printed. I’m just wondering which I should use. Thanks for any help!
After seeing your video on this I made the bread today and it is wonderful! I will be a staple in my house for sure. This bread is so easy but yet so yummy!
Yay! I am so happy to hear that! Thanks! 🙂
Wow, this recipe is incredible! I can’t believe how soft it turned out for being FMF. I used water in the tangzhong because we were out of milk, Spelt instead of Kamut and sourdough starter instead of instant yeast and it turned out perfect!
Yay! Glad to hear it was a hit! Thanks! 🙂
This has become my favorite bread recipe. The rise I get is beautiful!! Thank you so much ❤️
Yay! Glad to hear that! I have been LOVING this one too lately! 🙂
I am still fairly new to baking breads and also I do not have a mixer right now. How would you suggest I go about hand mixing this? Do you have a video that talks about this?
I have a video on French bread for hand kneading here- https://youtu.be/mbiSdbw3evM?si=iKiHQtX_BUEgJcA_
However, these light airy fluffy loaves like this Brioche will be very challenging to hand knead without adding too much extra flour, it will make them a bit more dense.
Thank you! This is the texture of bread I’ve been unsuccessful at making once I switched to fmf. I love the taste and squishiness of this recipe, and that I can use this dough for so many things – it will 100% be in my weekly rotation since you can make it and then decide what you want to do with it later. I used 140g of my stiff sourdough starter and it worked beautifully as an overnight ferment on my counter (it’s cold where I live so that helps too), then shaped and proofed the next day. Thanks for developing this recipe.
Awesome! Glad to hear it, thanks for sharing! 🙂
Do I add the starter to the paste after it’s cooled or do they add to the dough after the autolyse period right before kneading.
Thank you!
I add it after the past has cooled, so that the hot paste won’t kill the sourdough starter culture.