
Simple No Knead Bread Loaf Made With Fresh Milled Flour
A simple No Knead Artisan Bread Loaf Made With Fresh Milled Flour, yes it can be done. Have you ever dreamed of baking a mouthwatering artisan bread loaf made with fresh milled flour? Well, I have great news for you – it’s not only possible but also surprisingly simple! The best part? You don’t even need sourdough! In this recipe, I’ll show you how to create a magnificent, hands-off bread boule using just a touch of yeast. With a little bit of preparation the night before, you’ll be rewarded with a gorgeously crafted single loaf of artisan-style bread that pairs perfectly with any meal.

How To Make No Knead Bread Using Only Fresh Milled Flour
Working exclusively with fresh milled flour can present certain challenges when it comes to finding the right recipes. After experimenting with various no-knead bread recipes, I’ve discovered a winning formula that delivers consistently outstanding results. I’ve fine-tuned this recipe specifically for fresh milled flour, and I highly recommend using a hard wheat variety like hard white or hard red wheat. While incorporating a small portion of other grains such as Spelt or Kamut is an option, the bulk of the flour should consist of a hard variety that better forms gluten. In this post, I will guide you through the recipe to get a perfect loaf every time!
Understanding The Long Fermentation Process And The Science Behind It
The long fermentation process involved in baking is kind of fascinating how it works. The science behind it is pretty neat, how each organism has a part. During an extended rise period, enzymes, which are naturally present in the flour break down the complex carbohydrates into simple sugars. The wild yeast and lactobacilli thrive in this environment, and they release carbon dioxide gas and lactic acid. This relationship between the microorganisms and the carbohydrates creates a wonderful balance of flavors and textures. As the dough ferments, the lactic acid creates a delightful tang while also enhancing the dough’s texture. Also, the slow fermentation allows for the development of gluten, which is why we can get away with not kneading the dough with this process.

Ingredients For Making No Knead Bread With Fresh Milled Flour
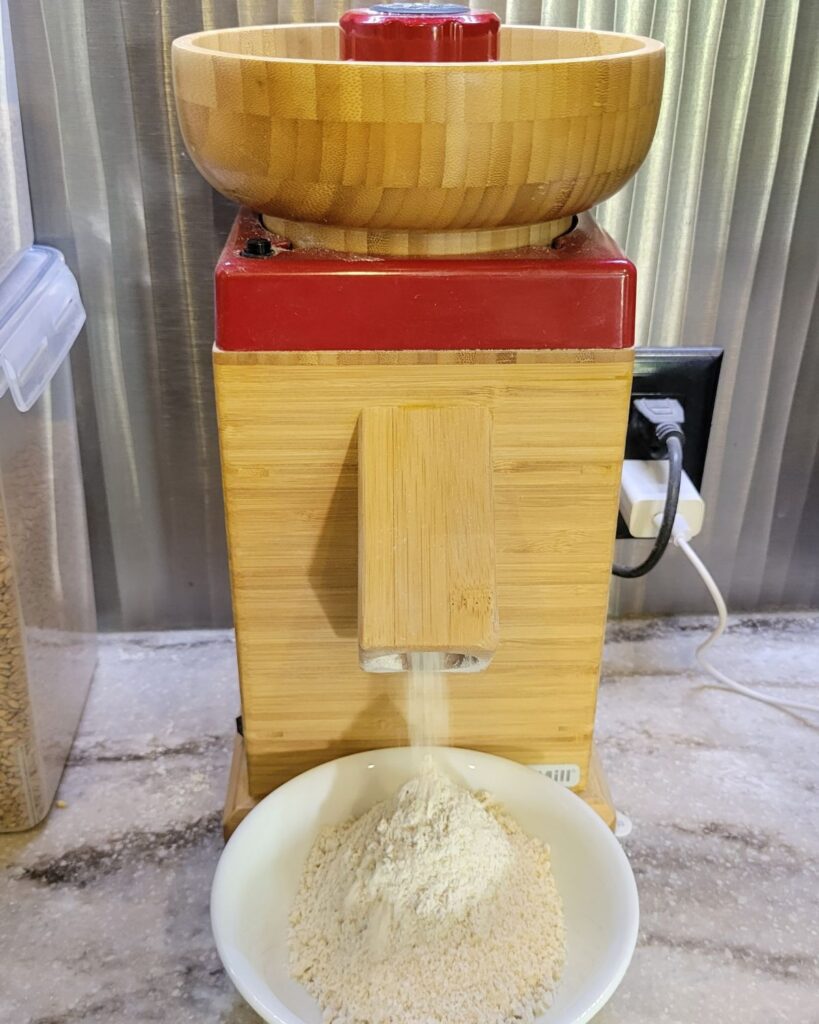
- 3 to 4 cups of fresh milled flour 390g to start (I milled about 2&1/8 cup of hard white wheat to get this amount.)
- 2 tsp salt
- 1/2 tsp yeast
- 1&1/2 cup warm water 350g (90-110*F)
Just those few ingredients mixed together the night before is all it takes to make this delicious bread loaf!
Instructions To Make This No Knead Artisan Bread With Fresh Milled Flour
The Night Before
- Mill Your Flour
- In a large bowl, combine yeast, salt, flour, and water. Mixt these ingredients until combine, the dough will be slightly shaggy (if it is too wet, add a tiny bit more flour.)
- Cover the dough, and let it sit on the counter at room temperature for 12-18 hours (or overnight.)
The Next Morning
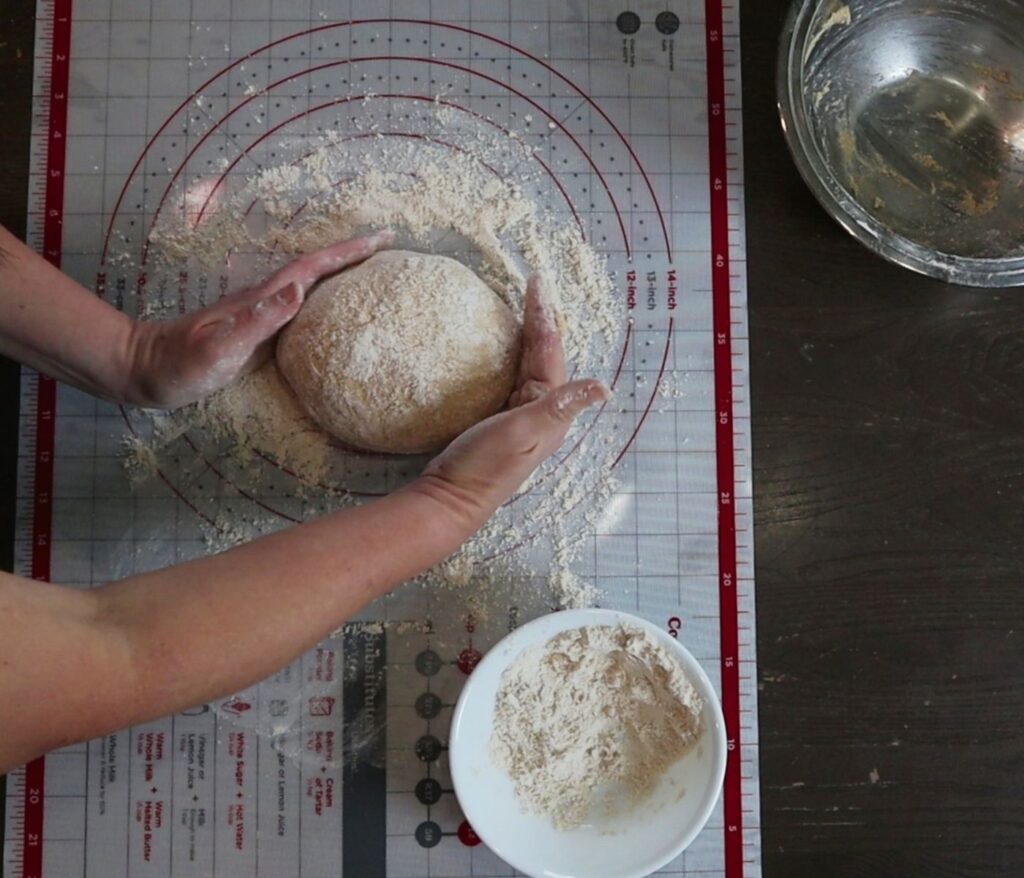
- After the dough has sat overnight, move dough out of bowl, and onto a clean, floured surface (I mill a bit more flour for this step, or use any excess from the night before.)
- Then, fold dough edges into the middle, and continue to cup and shape until there is some surface tension, and it creates a tight smooth ball. Also, you should notice the dough holding it’s shape better.
- Line your bowl with parchment paper, and sprinkle a bit of flour on the paper. Make sure the paper is long enough that you can use it as handles to lift the dough out of the bowl.
- Place dough seam side down into the bowl on the floured paper.
- Cover, and allow to rise for 30-40 minutes.
- While the dough is rising, place Dutch oven with lid (or other baking vessel) into the cool oven to preheat.
- Preheat the oven to 450*F with the baking vessel inside.
- Once the dough has risen slightly, and the oven is preheated, then using the parchment paper as handles, transfer the dough into the hot baking vessel. Place lid on, and bake for 35 minutes. *Be careful not to burn yourself!)
- After the 35 minutes, remove the lid, and bake for an additional 10-20 minutes, until the internal temperature reaches 205*F.
- Use the parchment paper handles to remove bread, and place on a wire cooling rack.
- Let bread cool before cutting into it.
- Enjoy!

Shop This Post
My Baking Pan (In lieu of a Dutch Oven)
Checkout Some Of My Other Recipes
Fresh Milled Flour Recipe Index


No Knead Artisan Bread Made With Fresh Milled Flour
Equipment
- 1 dutch oven Or baking vessel with lid that can handle high heat
Ingredients
- 3 to 4 cups Fresh milled flour 390g to start I milled about 2&1/8 cup of hard white wheat to get this amount.
- 2 tsp salt
- 1/2 tsp yeast
- 1&1/2 cup warm water 350g 90-110*F
Instructions
The Night Before
- Mill Your Flour
- In a large bowl, combine yeast, salt, flour, and water. Mix these ingredients until combine, the dough will be slightly shaggy (if it is too wet, add a tiny bit more flour.)
- Cover the dough, and let it sit on the counter at room temperature for 12-18 hours (or overnight.)
The Next Morning
- After the dough has sat overnight, move dough out of bowl, and onto a clean, floured surface (I mill a bit more flour for this step, or use any excess from the night before.)
- Then, fold dough edges into the middle, and continue to cup and shape until there is some surface tension, and it creates a tight smooth ball. Also, you should notice the dough holding it’s shape better.
- Line your bowl with parchment paper, and sprinkle a bit of flour on the paper. Make sure the paper is long enough that you can use it as handles to lift the dough out of the bowl.
- Place dough seam side down into the bowl on the floured paper.
- Cover, and allow to rise for 30-40 minutes.
- While the dough is rising, place Dutch oven with lid (or other baking vessel) into the cool oven to preheat.
- Preheat the oven to 450*F with the baking vessel inside.
- Once the dough has risen slightly, and the oven is preheated, then using the parchment paper as handles, transfer the dough into the hot baking vessel. Place lid on, and bake for 35 minutes. *Be careful not to burn yourself!)
- After the 35 minutes, remove the lid, and bake for an additional 10-20 minutes, until the internal temperature reaches 205*F.
- Use the parchment paper handles to remove bread, and place on a wire cooling rack.
- Let bread cool before cutting into it.
- Enjoy!
Video
*This post contains affiliate links, which means I make a small commission at no extra cost to you! As an Amazon Associate I earn from qualifying purchases. But, I will only suggest items I actually Love and Have Used!


I tried this recipe using only einkhorn flour and it didn’t rise enough and was super wet. I tried to salvage it adding a little extra flour the next day but it didn’t look quite right. It tasted fine but cooked super dense. I’m not sure what I did wrong? I think next time I’ll use hard white but einkhorn was all I had on hand at the time and I was too impatient to wait for the rest of my flour to come in. Any suggestions?
Einkorn won’t give you a rise like hard wheat will and will make a denser loaf.
Have been using your recipes and milling for almost 3 months. Breads have been okay. Have been issues and think most was too much liquid. But decided to give this recipe a try. The only thing I did different is only to add 1 1/4 cups of water. WELL let me tell you how it turned out. GREAT!!! Perfect size for us two seniors. My husband tested the heel, then a large slice and then again another slice. He wants this to be my go to bread. Love that it is so easy to make. Thanks for all your hard work.
Do have a question. I used my dutch oven for this bread. But could I also use my stoneware french loaf pan for this recipe?
Yes, I think that would also work, let me know how it goes! 🙂
Followed this to a t and my bread did rise well but it was super wet. I couldn’t even shape it it was a mess.
Make sure to use a hard wheat so that it will form a stretchy dough. Shape with some surface tension, if it is too sticky, you can use a bit of olive oil on your hands and work surface.
Question, I haven’t tried your recipe yet because I thought I read somewhere that FMF has to be cooked within 5 hours of milling it to benefit from the nutrients and protein in it. Have you heard this?
The fresh milled flour does start to oxidize after milling, much like an apple or avocado does. But, once liquid is added it stops/slows the oxidation process and locks in the nutrients.
Yay! I am so happy it was a hit! Thanks! 🙂
Hands down, this is my favorite go to recipe that is simple to prepare! It is a family favorite for sandwich bread and goes perfect with soup!
Awesome! I am happy to hear that! Yum! It really does go good with soup! Thanks! 🙂
Hi Kara
Can I double this recipe? Also do I double all the ingredients? How long do I bake the bread for when I double the ingredients or is it best to rather make two loaves.
Thank you so much for always sharing your amazing skills. May God continue to bless you abundantly in all areas of your life. Thank you in advance.
You can double this recipe, but I would recommend to make 2 loaves with it. You could try to make one big boule loaf, but I have not tried that with this. Let me know how it goes if you give it a try! 🙂
Thank you so much Kara. I think I will make 2 loaves to be on the safe side.
Sounds good! 🙂
The first time I tried this I got a decent loaf with some rise but every loaf since has not risen and I get a hockey puck for a loaf. It’s awful. I’m about ready to give up on the fresh milled flour because it’s absolutely infuriating to work with. I follow this recipe exactly every time and get terrible results. I don’t understand.
This is a denser type bread, I would suggest trying my 4 ingredient bread to start with. I also have lots of videos to help show what the dough should look like along the way. https://grainsinsmallplaces.net/easy-4-ingredient-bread-made-with-fresh-milled-flour/
Also, here is one of the videos I show what the dough should look like, this video is for my pizza dough, focaccia, and I use it for all sorts of things!
https://youtu.be/3nDorxqEgaU
I’ve made a couple of your other FMF yeast breads and they turned out so good, but this recipe is giving me trouble. I thought it was my yeast but it seemed fine when I tested. I thought maybe instant yeast was the problem, so I switched to regular active. I thought the bread tasted kinda salty so I halved the salt, and then doubled the yeast. I still get an extremely dense tight dough. I wonder if I’m overproofing, even at 12 hours? cause when I go to turn out my dough after the first proof the top is quite concave, not convex, is that normal? The only thing I haven’t changes is my FMF which is hard white.
Sorry to be so whiny, I’m sure its something I’m doing wrong. It’s just I’ve made this recipe and variation so many times and I just want some chewy crusty bread! I’m starting to feel like it’s just not in the cards for me and I’ve got to give in and try sourdough.
This is a bit of a denser bread, you can try shaping it a bit tighter and see if that helps. flatten it all out, and fold it all in tightly, then let it rise a bit again. OR you can make my 4 Ingredient Bread with the Italian loaf version on the recipe, but (Don’t put in a loaf pan) and shape and bake it same day in a Dutch Oven like this one. It is nice and chewy! It’s a secret recipe! 🙂
https://grainsinsmallplaces.net/easy-4-ingredient-bread-made-with-fresh-milled-flour/
Hello, my dough is rising for tomorrow. I have 3.5, 3.75, and 5.5 qt. dutch ovens as options. What do you think would be the best choice? I used 80% hard white and 20% kamut and am looking forward to the result!
Probably the 5.5 qt would be good.
Hi! Have you tried open baking this??
It should work fine, the outside of the crust will be harder than it would if bake with steam (closed baking)
Sorry if this has already been asked, there are a lot of comments! Would shaping this into bread pan loaves not work out? I’m currently without a mixer and physically unable to knead but strongly prefer a smaller slice. Thank you, honestly you’ve made my fresh flour journey a lot smoother- it was a rough go at first!
I am so happy to help! Yes, you can bake this bread in a loaf pan, Bake until the internal temp of the center of the loaf reaches at least 190*F
Question- does this long fermented bread with commercial yeast offer the same help with gluten sensitivity as long fermented sourdough? I’m histamine intolerant and thought this may be easier on me without the sourdough starter.
It can slightly help, but it is not going to give the same amount as sourdough will.
Hello! This is a family hit! A delicious chewy, nutty taste!! Only thing is it disappeared quickly and my husband asked if I could make a bigger loaf. If I increased it to say 450 – 500g would the salt and yeast need to increase for this recipe?
Awesome! I am so happy to hear it was a hit! You could double the recipe, and split into 2 loaves.
How does it rise with no “sugar” to feed the yeast? From all the comments it must turn out, I’m just genuinely curious as I thought yeast always needed a sugar.
I just mixed up a double batch as a last minute (as in, i have no stale bread in the house lol) quickie recipe to have some bread to use as a base for stuffing on Thanksgiving. I screwed up the water ratio then tried to fix by adding more flour but no idea how this is gonna come out. May be good thing it’s for stuffing! LOL
The yeast doesn’t need sugar added to rise, it will feed off the fresh milled flour. Sugar just helps the yeast to rise a bit faster.
I’ve heard that the longer the fermentation for an artisan bread the more flavor. If I wanted to prepare this on Tuesday for Friday could I put it in the fridge until Thursday night then leave it on the counter per the recipe from there?
I have left it in the fridge for 2 nights, then put on the counter to come to room temp before baking.
Hi. I tried this recipe with3 1/2 cups hard red and 1 1/2 cups water at the temp recommended followed the recipe for salt and yeast. Proofed for 13 hours, it didn’t rise much, and dough had a crust on the top. Followed directions for cup and fold. Followed test of the directions. And bread came out with a very hard crust and gummy inside☹️. What did I do wrong?
Thank you!!
Sounds like something went wrong with the yeast. I would recommend trying with a new batch of yeast, and make sure the liquid is not too hot as it can kill off the yeast, and there will be no rise. Also, if there was a skin on top, try keeping it in a more air tight container.
Why did my bread not rise as much as yours for the final proof? I even let sit for 40 min. Followed your recipe exactly.
It could have over proofed if it sat too long, then it will collapse, or not have as much oven spring when baking.
I haven’t cut it open, but my loaves are significantly smaller than what you got. My house is kept at 69, and it only rose overnight for 10 hours. When I woke up, it was extremely bubbly and large. When I went to shape, its a lot smaller. The oven made it slightly larger than prior, but still smaller.
This recipe is for one loaf, it is a somewhat smaller loaf. IT should have a nice oven spring after the short second rise.
Thank you for always sharing your recipes, I made this loaf and have a couple of questions.
1. It seams much smaller then my other loaves is there a reason?
2. Since I didn’t have the yeast bloom I used instant yeast, is that correct or perhaps the reason for the smaller loaf.
3. Can this be baked like a sandwich loaf, in a bread pan?
Thanks in advance
This is a smaller loaf, you can double and bake longer. Yes, I use instant yeast usually for this as well. It could be baked like a sandwich loaf, but it will be more dense than a soft sandwich loaf texture.
I made this recipe last night and baked it this morning. It was absolute perfection and so incredibly easy. Thank you so much! Wondering if I could just double the ingredients and make two loaves?
Yay! Glad it was a hit! Yes, you can double it for 2 loaves.