
Everyday Sandwich Bread made with Fresh Milled Flour : Easy Recipe
This Everyday Sandwich Bread made with Fresh Milled Flour is an Easy, beginner friendly Recipe. I will walk you through each step of the way, and I have video instructions HERE where you can watch me make this exact bread along with some other goodies too! I believe that homemade is usually better, especially when it comes to bread. Also, I want to show you how to make a delightful everyday sandwich bread using fresh milled flour. By using this wholesome and nutritious ingredient, you’ll not only enhance the flavor and texture but also add an extra dose of nutrition to your sandwiches. So, Let’s get started!
*Updates To Post
*This post was updated to modify the original baking temperature and time, I find the slight cooler temp with longer bake time works better for most ovens. (The original bake time for this Fresh Milled Flour Sandwich Bread was 400*F, but I have updated it to 350*F for a longer bake time.)
*I also updated the post to include the alternative pan sizes, and how to alter the Fresh Milled Flour Sandwich Bread recipe for each size.

Can I Make This Fresh Milled Flour Sandwich Bread With Sourdough Instead Of Yeast?
Yes! This recipe can be made with sourdough rather than yeast. I have that recipe and method on my website as well! HERE is my Sourdough Sandwich Bread Recipe made with freshly milled flour.
Making Sandwich Bread With Fresh Milled Flour
Making Sandwich bread with fresh milled flour is no easy feat when you are first learning. Even if you are an experienced baker for many many years, fresh milled flour is a whole new ballgame! When I started baking with fresh milled flour, years ago, everything I knew about baking with white flour went out the window. All the tricks I thought I knew didn’t work. And all those “Golden Rules” I always abided by just ended in failure after failure. So, this made me even more determined to figure out why and what I needed to do to change this into success! I was determined that I could create light fluffy loafs just like the sandwich bread I bought at the store…..But better!

Learning To Master Fresh Milled Flour Sandwich Bread
When I was learning, there was very little information out there only a couple resources, and slim to no recipes written specifically for freshly milled flour. I had to figure out, all by trial and error how to master this! Once I began working with fresh milled flour more and more, I began to learn and grow. This is when I decided I should try to teach others everything I have learned. My inspiration bloomed into a Youtube channel, and Blog. I never thought I would do either of those (I am quite introverted), but the calling was just there I guess. So, I just needed to step out of my comfort zone!
I teach tips and tricks in most all of my videos, and blog posts. I am continuing to write new recipes often to share with the world. All of them with exclusively fresh milled flour. I have a passion to spread the word, and teach people how much healthier whole grains are. Also, I want to help people learn what they are putting in their foods, and in turn putting in their bodies.
Switching From White Flour To Fresh Milled Flour
Firstly, don’t start out changing everything at once! It will be difficult to do, as there is a learning curve, and tastebud curve as well. (If that is even such a thing.) Take it slow, and work on mastering one bread, and one or two other non bread recipes. Once you master one bread recipe you will start to develop a feel for how it should look, feel, and move. (*hint I will post a couple great starter bread recipes (other than this one, of course) at the end of this post.) I know it is exciting to try all sorts of new recipes, but often times when people do this, they just think they don’t like fresh milled flour, and stop using it. I promise it will all come to you in due time.

What Pan Size Should I Use?
My recipes call for the smaller 4×8 bread loaf pans, because I have a tiny oven! lol. Even the 4.5×8.5 pans are a bit larger, crazy how just that half inch each way can make such a difference! So, if you only have the larger pans, I recommend to x1.5 my recipes if you are looking for a large high rise loaf of bread. The large pans will definitely still work, the loafs will just be a bit smaller. HERE is a link to the smaller bread pans I use.

Ingredients To Make This Fresh Milled Flour Sandwich Bread
Bread Pan Size 4×8
- 4 cups Fresh Milled Flour 485g (I like to mill 405g hard white, and 80g Kamut)
- 3/4 cup water 180g
- 3/4 cup milk 180g
- 3 TBSP Butter 42g
- 3 TBSP Sugar or Honey 63g
- 1&1/2 tsp salt
- 1 egg 50g
- 2 tsp instant yeast
Medium Bread Pan Size 4.5×8.5
- 6 cups Fresh Milled Flour 728g (I like to mill 608g hard white, and 120g Kamut)
- 1&1/8 cup water 270g
- 1&1/8 cup milk 270g
- 4&1/2 TBSP Butter 63g
- 4&1/2 TBSP Sugar or Honey 94g
- 2&1/4 tsp salt
- 2 eggs 100g
- 3 tsp instant yeast
Large Bread Pan Size 5×9
- 8 cups Fresh Milled Flour 970g (I like to mill 810g hard white, and 160g Kamut)
- 1&1/2 cup water 360g
- 1&1/2 cup milk 360g
- 6 TBSP Butter 84g
- 6 TBSP Sugar or Honey 126g
- 3 tsp salt
- 2 egg 100g
- 4 tsp instant yeast
Instructions To Make Fresh Milled Flour Sandwich Bread
- Firstly, Mill the flour
- Then, to a microwave safe bowl add water, milk, and butter and microwave until the butter is melted completely.
- Add water/milk/butter mixture to stand mixer bowl, then add sugar, egg, and salt. Mix to combine.
- Then, add flour to the stand mixer, and start to mix until all the dry flour is gone.
- Cover and let it sit at room temperature for at least 15 minutes, up to 2 hours to allow the fresh milled flour to absorb the liquid.
- Then, add the instant yeast. Start to mix the yeast in until combined.
- Start the kneading process. This could take 25 minutes with fresh milled flour, or less. This varies greatly, so the best way to check if the dough is done being kneaded, is to check for a window pane test. Window Pane Test Video HERE
- Once a successful window pane test is done, then, cover the dough and let it rise until doubled. This will typically take 1 to 2 hours.
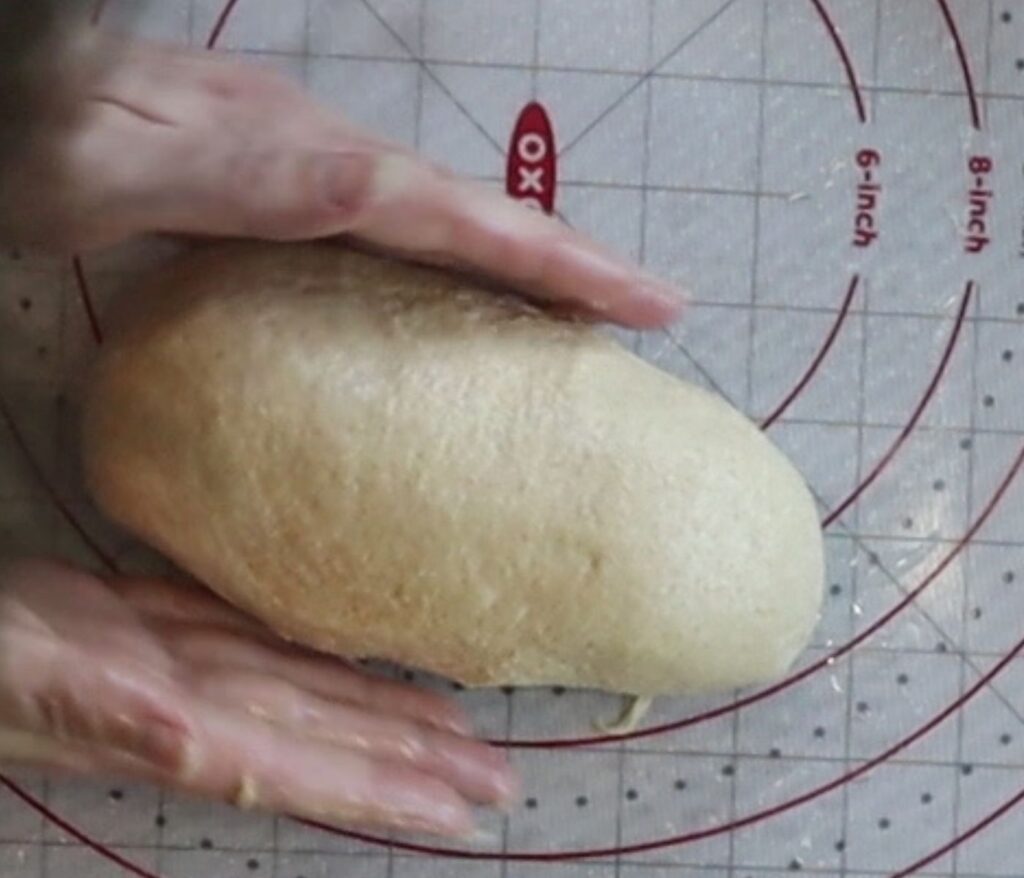
Shaping The Loaf
There are so many ways to shape a loaf of bread, but the most important thing is to make sure you have good surface tension.
- After the dough has doubled in size, then, divide the dough in half if you are making 2 one pound loaves. Press each piece flat, then roll up to shape. Make sure there is some surface tension, see my video for shaping if you are interested HERE
- I like to use some oil on my hands and work surface to help with the wetter stickier dough.
- Place in a parchment paper lined 4×8 bread pan, and cover for about 40 minutes until puffy looking.
- Preheat oven to 350*F towards the end of this second rise time.
- Bake for 30 to 40 minutes until the internal temperature reaches 190*F.
- Take bread out of the oven, and out of the bread tins right away, and place them on a wire cooling rack.
- Let cool for at least one hour before slicing.
- Slice to desired thickness, and enjoy!
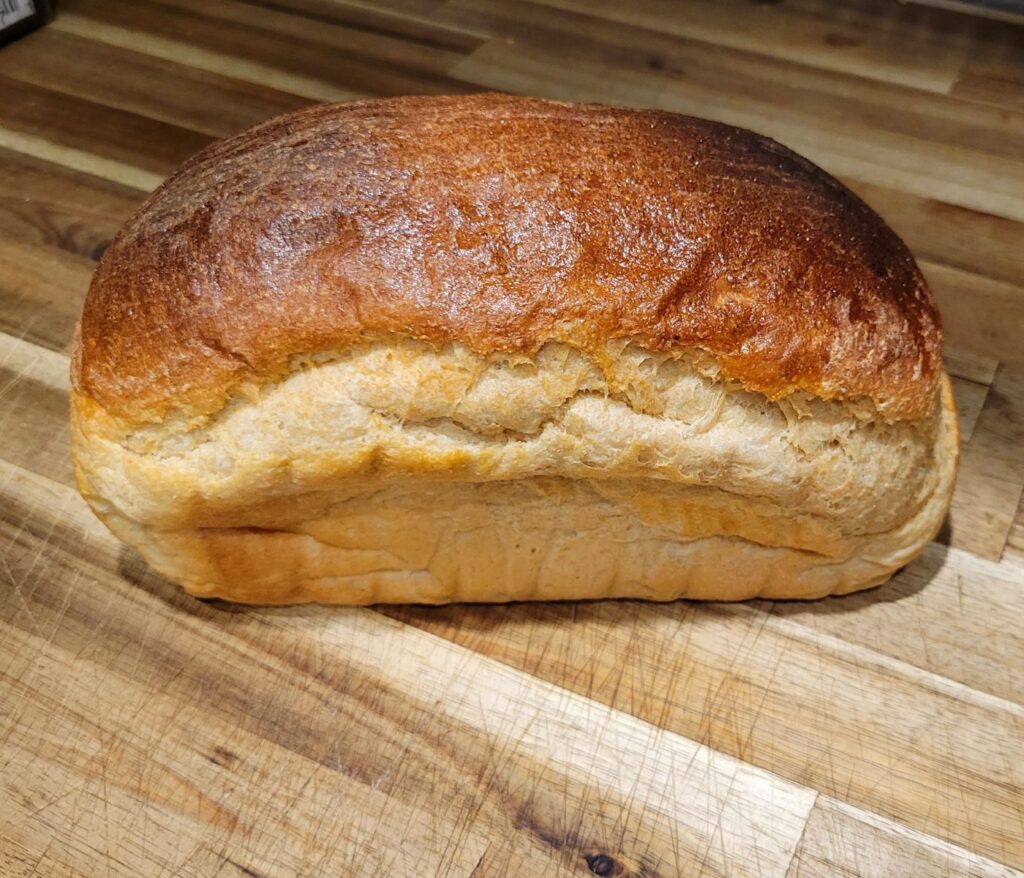
Using Hard White Wheat & Kamut To Make Sandwich Bread
Indulge in the epitome of homemade perfection with this captivating slice of bread. Expertly crafted using a combination of predominantly hard white wheat and a delightful hint of Kamut, this sandwich bread is a true marvel made with freshly milled flour. Prepare to experience the utmost softness and irresistibly squishy texture, all while savoring the wholesome essence of 100% whole grains. Brace yourself for a taste sensation that redefines what homemade bread can truly be

Enjoy That Bread!
With this simple and rewarding recipe, you can easily create a delicious everyday sandwich bread using freshly milled flour. The wholesome goodness and aromatic flavors will elevate your sandwiches to a whole new level. Say goodbye to store-bought bread and enjoy the satisfaction of homemade goodness. Happy baking!
How To Store Fresh Milled Flour Sandwich Bread
To store these fresh milled flour sandwich bread loafs, keep in an airtight container, or bag. Then, keep on the counter for 2-3 days. For longer storage, place in a freezer safe bag and freeze for up to 4 months. (Make sure the loaf has cooled completely before freezing, best results to freeze the same day as it is baked.) To thaw, sit on the counter, and let come to room temperature.
Shop This Post
Toaster Oven With Proofing Function
My Suggested Beginner Bread Recipes
Simple Sandwich Bread – No eggs, milk, or butter
No Knead Overnight Yeast Bread
My 4 Ingredient Bread – Italian Baguette Style (no loaf pan required)
Focaccia – If you are struggling to get the dough right for any Fresh Milled Flour Bread, or have questions, I highly recommend my FREE Masterclass on Youtube, HERE
Once These Are Mastered, I have some level 2 breads to try out!
Sourdough Sandwich Bread Made With Fresh Milled Flour
Cheesy Garlic Pull Apart Bread
And, here is My Fresh Milled Flour Recipe Index updating each week with new ones! You can find cookies, cupcakes, Sourdough, Pasta, muffins, waffles, and more all made with 100% fresh milled flour!

Fresh Milled Flour Everyday Sandwich Bread
Equipment
- 2 4×8 bread pans
Ingredients
For Smaller Bread Pans 4×8
- 4 cups Fresh Milled Flour 485g I like to mill 405g hard white, and 80g Kamut
- 3/4 cup water 180g
- 3/4 cup milk 180g
- 3 TBSP Butter 42g
- 3 TBSP Sugar or Honey 63g
- 1&1/2 tsp salt
- 1 egg 50g
- 2 tsp instant yeast
For Medium Bread Pan Size 4.5 x 8.5
- 6 cups Fresh Milled Flour 728g I like to mill 608g hard white, and 120g Kamut
- 1&1/8 cup water 270g
- 1&1/8 cup milk 270g
- 4&1/2 TBSP Butter 63g
- 4&1/2 TBSP Sugar or Honey 94g
- 2&1/4 tsp salt
- 2 eggs 100g
- 3 tsp instant yeast
For Large Bread Pan Size 5 x 9
- 8 cups Fresh Milled Flour 970g I like to mill 810g hard white, and 160g Kamut
- 1&1/2 cup water 360g
- 1&1/2 cup milk 360g
- 6 TBSP Butter 84g
- 6 TBSP Sugar or Honey 126g
- 3 tsp salt
- 2 egg 100g
- 4 tsp instant yeast
Instructions
- Firstly, Mill the flour
- Then, to a microwave safe bowl add water, milk, and butter and microwave until the butter is melted completely.
- Add water/milk/butter mixture to stand mixer bowl, then add sugar, egg, and salt. Mix to combine.
- Then, add flour to the stand mixer, and start to mix until all the dry flour is gone.
- Cover and let it sit at room temperature for at least 15 minutes, up to 2 hours to allow the fresh milled flour to absorb the liquid.
- Then, add the instant yeast. Start to mix the yeast in until combined.
- Start the kneading process. This could take 25 minutes with fresh milled flour, or less. This varies greatly, so the best way to check if the dough is done being kneaded, is to check for a window pane test.
- Once a successful window pane test is done, then, cover the dough and let it rise until doubled. This will typically take 1 to 2 hours.
- After the dough has doubled in size, then, divide the dough in half. I like to use some oil on my hands and work surface to help with the wetter stickier dough.
- Press each piece flat, then roll up to shape. Make sure there is some surface tension.
- Place in a parchment paper lined 4×8 bread pan, and cover for about 40-50 minutes until puffy looking.
- Preheat oven to 350*F towards the end of this second rise time.
- Bake for 30 to 40 minutes until the internal temperature reaches 190*F.
- Take bread out of the oven, and out of the bread tins right away, and place them on a wire cooling rack.
- Let cool for at least one hour before slicing.
- Slice to desired thickness, and enjoy!
Video
Notes
*This post contains affiliate links, which means I make a small commission at no extra cost to you! As an Amazon Associate I earn from qualifying purchases. But, I will only suggest items I actually Love and Have Used!


My second time making this recipe and first time with my new mill (the other mill wasn’t getting the grains fine enough) and it all goes well until baking. The outside looks really dark (almost smells burnt) but it seems to have to get that dark to reach 190 degrees. The very first time I pulled it out when the crust looked perfect, excitedly cut into it, and it was raw inside. Ha! Would you suggest reducing the heat? Right now it seems to reach 190 when I bake at 400 for almost 30 minutes. Thank you!!!!
It is possible that your oven runs hotter than mine. Yes, I would recommend you cut the temperature down by 25-50 degrees less. Then bake a bit longer. Let me know how that goes!
I had to do that too. Put a foil tent over top about halfway through.
Oh my! Have been making this recipe. What a difference the kamut makes!! I was surprised that it made such a big difference! Thanks so much! Your method is so much better than other recipes with milled flour that I have tried. Bit of a learning curve leaving it sticky. I’m now making it several times a week. Apparently, you CAN teach an old dog new tricks! I’m 81. Healthy from years of “scratch” cooking. Stay with it!!
Yes! I love what a little Kamut can do for each recipe! Thank you so much I am so happy to hear that! Happy Baking!
First of all, this recipe is amazing! The results are shockingly soft and yummy!
But I’m having a huge problem that has nothing to do with this recipe that I’m hoping you can help me with.
I’m using an old Bosch mixer for kneading that was gifted to me.
I’ve had the same problem with every single loaf of bread I’ve tried from several different recipes. I’ll check on the kneading process and it’s doing well around the 6 minute mark, although not quite window pane. so I’ll turn it back on…come back 3 minutes later to find a blob of sticky, gooey mess that is no longer forming a ball and has lost whatever gluten that had started to form just a few minutes before.
if I immediately remove it and finish it by hand kneading for 10 minutes or so, I get a perfect result. if I attempt to keep it going in the Bosch, it never recovers and over kneads and is ruined.
it’s so frustrating because I’ve got every other part of the process nailed and the bread is delicious…….as long as I finish with hand kneading…..but I don’t want to have to always do that. I have a million other projects I’d like to be working on!!!
I really hope you have some ideas for me of what the problem could be. I’ve never turned the speed up past 2 on the mixer….. this last time I tried speed 1. I do not believe there is any problem at all with the dough itself since when I finish kneading by hand it comes out perfect.
The Bosch is such a great mixer because it kneads the dough so quickly, but that is also one of the downfalls is that it can over knead the dough so quickly as well. Here is a quick little short I made showing over, under, and perfectly kneaded dough. https://youtube.com/shorts/C8KQklITZSg
Are you autolyzing the dough (Letting it sit to absorb the liquids)? That can help tremendously. If you are already doing that, I would recommend you stop kneading at the 6-7 minutes. Let time do it’s job. If the dough is nice and stretchy, even if not a perfect windowpane, then I would cover and let it rise. The gluten will still develop during the first rise. Try that and let me know how it goes! Happy Baking!
THANK YOU!!! I’m trying that now!!
Yay! Let me know how it goes! Happy Baking!
Hi there!
This exact thing is happening to me
I watched your YouTube video last night in preparation for making some bread today
This is my first time using freshly milled flour
I am using a breville stand mixer with a dough hook attachment and everything seemed really good until after 6-7 minutes!
It went to a cpmplet goopy mess
I tried taking it out for the bowl and kneading with oil on the bench but that did not work
So I put it back in the bowl to mix a bit more
I’ve now got the mess in a lined bread tin and I will bake it anyway
So I think I’ll take it out at the 6-7 minute mark and go from there for my next attempt!
Every mixer is a bit different, I am not familiar with the Breville mixer, but you are mainly looking for nice stretchy dough. Go by how the dough feels. 🙂
Thank you so much for this recipe! I’m a complete amateur and I have never made bread before at all. I just felt like it would feel special to mill my own flour and make bread. The bread turned out absolutely amazing! I didn’t even have any bread pans, so I used my 3.5 inch x 7.5 inch Pyrexes. Still turned out perfect. I’m gonna try some of your other recipes as well. I used a kitchen aid and I saw a helpful comment on your window pane test video about using a kitchen aid to knead. I’m gonna relay it here just in case someone else may need. Knead on 2 for 10 minutes, stop and wait for 7-10 minutes. Then, knead for 10 minutes again. It worked like a charm. Thank you again for this incredible recipe.
Yay! I am so happy to hear that! Nice job! Thank you for sharing that on here for others who may be struggling with theirs.
Thank you for the comment. I’m going to give it a try!
Love this recipe!! I was afraid for a bit while it was kneading and didn’t seem to want to come together, but then after 20 mins, bam it came together! So yummy. Glad you added the note in there about kneading it for up to 25 mins
Yay! I love it when you can see it transform in front of your eyes! That is the best way to learn! Thanks for sharing! I am glad this was helpful!
Hi!
I currently only have 10 x 5 pans (and I love the size of the bread that it makes)! Would you recommend doing this whole recipe for one loaf of that size? Thank you!
Yes, for that size pan, I would recommend putting this whole recipe in one pan, or doubling it for 2 loafs. Let me know what you think! Happy Baking!
How sticky should the dough be? After rising, I was trying to shape, it and that seemed very difficult to do with how sticky it was. Also, are you dropping 485g total into the mill or is that what comes out. There’s always some product loss, which is why I ask.
The dough is pretty sticky, I like to use olive oil on my hands, and work surface to shape, that will help with that. As far as the wheat goes, I weigh out my wheat berries, and mill them it will give me the same amount of flour (yes, there can be a small amount of loss, but it is generally very minimal.) Let me know how it goes! Happy Baking!
Well, 1st thing I found I failed the reading part of the test 😉 I was so impressed that I re-read the recipe when I came back to leave a comment, I read it makes 2 loaves, explains a lot.
I have a thing where I always have to proof it. I’ve had some yeast that failed on me.
After reading comments about the Kitchenaid, I followed their instructions to mix wait and mix. I was low on flour and only had 00 pizza flour and used both sugar and honey, I couldn’t decide which to use.
Wow just WOW. This is the recipe I was searching for. Just AMAZING!!!
After forming it to fit the bread pan, I found that if I used all the dough, it couldn’t raise because the pan was too full. I was going to say that I had extra dough but not enough for another loave, but now I know better
What do you do with extra dough, yuppers, cinnamon rolls. They were the best I’ve ever made, I recently bought cinnamon sticks that I had to grate.
My mistakes 1. Not reading the makes 2 loaves part. 2. Making the wrong recipe for the pan I had. 😀
Lol, I have done that before! I am glad it ended up as a hit! Nice job! Thanks so much! 😊
I have made this bread twice and it is delicious!! It is light, fluffy and airy-although, almost too much. It is so fluffy and light I can’t use it for a sandwich and it kind of falls apart when handling. I am wondering if I am doing something wrong. It is so good though, even if I can’t make a sandwich.
You can try adding an additional egg to it, and a tiny bit more flour (1/3 cup) 40g with it. Let me know how it goes! Happy Baking!
This was the first loaf bread I tried after getting a mill and the loaves turned out super light and fluffy! I’m so excited 😁 (I used hard red because it’s what I had and it was great). Thank you!
Yay! I am so happy to hear that! Great job! 😊
I have tried this recipe 4x. the first time it turned out so good. every other time I have had to throw the dough away due to it being so sticky I couldn’t even touch it. I couldn’t ever get it to pass a window test at all. I tried active yeast and instant. I was doing the 1.5x recipe and thought that was the issue so I went back to the original size. I have wasted so much grain it’s been so frustrating. I don’t understand how everyone is getting it to turn out and I can’t seem to get it to work.
I ran my mixer for almost an hour the one time and it just continues to get sticker and stickier.
I have done many of your other recipes and they have came out well. but not this one. my husband likes soft bread that doesn’t break apart when making a sandwich and I just can’t seem to figure it out
Hmmm, sounds like it could be over kneading, I have a short video showing what this looks like. Let me know if this is what it is doing? I want to help troubleshoot this with you. https://youtube.com/shorts/C8KQklITZSg
What’s another grain I can use instead of kamut or spelt? I have hard white, soft white and red winter berry. Trying to use what I have before I buy into another kind.
You can use all hard white, or sub the Kamut for your red wheat. Or you can use a tiny bit of soft white, but it doesn’t develop gluten, so no more than 15% soft white and the rest hard white wheat. I hope that helps! Let me know what you decide to do! Happy Baking!
Hello, Kara
Thank you for this delicious-looking recipe. I have two questions – what’s your experience making this recipe in a bread maker (Zojirushi)? And secondly, I don’t have kamut on hand. I only have hard red berries, besides the hard white. Do you think that will work? Looking forward to receiving your reply.
I don’t have a bread maker at the moment, but I have had many people have success with this recipe in the bread maker. You would use the smaller 4×8 recipe, and that whole recipe will make one 2 pound loaf. Sometimes you need to run a longer or second kneading cycles. Just check the dough for it to be nice and stretchy. I would use the hard red in place of the Kamut with the hard white, and see how you like it! Let me know how it goes! Happy Baking!
I found my new bread recipe, delicious and soft. I use the medium size recipe for my pullman loaf pan and it comes out beautifully every time. Thank you for all your time in helping others bake with whole grains.
Awesome! I am so happy to hear that! My pleasure! Thanks so much!
Hey, Kara.
As a complete newbie to baking bread, I tried this recipe in my Zojirushi bread machine today, and followed your recipe to a T. I wish I could post pictures for clarity. Anyways, here are the results: 1) I didn’t have kamut, so I did hard white and hard red. The entire middle of the loaf was deflated, like, an actual concave. 2) After slicing, I tasted it, and it tasted a tad bit yeasty but otherwise delicious. 3) The texture of the loaf is airy and springy.
What do you think went wrong? Would appreciate your expertise here.
I would shorten the rise time, IF it deflated, that means the rise was too long, and the yeast exhausted all their resources, and couldn’t hold the loaf up anymore. That over proofing is also what could cause a yeastier flavor as well.
I can’t figure out what you mean by surface tension on the dough. I haven’t tried this recipe yet but it is next on my list. I made the blueberry bread and the tortillias.
I have a quick short video on surface tension to help show it better. https://youtube.com/shorts/LdENdqzPUNs?si=r8l0wl03EHT8bwR4
Is there any stage that I can put the process on “hold”?
I just realized I will have to be gone before I can bake.
I like to make the dough, allow the first rise, shape, then cover and put in the fridge. Then, they can sit in the fridge even overnight. To continue, let the dough sit on the counter for 1-2 hours to come to room temperature, then bake as directed. I hope that helps!
how do I substitute Hard red for recipes that use hard white
It is typically 1 for 1 replacement, especially if going by weight.
how and can I substitute hard red in recipes for hard white
It is typically 1 for 1 replacement, especially if going by weight.
Can I put the ingredients in a bread machine and have it do this in whole wheat mode?
I don’t have a bread maker, but I have been told that many have had success with it in a bread maker. You may need to run it through a double kneading cycle. Let me know how it goes! 😊