How To Make Cream Puffs With Fresh Milled Flour – Choux
Yes, you can make cream puffs with fresh milled flour! I am here to walk you through the process! Cream Puffs are perfect for holidays, parties, or any get together. And, the best part is, they freeze beautifully! So, you can make a big batch, and freeze them and all year long you can have an impressive treat to bring with little effort! The best part is, my recipe doesn’t require you to sift the flour! So, that means that they still contain plenty of nutrients that whole grains have to offer!
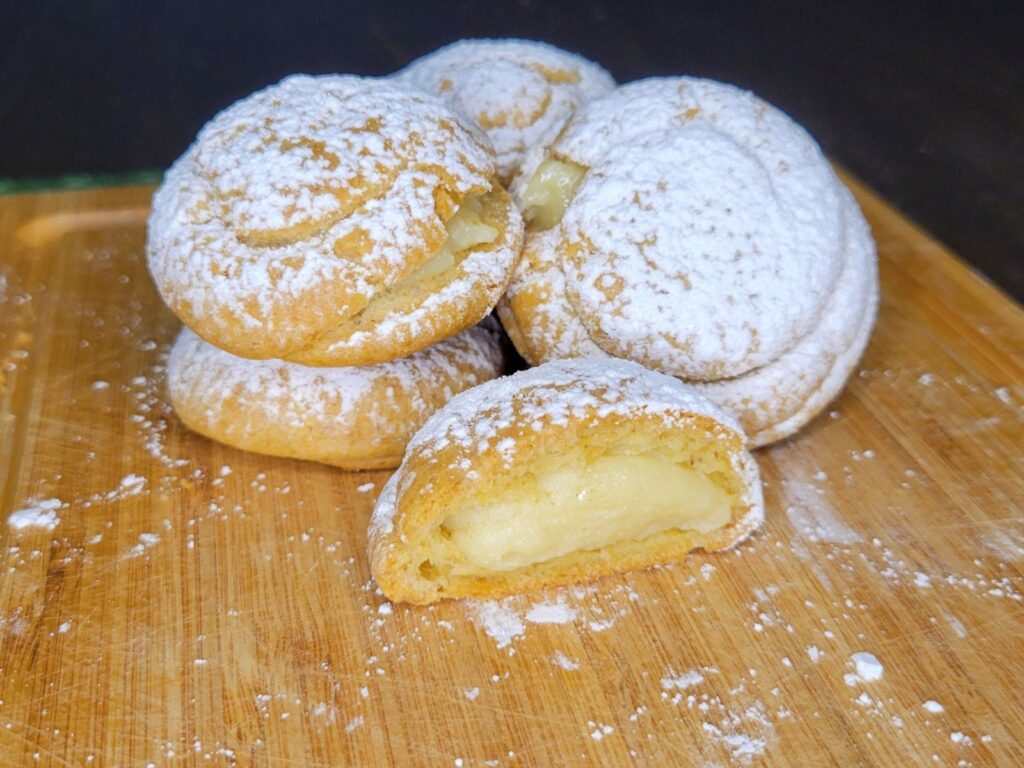
Fresh Milled Flour Cream Puffs are more than just a sweet treat! They also are a blend of tasty flavors and textures together. Using freshly milled flour adds a nutritious nutty taste that goes well with the light, airy pastry. Whether you want something familiar or a new twist on a favorite, these cream puffs offer a yummy adventure for your taste buds that’ll make you happy.

What Is A Cream Puff?
A cream puff is a delightful pastry crafted from choux dough. (What is Choux dough? I will get to that next.) Baking the choux dough causes it to puff up, forming a hollow, crispy shell around a soft airy interior. Once cooled, fill with whipped cream, pastry cream, custard, pudding, or ice cream, and then top them with powdered sugar, chocolate, or caramel. It’s a delightful treat blending a crispy outer layer with a velvety creamy interior.
What Is Choux Dough or Choux Pastry?
Choux pastry, also known as pâte à choux, is a classic French pastry dough that’s used to make various delicious treats. It’s unique because it’s a cooked dough that puffs up during baking to create hollow interiors, perfect for filling.
The main ingredients for choux pastry are water, butter, flour, and eggs.
To make the dough, cook water and butter together until boiling. Then, add flour and stir vigorously until the mixture forms a smooth ball of dough. Afterward, let the dough cool slightly before gradually beating in the eggs until it becomes smooth and glossy.
When baked in the oven, the moisture in the dough creates steam, causing the pastry to puff up and form a hollow interior while developing a crispy, golden exterior. This characteristic makes it perfect for various pastries like cream puffs, éclairs, profiteroles, and more. Choux pastry is versatile and can be filled with sweet or savory fillings, making it a versatile base for a wide range of delightful treats.

Filling Fresh Milled Flour Cream Puffs
I like to fill my cream puffs with made from scratch Pastry Cream. I show you how to make this in a video HERE. But, you can of course use whatever you favorite filling is. Here are some ideas:
- Whipped Cream: Light and airy, whipped cream is a classic filling for cream puffs. You can sweeten it with sugar and add vanilla for extra flavor.
- Pastry Cream: Also known as crème pâtissière, this rich and creamy custard filling adds a luxurious touch to cream puffs. It’s often flavored with vanilla but can incorporate other flavors like chocolate or fruit extracts.
- Custard: A thick, egg-based filling that’s slightly firmer than pastry cream. It’s rich and smooth, offering a delightful contrast to the pastry shell.
- Ice Cream: For a chilly treat, fill cream puffs with your favorite ice cream flavor. You can let the puffs cool completely before adding the ice cream to prevent melting.
- Fruit Fillings: Fresh fruits, fruit preserves, or fruit curds can add a burst of flavor. Consider strawberries, raspberries, lemon curd, or even a mixed berry compote.
- Savory Fillings: Cream puffs can also be filled with savory options like chicken or tuna salad, herbed cream cheese, or savory mousse for a different twist.
- Ganache: A mixture of chocolate and cream, ganache adds a decadent chocolatey element to cream puffs.
Remember, the possibilities are nearly endless when it comes to filling cream puffs. Feel free to experiment with different flavors and combinations to create your own unique treats! Let me know in the comments what you choose!

Troubleshooting Fresh Milled Flour Cream Puffs
There are a few things that can go wrong when making cream puffs at home, so I want to go over some of the common problems.
- The dough puffs up, then deflates while cooling. This problem is typically caused by the dough not being baked all the way through. They need to be completely baked before you take them out of the oven. If there is any moisture still in the dough they will collapse during the cooling process.
- The dough never puffs up at all. The dough may have been to dry or too wet. Also, make sure the oven is preheated all the way, and don’t open the oven door while they are baking.
- Trick to help the dough dry out. I did not have any problems getting the choux dough to dry out while baking, but if your oven holds in steam more than mine, then you may want to take a toothpick or skewer, and poke a hole in the center of the cream puff during the last 3 minutes of baking. This will help the steam to escape and allow the center to dry out.

Flavoring Fresh Milled Flour Cream Puffs
Flavoring cream puffs made with fresh milled flour can add a wonderful dimension to these delicate pastries. Here are some ideas:
- Vanilla: Vanilla is a classic flavor for cream puffs. You can infuse the pastry cream or whipped cream filling with vanilla extract or vanilla bean seeds for a fragrant and familiar taste.
- Chocolate: Drizzle melted chocolate over the finished puffs, or dip them into melted chocolate. Another option is to fill them with chocolate ganache or a chocolate-flavored cream.
- Coffee: Add instant coffee granules or espresso powder to the pastry cream or whipped cream filling for a delicious coffee-flavored cream puff.
- Fruit Flavors: Experiment with fruit flavors by adding fruit extracts or fruit zest to the pastry dough or the filling. For instance, lemon zest can provide a refreshing citrusy twist, while orange or raspberry juice can infuse a fruity taste.
- Spices: Infuse warmth and depth by adding spices like cinnamon, cardamom, or nutmeg to the pastry dough or the filling for a comforting and aromatic touch.
Remember to start with small amounts of flavorings and adjust to your taste preferences. You can experiment by combining different flavors or creating unique fillings to make your cream puffs truly stand out.

Ingredients To Make Cream Puffs With Fresh Milled Flour
- 1 cup water 240g
- 8 TBSP unsalted butter 113g
- pinch of salt
- 1&1/4 cup of fresh milled flour 150g (I used half Kamut & half soft white wheat 75g of each)
- 4 large eggs
- 1 TBSP sugar or honey
- 2 Cups filling of your choice (I have a recipe for Pastry cream HERE.)
- *Optional- Dusting of powdered sugar, or drizzled/Dipped in melted chocolate or caramel.
Instructions To Make Fresh Milled Flour Cream Puffs
- Firstly, decide what filling you want to use and prepare it so it can cool down before filling if needed.
- Then, mill the flour (I love to use half soft white wheat and half Kamut)

Make The Choux Dough
- In a large saucepan, combine water, butter, sugar, and salt. Heat on medium-high heat until melted and starting to boil.
- Take the pan off the heat, and pour in the flour all at once. Stir quickly with a sturdy spoon until combined, and a paste forms.
- Place the pan back on the heat, now at medium, Stir the dough until it looks smooth, and you start to see steam coming from the dough. This will take about a minute or less. The dough should have thickened and appear somewhat shinier now.
- Remove the pan from the heat, and let the dough cool until it reaches below 125*F. You can stir it occasionally to help cool. Don’t put it in the fridge, you still want it warm. If you don’t have a thermometer, just make sure it has cooled so you can hold your finger on it for a second or two, but still be hot.
- While the dough cools, prepare your baking sheets with parchment paper.
- Preheat the oven to 425*F. (These bake at 425 initially, then decrease later.)
- Then, when the dough has cooled to below that 125*F temperature, it is time to add in the eggs one at a time. (You want to make sure the mixture cooled enough that the eggs don’t scramble when you add them.)
- Add eggs one at a time, and make sure to mix completely before adding in the next egg. (This can be done by hand, but to make the process easier, you can use a mixer.) The eggs & dough will slosh around, but eventually come together.
- Once all the eggs are added, mix for a couple minutes ensuring an even mix. The dough should now be a bit looser, and be a smooth and shiny paste.

Piping The Cream Puff Choux Dough
- Now it is time to pipe the pastry. Using a piping bag, and a 1/2 inch round piping tip (or cut a 1/2 inch circle in the bag.) pipe the choux dough on the prepared baking pans 1 inch apart from each other allowing room to expand. Pipe each cream puff straight up from the bottom at 1&1/2 inch diameter and about 1/2 – 3/4 inch tall.
- Wet your finger, and lightly flatten the tops of the cream puff batter. You want a smooth top, not a peak.
- Bake at 425*F for 10 minutes, then without opening the oven – Decrease the temperature to 325*F and bake for 20-30 more minutes. (This time will vary on your oven.) Bake until they are a dark golden brown color. If they are not completely baked, they will deflate as they cool. See troubleshooting above in my blog.
- After the cream puffs are finished baking, pull them out of the oven, and let them cool on the pan.

Filling the Cream Puffs
- Then, when they are completely cooled, you can either pipe the filling in the middle, or cut them in half and fill that way.
- Once filled, you can choose if you want to leave plain, dust with powdered sugar, or dip/drizzle with chocolate or caramel.

How To Store The Fresh Milled Flour Cream Puffs
To Store the cream puffs, cover and keep in the fridge for 3-4 days. BUT, for longer storage, and my family’s favorite way to enjoy these is to freeze them. To freeze place in a freezer safe bag or container and freeze for up to 3 months.
Shop This Post
Nutrimill Flour Mill – Use Coupon Code Grainy for $20 off!
Soft White Wheat (Small Amount)
Soft White Wheat (Bulk)
Kamut (Small Amount)
Kamut (Bulk)
Checkout Some Of My Other Fresh Milled Flour Recipes
Fresh Milled Flour Recipe Index
Fresh Milled Flour Cream Puffs Printable Recipe

Cream Puffs Made With Fresh Milled Flour (Pate A Choux)
Equipment
- 1 large sauce pan
- 2 baking sheets lined with parchment paper
- 1 piping bag (you can use a ziplock bag with the tip cut off)
Ingredients
- 1 cup water 240g
- 8 TBSP unsalted butter 113g
- pinch of salt
- 1&1/4 cup fresh milled flour 150g I used half Kamut & half soft white wheat 75g of each
- 4 large eggs
- 1 TBSP sugar or honey
- 2 Cups filling of your choice I have a recipe for Pastry cream HERE.
- *Optional- Dusting of powdered sugar or drizzled/Dipped in melted chocolate or caramel.
Instructions
- Firstly, decide what filling you want to use and prepare it so it can cool down before filling if needed.
- Then, mill the flour (I love to use half soft white wheat and half Kamut)
- In a large saucepan, combine water, butter, sugar, and salt. Heat on medium-high heat until melted and starting to boil.

- Take the pan off the heat, and pour in the flour all at once. Stir quickly with a sturdy spoon until combined, and a paste forms.
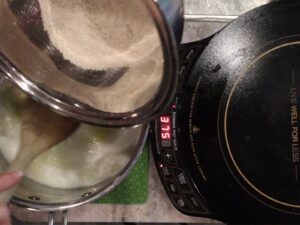
- Place the pan back on the heat, now at medium, Stir the dough until it looks smooth, and you start to see steam coming from the dough. This will take about a minute or less. The dough should have thickened and appear somewhat shinier now.
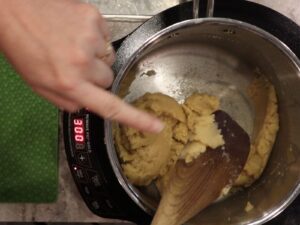
- Remove the pan from the heat, and let the dough cool until it reaches below 125*F. You can stir it occasionally to help cool. Don’t put it in the fridge, you still want it warm. If you don’t have a thermometer, just make sure it has cooled so you can hold your finger on it for a second or two, but still be hot.
- While the dough cools, prepare your baking sheets with parchment paper.
- Preheat the oven to 425*F. (These bake at 425 initially, then decrease later.)
- Then, when the dough has cooled to below that 125*F temperature, it is time to add in the eggs one at a time. (You want to make sure the mixture cooled enough that the eggs don’t scramble when you add them.)
- Add eggs one at a time, and make sure to mix completely before adding in the next egg. (This can be done by hand, but to make the process easier, you can use a mixer.) The eggs & dough will slosh around, but eventually come together.

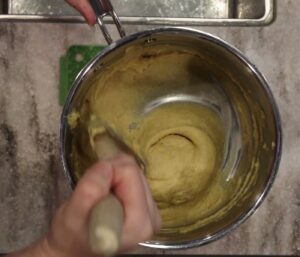
- Once all the eggs are added, mix for a couple minutes ensuring an even mix. The dough should now be a bit looser, and be a smooth and shiny paste.
- Now it is time to pipe the pastry. Using a piping bag, and a 1/2 inch round piping tip (or cut a 1/2 inch circle in the bag.) pipe the choux dough on the prepared baking pans 1 inch apart from each other allowing room to expand. Pipe each cream puff straight up from the bottom at 1&1/2 inch diameter and about 1/2 – 3/4 inch tall.

- Wet your finger, and lightly flatten the tops of the cream puff batter. You want a smooth top, not a peak.

- Bake at 425*F for 10 minutes, then without opening the oven – Decrease the temperature to 325*F and bake for 20-30 more minutes. (This time will vary on your oven.) Bake until they are a dark golden brown color. If they are not completely baked, they will deflate as they cool. See troubleshooting above in my blog.

- After the cream puffs are finished baking, pull them out of the oven, and let them cool on the pan.

- Then, when they are completely cooled, you can either pipe the filling in the middle, or cut them in half and fill that way.

- Once filled, you can choose if you want to leave plain, dust with powdered sugar, or dip/drizzle with chocolate or caramel.

Video
Notes
*This post contains affiliate links, which means I make a small commission at no extra cost to you! As an Amazon Associate I earn from qualifying purchases. But, I will only suggest items I actually Love and Have Used!





Hi, thanks for the recipe! I just made my crème puffs and they didn’t deflate but got pretty burned on the bottom. I did 10 mins at 425 and then lowered to 325 but had to pull them out at about 10 mins. Any thoughts or suggestions? They raised but not a lot.
Thanks! I love your recipes 🙂
If only the bottoms got dark, I would raise your oven rack to the next one higher, that should help them bake more evenly, which will let them rise more evenly.
They were on the top rack 🙈
Do you prepare them completely before freezing? Filling, topping etc.
We froze them all ready to go! My husband actually loves them partially frozen! 🙂