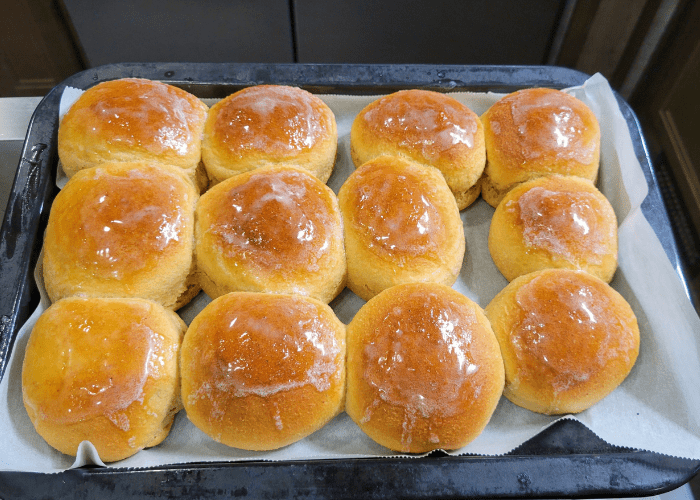
The Best Sweet Yeast Dinner Rolls With Fresh Milled Flour
These are The Best Sweet Yeast Dinner Rolls Made With Fresh Milled Flour! They are perfect for a dinner party or just for a nice family dinner. And, the come together pretty quickly while you are making dinner. Also, my very favorite way to make these dinner rolls is to make the dough the day before, let them rise, shape them, and then cover and pop in the fridge overnight. Pull them out 1-2 hours before dinner, and let them come to room temperature. Lastly, bake them! Fresh yeast dinner rolls warm and ready to go for you meal without very much effort! Win-win!
How Do I Make My Rolls Taste Yeasty?
The best way to make your rolls have a stronger yeast flavor, without adding any additional ingredients, is to give them time. But, too much time, and they will overproof quickly. So, I recommend making the rolls the night before you want to serve them. So, this is my little trick, step by step:
- Make the roll dough, and let it double in size for the first rise (about 1-2 hours.)
- Shape the rolls, and place them in a parchment paper lined 9×13 baking pan.
- Cover with cling film wrap, and place them directly in the refrigerator.
- Allow the rolls to do their second rise slowly in the refrigerator.
- The next day, get the rolls out of the fridge, and let them sit on the counter for 1 to 2 hours, until they are room temperature.
- Bake them at 350*F for 20-25 minutes.
- Then, right after they come out of the oven, brush them with butter.
- Enjoy that yeasty flavored goodness!
Why Are My Dinner Rolls Not Light & Fluffy?
There are a couple reasons why dinners rolls may not turn out light & fluffy. Here is a list to help you trouble shoot the problem.
- Your yeast was not good, or your liquid was too hot, killing the yeast.
- Too much flour in the dough causes a very dense roll. I like a higher hydration dough to give me a super light, fluffy, and airy roll.
- The dough was not kneaded long enough! Knead until it passes the window pane test! I have a short video HERE if you are interested showing a pass & fail of the window pane test.
- Another reason for dense rolls is over cooking them. Make sure to bake them only until they reach 190* F, so they don’t dry out!
- Lastly, they did not rise long enough.

Why Are My Dinner Rolls Bland?
One reason for bland dinner rolls, is either because too much flour was added, making the salt, flour, sugar ratio off. Another reason for bland dinner rolls is not enough salt or the salt was forgotten. Even on a sweet roll, salt is necessary for flavor, and proper rising. Thirdly, if the dough did not rise long enough, it would not develop the yeasty flavor we all love in our dinner rolls. See above, where I mention how to make your rolls have a strong yeast flavor.
Is It Better To Use Milk Or Water For Yeast Rolls?
This question depends on what you are looking for in a yeast roll. Most recipes say milk is better, because milk will make a softer roll, and it will also help with browning the roll. Milk will also sweeten the roll a bit. But, some will argue that milk affects the gluten structure of bread, so it will be slightly more heavy. I wrote this recipe with water, but feel free to sub for milk 1:1. Just make sure the milk is heated so it doesn’t affect the gluten development.
Ingredients For These Fresh Milled Flour Yeast Dinner Rolls
- 3&1/2 cups fresh milled flour (420g) (I milled 2&1/4 cup hard white wheat berries)
- 1 cup warm water (240g)
- 4 TBSP softened butter (56g)
- 1/3 cup brown sugar (74g)
- 2 eggs (room temperature)
- 1 tsp salt
- 2&1/2 tsp instant yeast
Instructions For Making These Sweet Yeast Dinner Rolls With Fresh Milled Flour
- Firstly, Mill The Flour
- Heat water in microwave for 60 seconds. (You could sub for milk if you prefer)
- Pour warmed water, softened butter, brown sugar, eggs, and salt in mixer, mix until combined.
- Then, add the flour & mix until incorporated. This is a sticky dough.
- Now, let the dough sit and rest for about 15 minutes for the fresh milled flour to start absorbing the liquids.
- After the rest, add your instant yeast, mix in.
- Knead dough until it passes the window pane test. (see video)
- Spray the dough ball with oil & cover for 1-2 hours, until dough has doubled.
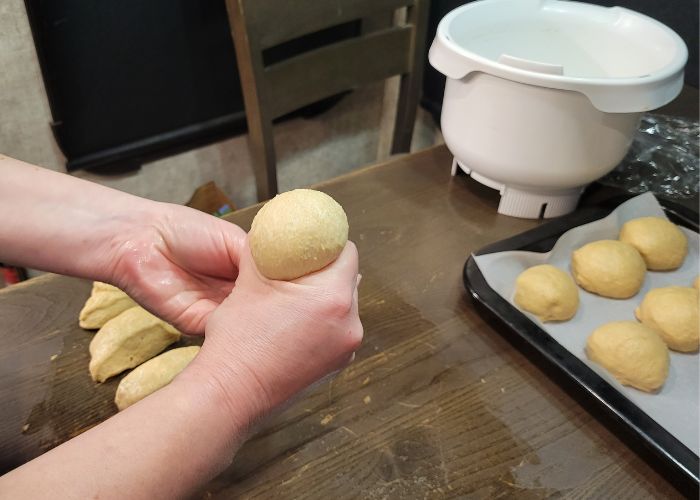
- On an oiled surface, divide dough into 12 equal pieces.
- Then, Roll & shape each pieces into a ball, making sure there is surface tension. (see video)
- Place in a parchment paper lined 9×13 baking dish.
- Then, cover. Now, you can make these the same day, or if you prefer a strong yeast flavor, make a day in advance.
- If making same day, let the dough rise for about 40 minutes until they appear “puffy”
- Preheat oven to 350*F during the end of the rise.
- Bake at 20-25 minutes
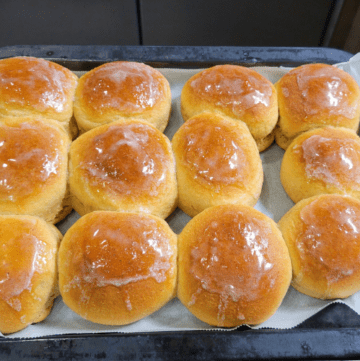
- Brush the rolls with butter after coming out of oven.
- Best enjoyed warm!
- **For a stronger yeast flavor – at step 12 put them covered in the fridge overnight. Then, the next day, get them out and let them come to room temperature. Bake, and enjoy that stronger yeasty flavor!

If You Want To Learn More About Milling Your Own Flour, I have a Fresh Milled Flour 101 post. I Recommend Starting With That Post.
Shop This Post
Checkout My Other Recipes:
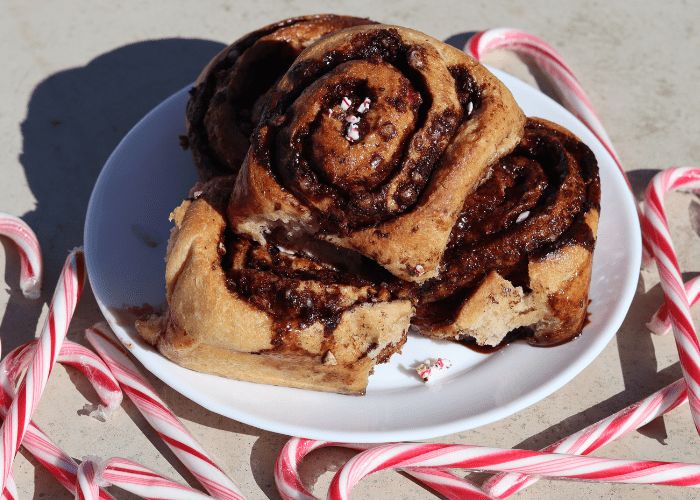
Cinnamon Rolls with Dates (or Not)
Sweet Yeast Dinner Roll – Whole Wheat – Yeasty Flavor Tip!

The Best Yeast Dinner Rolls Made With Fresh Milled Flour
Ingredients
- 3&1/2 cups Fresh milled flour (420g) (I milled 2&1/4 cup hard white wheat berries)
- 1 cup warm water 240g
- 4 TBSP softened butter 56g
- 1/3 cup brown sugar 74g
- 2 eggs room temperature
- 1 tsp salt
- 2&1/2 tsp Instant yeast
Instructions
- Mill The Flour
- Heat water in microwave for 60 seconds. (You could sub for milk if you prefer)
- Pour warmed water, softened butter, brown sugar, eggs, and salt in mixer, mix until combined.
- Then, add the flour & mix until incorporated. This is a sticky dough.
- Now, let the dough sit and rest for about 15 minutes for the fresh milled flour to start absorbing the liquids.
- After the rest, add your instant yeast, mix in.
- Knead dough until it passes the window pane test. (see video)
- Spray the dough ball with oil & cover for 1-2 hours, until dough has doubled.
- On an oiled surface, divide dough into 12 equal pieces.
- Roll & shape each pieces into a ball, making sure there is surface tension. (see video)
- Place in a parchment paper lined 9×13 baking dish.
- Then cover. Now, you can make these the same day, or if you prefer a strong yeast flavor, make a day in advance.
- If making same day, let the dough rise for about 40 minutes until they appear "puffy"
- Preheat Oven to 350*F during the end of the second rise
- Bake at 20-25 minutes
- Brush the rolls with butter after coming out of oven.
- Best enjoyed warm!
- **For a stronger yeast flavor – at step 12 put them covered in the fridge overnight. Then, the next day, get them out and let them come to room temperature. Bake, and enjoy that stronger yeasty flavor!
Video
Notes
*This post contains affiliate links, which means I make a small commission at no extra cost to you! As an Amazon Associate I earn from qualifying purchases


If you needed to make these a week in advance, would you recommend freezing the raw dough or baking, freezing and reheating later?
I have done it both ways. I like top make them freeze same day after they cool. Then thaw on the counter for a few hours. You can make the dough all the way to shaping, and freeze the whole tray. Then, put in the fridge the night before to thaw out. Then, place on the counter the day of baking to come to room temp.(usually 1-2 hours) then bake. Both ways should work.
Can I substitute the brown sugar for honey or coconut sugar or maple syrup
Yes, you can sub for any of those options! 🙂
Best rolls ever. I had them in a friend’s house and then tried to replicate them at home. My batter is too wet to do a window test after 45’ of kneading. I’ve been measuring in grams so I know the amounts are correct. I live in Central Missouri and don’t usually have this problem with other recipes I’ve had to add a little bit of all purpose flour to manage the dough and after baking the are delicious, however with the added flower just a little bit dry Can you give me any suggestions?
This should be a pretty wet and sticky dough, often more than people think. 45 minutes of kneading could have caused them to over knead. Here is a short video I made to show what over kneaded dough looks like so you can compare. https://youtube.com/shorts/C8KQklITZSg
If that wasn’t the issue, then I recommend starting out the recipe with less liquid (you can always add in more liquid, but I advise against adding in more flour if at all possible. I talk about this in a video I will link here about what to do with wet dough- https://youtu.be/tdnCrbOsVag
First. Thank you so much for these recipes. I have been using fmf since July. Just got an Ank a cpl months ago and still learning but your videos are life savers! All that said. This recipe specifically. When subbing honey in place of brown sugar should you cut back on milk/wtr a little to allow for the additional fluid? Made a batch with honey yesterday and did seem a little flatter. Thanks again so much!
My pleasure! I am so happy you are enjoying them! I sub for honey, but maybe slightly less instead of 1/3 cup, I would do 1/4 cup. I generally don’t need to adjust for liquid, but if the dough seemed too wet, you could leave out about 1-2 TBSP of the liquid. Let me know how it goes! Happy Baking! 🙂
Your recipes are awesome. My first try and these rolls turned out delicious. I’ve always been intimidated by making homemade rolls, but these were basically easy to put together. Thanks for sharing!
Yay! So Glad to hear that! Nice job! 🙂
Would it be okay to sub the brown sugar for honey? Or would that mess with the whole recipe?
Yes, you can sub honey for the brown sugar, but I would add about 1/4 cup honey rather than 1/3 cup. Let me know how it goes! Happy Baking! 🙂
These are amazing! I used your recipe + 2T of purple ube powder and some extra milk to make ube pandesal. My husband is Filippino and he said it was the best ube pandesal he’d ever had!!!! WOW!
Yay! I am so happy to hear that! Also, thanks for sharing incase anyone else is also interested in those substitutions!
Hi there! I have made this recipe twice with hard white wheat flour and followed the directions step by step (using active dry yeast) – kneading my dough for 25 minutes, but getting no rise. The flavor is wonderful however. What am I doing wrong? thank you!
If there is an issue with the rise, that usually indicates a yeast issue. Make sure the liquid is not too hot before adding the yeast, as that can kill it. Try with a new batch of yeast, and see if that helps. Other reasons for no rise could be the dough is in a cold place to rise, or the dough is too dry.
I messed up the timing for these and had to put them in the fridge prior to the first rise and finish later. STILL SO GOOD!!
Glad to hear they were a hit! Thanks! 🙂
Delicious! This was my first attempt at making bread on my fresh milled flour journey and it turned out amazing. I used my nutrimill and followed the recipe as written. Thank you so much for the video and for listing both sizings for the flour before and after milling.
Yay! I am so happy to hear they were a hit! Nice job! Thanks 🙂
Thanks so much for your recipes. I’ve been purchasing fresh ground flour from a farm producer and realized quickly that you have to treat it differently than store bought flour. I appreciate all the work you’ve put into these recipes!
That being said, I’m wondering if you could add an approximate kneading time to the recipe. I read some comments when I realized how wet the dough was, but didn’t get to the ones talking about kneading time. I had no idea if that was going to get better with longer kneading and I didn’t know how long to let it go for either. Perhaps if you put some reference in the recipe it would help the newbies like me! Thanks!
There is no quick answer for this, because there are so many determining factors. Knead until the dough is nice and stretchy. Typically, 6-8 minutes in a Bosch style mixer, 16-20 minutes in an Ankarsrum style mixer, or 25-30 minutes in a Kitchen aid mixer (allow extra time for a Kitchen Aid style mixer to have breaks in between kneading to prevent overheating of the mixer.) These kneading times will vary for everyone, this is just the most common times for these style of mixers.
I adore these rolls. I’ve now made them 3 times and they are the best FMF rolls I’ve made. I use active dry yeast because that’s just what I keep on hand. I also do add a touch more FMF because I found the dough to be unmanageable if I didn’t. I add an additional 10g and it comes out perfect every time. They are SO tasty, my husband RAVES about them and our family devours them. Thanks for the awesome recipe🙌
Yay! I am so happy to hear they are a hit! Thanks! 🙂
These come out amazing! I’ve learned a lot with fresh milled recipes. With my KitchenAid you definitely need to let it knead for about 25 minutes, and resist the urge to dump more flour in. It is a stickier dough but still elastic. Even when I’ve been inpatient or haven’t kneaded for long enough, they still come out great. Always get lots of compliments on them. You have some of the best recipes!
Yay! Glad to hear it! Yes, I almost never add more flour, it always messes with the gluten development. Thanks for sharing! 🙂
I’ve made these a few times already and they are just the best! I’ve also shaped them into 9 instead if 12 rolls and they make the perfect hamburger buns! Seriously, sooo good! Thank you for sharing this recipe!
Yes! So happy to hear that! Thanks for sharing! 🙂
Thank you for this recipe!! These are now my “go to” dinner rolls. The dough is very wet and I had to add a lot of flour when shaping them which makes me wonder if I did something wrong? I used my bread machine on the dough setting and autolyzed 25 minutes before starting. Regardless, these are the best.
Yay! So glad to hear that! I would recommend to hold back some of the liquid in the recipe and only add it in later if the dough seems stiff or dry.
It started out the texture of a batter more than dough, I mixed it for 20 minutes after the autolyzing and added 75g more FMF and it never approached anything resembling windowpane, just a craggy dough. What did I do wrong?! 😭
I would recommend holding back some of the liquid next time and only add it n later if the dough seems stiff or dry. I recommend watching the video to see what the dough should look like that may be helpful if you haven’t had a chance to already. https://youtu.be/LoHz0b-c6AQ