
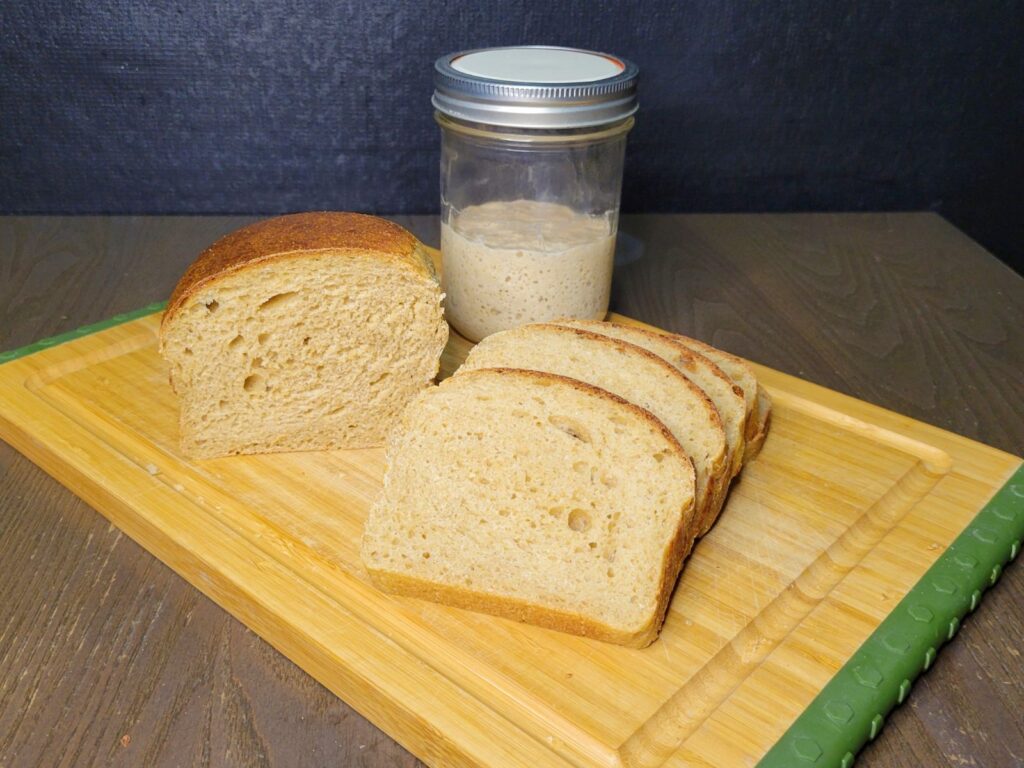
Sourdough Sandwich Bread With Fresh Milled Flour Made Easy
Sourdough sandwich bread made with fresh milled flour can be easy. We just have to not overthink it! This loaf is perfectly soft, slightly sweet, and tangy at the same time. It holds up nicely to slicing, and spreads to make the perfect sandwich bread, and it is made with 100% fresh milled flour, unsifted, and leavened with a pure sourdough starter, and no yeast.
Updated Post on 8/14/2024 to include larger pan sizes.
I actually really have been hesitant on putting this recipe out, along with other sourdough recipes, because sourdough made with fresh milled flour is very different than sourdough made with white flours. But, I decided I am here to help and share my knowledge of the things I have learned by my own experiments. So, here it is, one of the most requested recipes I am finally releasing!
So, there are some things I have learned along the way while experimenting and working with sourdough. Now, I am no professional sourdough baker, and there are many that are probably much better than I am. But, I get asked for sourdough recipes multiple times a day.

Why Does Sourdough Act So Differently With Fresh Milled Flour Than With White Flour?
The reason that sourdough is so different with fresh milled flour than it is with white flour is because freshly milled flour contains the WHOLE raw wheat berry with nothing added. If you do a side by side comparison as I have you will see that sourdough LOVES fresh milled flour so much that this is the very reason so many people are struggling with it when switching to fresh milled flour. The sourdough ferments much quicker! There are no additives, preservatives, or bleach there to slow or inhibit the good bacteria and yeast to be active. Also, Whole grain flours contain more natural yeast and bacteria compared to refined flours.

Why Are My Sourdough Rise Times So Different Than The Recipe?
There are so many variable to think about when we consider bread baking alone, but when you factor in sourdough starter in the mix, that is a whole new ballgame! Sourdough starter doesn’t always like to play by the rules, and sometimes has a mind of it’s own.
What Variables Affect My Sourdough Starter?
Some examples of variable that can affect sourdough starter:
- Water Temperature: The warmer the water, the quicker the sourdough will ferment & grow. BUT, if the water is too hot, it will kill your starter, and then there will be no growth!
- Temperature Of The Flour: When milling flour, it does get warm, so this plays a role in the fermentation of the sourdough. If you pre-milled the flour and it is kept in the freezer or fridge, then this will slightly slow down the growth time.
- Room Temperature: The temperature of your house will play a role in the time, and this can vary from day to day, and even from morning to night.
- Feeding Frequency: How often you refresh or feed the sourdough starter impacts its growth. Regular feedings help maintain its activity and strength. Also, the amount you feed will affect the strength of your starter.
- Starter Health: The balance of yeast and bacteria in the starter, influenced by regular feedings and maintaining a healthy environment, affects its growth rate.
- Air Quality and Environment: Factors like airborne microbes, humidity levels, and the cleanliness of the environment where the sourdough is kept can impact its growth.
- pH Levels: The acidity of the starter can influence the growth of specific microorganisms. A more acidic environment might favor certain bacteria and yeast strains over others.
- Starter Age: Young starters might need more time to develop strength and activity compared to well-established, mature starters.
Balancing these variables is part of the art of maintaining a healthy and active sourdough culture made with fresh milled flour. Small adjustments to any of these factors can impact the growth and performance of the starter.

You Can Do This!
I know this all sounds confusing, but once you start using it, you will start to learn how your starter behaves, and what is normal for it. These points are all just here to reference for troubleshooting and understand why your bake may have not turned out.
It is completely normal to have several failed bakes in the beginning, especially when using fresh milled flour. I came from baking beautiful almost perfect loaves of sourdough made with white flour too. I also thought it would be exactly the same, and I could just swap out my flour… right?
Wrong… I was soooo wrong! I had so many failed fresh milled four sourdough loaves that I actually gave up and threw my beloved sourdough started in the trash! (Please don’t hat me! I have learned from my mistakes!) I soon regretted this, because I missed it! So, I had to start a new one from scratch. And, this was not without difficulty. But, this is exactly how I learned the how’s, and the why’s about sourdough in relation to fresh milled flour. So, now I can share all this knowledge and my recipes with you, possibly saving you from years of anguish! LOL. But, please understand there will be fails, and there may be a lot! It’s ok, you can do this, just keep going!
I Am Here To Help!
So, let me share my recipe and techniques with you in my recipes, and videos. I have so many videos online that I share my tips and tricks. There you can see the texture, and consistency of my doughs, and it may help you visualize what I am saying.
I plan to release a video in the future if you want to create your own sourdough starter in the future from fresh milled flour, so make sure to subscribe to my Youtube Channel HERE so you don’t miss when I release that video this year. (Jan 2024, if you are reading this later, the video may already be released!)

Ingredients To Make Fresh Milled Flour Sourdough Sandwich Bread
- 4 & 1/2 cups Fresh Milled Flour 560g (My favorite is 450g hard white wheat & 110g Kamut)
- 1&1/2 cup room temperature water 360g
- 3 TBSP melted butter OR Olive Oil 42g
- 3 TBSP Sugar 36g OR Honey 60g
- 1&1/2 tsp salt 9g
- 1 egg room temperature
- 1/2 cup Sourdough Starter 115g
- *optional egg wash (1 egg+1 tsp water) for topping bread before baking
Instructions To Make Sourdough Sandwich Bread With Fresh Milled Flour
Preparing The Dough
- Firstly, make sure that you feed your sourdough starter the night before you want to bake with it. (Even if you already fed it in the morning. You want it nice and strong the night before.)
- Then, mill the flour. I like to use mostly hard white wheat with a little Kamut (Khorasan Wheat). Just make sure to use mostly hard wheat of some sort for this recipe. Otherwise, it will not develop the gluten enough to have a nicely risen loaf of bread.
- In a stand mixer, add water, melted butter (or oil), sugar (or honey), salt, and egg. Mix all these ingredients to combine.
- Then, add the freshly milled flour to the stand mixer, and start to mix slowly until all the dry flour is completely incorporated.
- Add the sourdough starter into the dough, and mix until incorporated. (The dough will seem very wet at this stage.)
- Cover, and let the dough sit at room temperature for a minimum of 15 minutes, or up to 1 hour. This resting time is important, It allows the fresh milled to start absorbing the liquid, and the bran to start softening. This is the Autolyse step.
Kneading
- After the dough has had time to Autolyse, then start the kneading process. This kneading process could take anywhere between 7 to 30 minutes. This time varies greatly, so the best way to tell if the dough is done being kneaded is to check the dough itself. You want a nice stretchy dough that wants to stay together. This is a wet dough, so try to resist adding flour to it. See video for the desired texture of dough that you are looking for.
- Once kneaded, cover the dough and let it rise until doubled. This can take anywhere from 2 to 8 hours depending on your sourdough starter, and how warm it is in your kitchen. (Other variables I mentioned above in my blog post can affect this rise time as well.) Mine generally takes about 3- 4 hours for example.
Shaping The Dough
- Prepare bread loaf pans with parchment paper.
- After the dough has doubled in size, then on a lightly oiled surface, cut the dough in half. This will make 2 small 1 pound loafs. See notes for other size bread pans. I use small 4×8 bread pans.
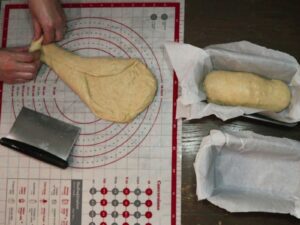
- Press each piece flat, then roll to shape, I show one shaping technique option in my video. But, make sure there is some surface tension, and no air pockets while rolling. it will be sticky so I recommend oiling your hands as well as the work surface.
- Place each loaf in the lined bread tin, and cover. Let rise this second time for 2-3 hours, or until it has risen and looks puffy. (Times may vary greatly, so make sure to check your dough occasionally during this second rise time.)
- During the end of this second rise preheat oven to 375*F.
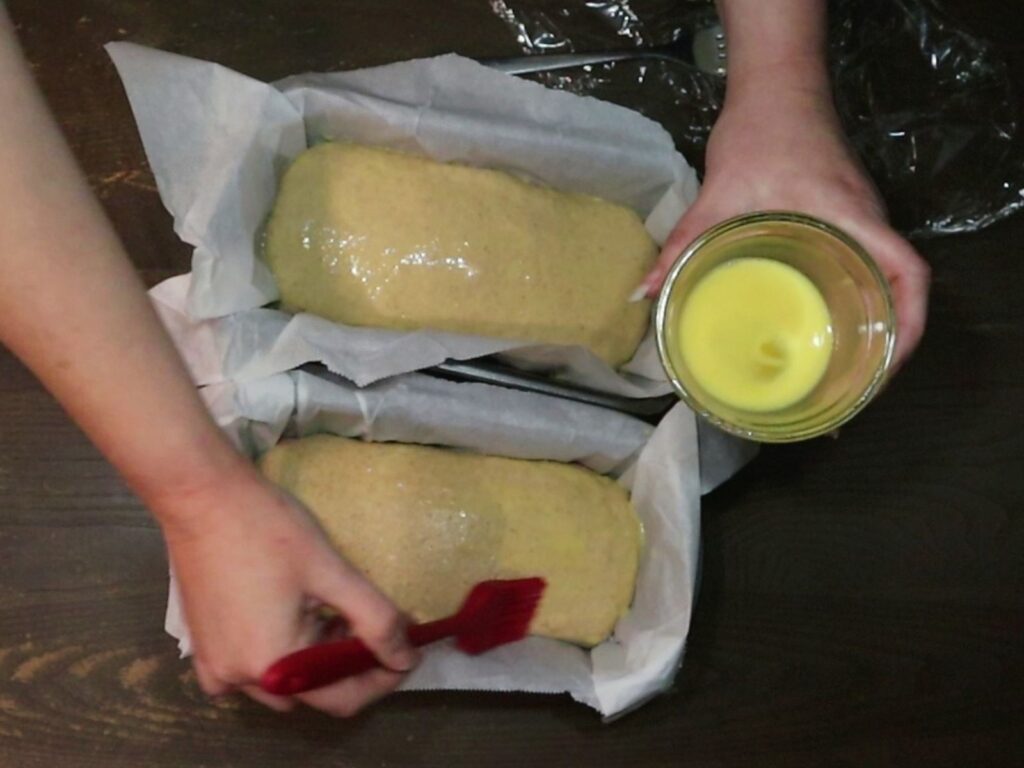
- Once the loafs have risen and look puffy, you can brush with an egg wash to make the loaf shiny and more browned. This step is optional.
Baking The Loaves
- Bake loaves for 35-40 minutes until the internal temperature of the center of the loaves are 205-210*F. If they are below this temp, the loaves may be gummy.
- Take bread out of the oven when the bread reaches that temp range. Then, remove them from the baking pans to a wire rack to cool. (The parchment papers can be used as handles so you don’t burn yourself.)
- Let the loaves cool completely before cutting into them! If you cut into them before they cool completely, they may be gummy on the inside.
- Once cooled completely, then slice to desired thickness, and enjoy!
Bread Pan Size
*Bread Pan Size Tips: My recipes call for the smaller 4×8 bread loaf pans, because I have a tiny oven! lol. Even the 4.5×8.5 pans are a bit larger, crazy how just that half inch each way can make such a difference! So, if you only have the larger pans, I recommend to x1.5 my recipes (except the sourdough starter, leave that the same) if you are looking for a large high rise loaf of bread. The large pans will definitely still work with this recipe as written, the loafs will just be a bit smaller. See Below for those measurements.
Larger Bread Pan Sizes
This recipe is for 2 small 4×8 loaves. However, I realize there are different pan sizes, so I wanted to give you the amounts for the two other most common bread pan sizes.
For Medium Bread Pan Size 4.5 x 8.5
- 7 cups Fresh Milled Flour 840g (I like to mill 700g hard white, and 140g Kamut)
- 2&1/4 cup Room temperature water 54og
- 4.5 TBSP Melted butter OR Olive Oil 63g
- 4.5 TBSP Sugar 60g OR Honey 90g
- 2&1/4 tsp Salt 13g
- 2 Eggs, room temperature
- 3/4 cup Sourdough Starter 174g
- *optional egg wash 1 egg+1 tsp water for topping bread before baking
For Large Bread Pan Size 5 x 9
- 9 cups Fresh Milled Flour 1,120g (My favorite is 900g hard white wheat & 220g Kamut
- 3 cups Room temperature water 720g
- 6 TBSP Melted butter OR Olive Oil 84g
- 6 TBSP Sugar 72g OR Honey 120g
- 3 tsp Salt 18g
- 2 Eggs, room temperature
- 1 cup Sourdough Starter 230g
- *optional egg wash 1 egg+1 tsp water for topping bread before baking
How To Store Sourdough Sandwich Bread Made With Fresh Milled Flour
To store this fresh milled flour sourdough sandwich bread, keep in an airtight container, or bag. You can keep these on the counter for 2-3 days. For longer storage, place in a freezer safe bag and freeze for up to 4 months. (Make sure the loaf has cooled completely before freezing, best results to freeze the same day as it is baked.) To thaw, sit on the counter, and let come to room temperature.
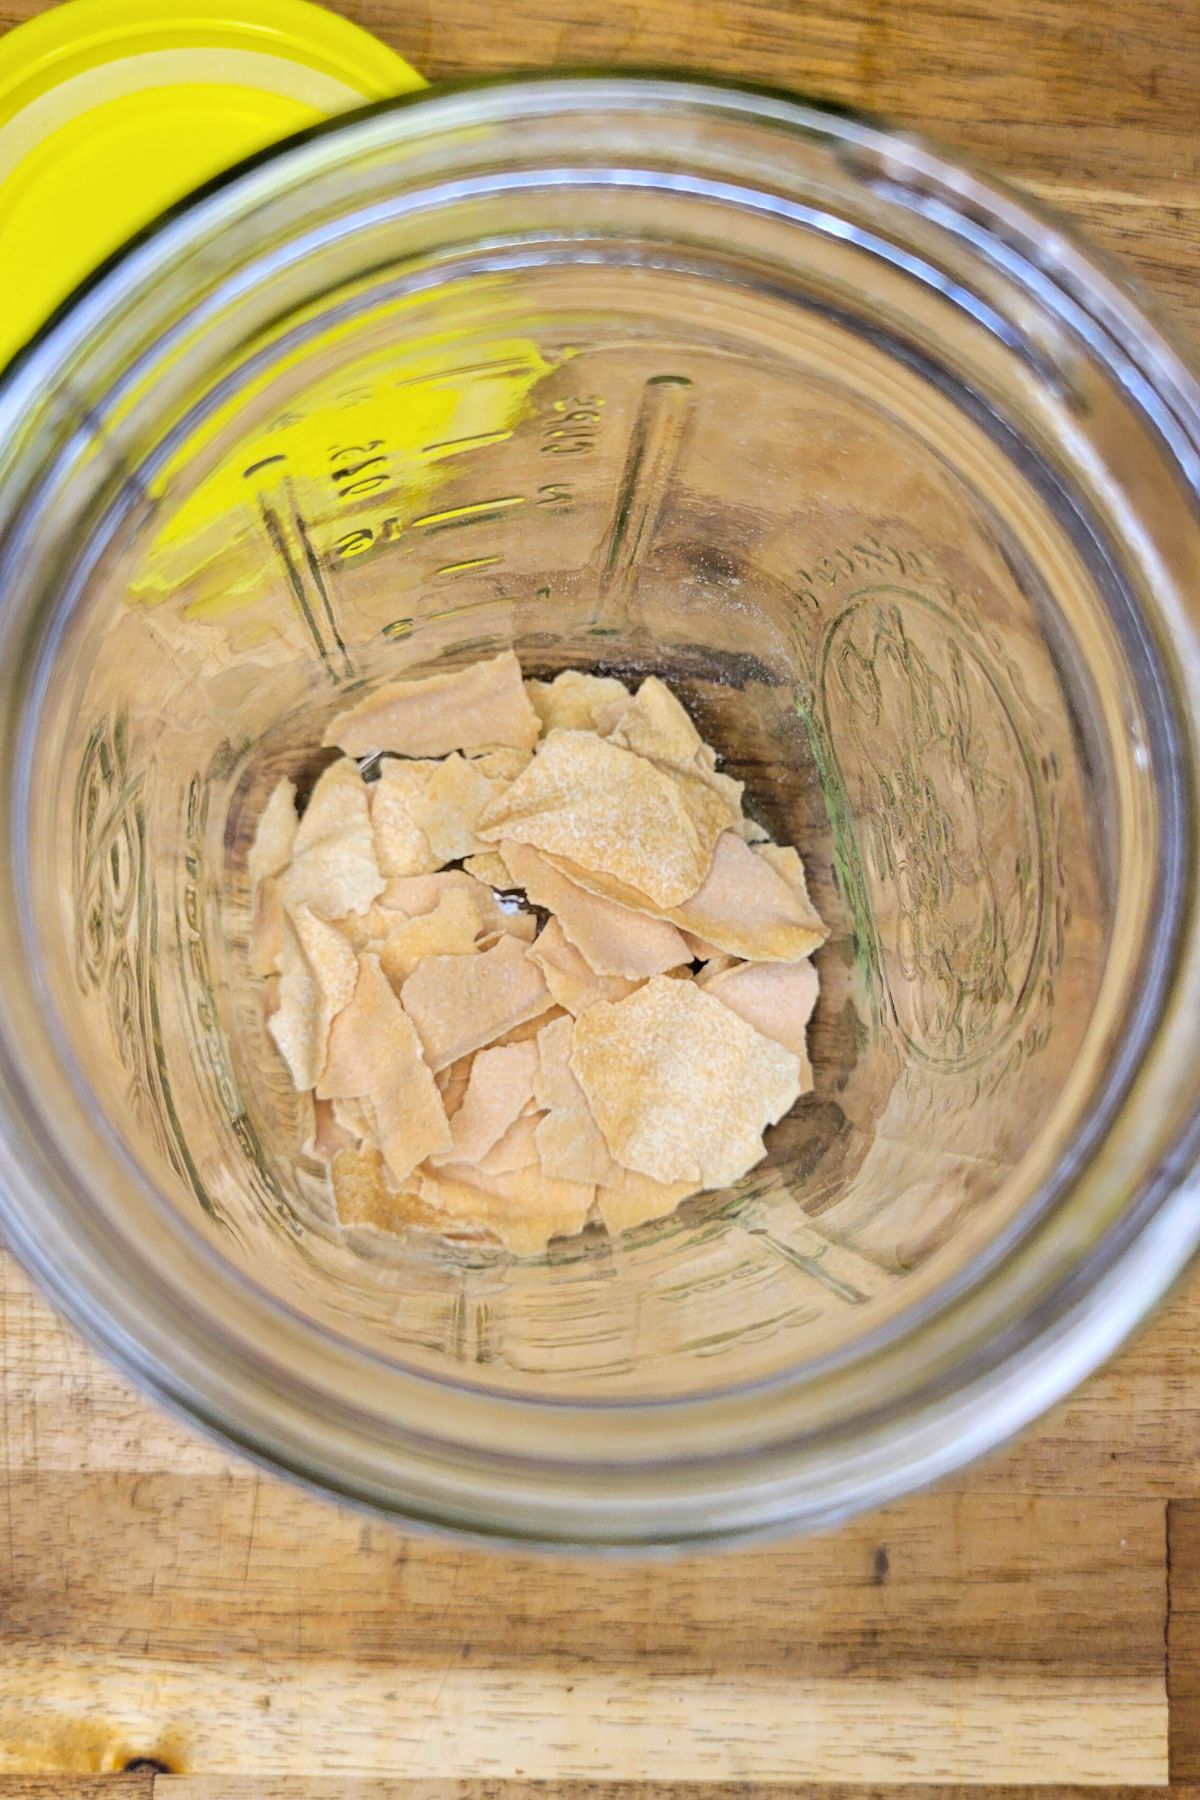
Make Your Own Sourdough Starter From Scratch With Fresh Milled Flour
If you don’t already have a sourdough starter, but are wanting to make one with 100% fresh milled flour from scratch, I am here for you! I have a video resource that goes over how you can make your very own sourdough starter using only freshly milled flour. I also go over troubleshooting issues to help make this process a little easier for you, and I make a brand new sourdough starter right along side you! You can watch that video HERE.
I also have a written blog post that covers this information, if you would like to print it out and have it handy for when you are just getting started. You can do this, it is not as difficult as some on the internet have made it seem! You can checkout my blog post about it HERE.
Shop This Post
Grain mill Nutrimill (Use Coupon Code: Grainy for $20 Off yours)
Hard White Wheat (Small Amount)
Kamut (Small Amount)
Check Out Some Of My Other Recipes
How To Make Your Own Sourdough Starter With Fresh Milled Flour
Brown Butter Sourdough Chocolate Chip Cookies
Peppermint Chocolate Sourdough Cupcakes
How To Transition Your Sourdough Starter To Fresh Milled Flour
Fresh Milled Flour Recipe Index

Sourdough Sandwich Bread Made With Fresh Milled Flour Printable Recipe

Sourdough Sandwich Bread Made With Fresh Milled Flour
Equipment
- 2 4×8 bread pans *See Notes for Larger Bread Pan Ingredient List
- 1 digital thermometer to check to see when the loaves are done
Ingredients
- 4&1/2 cups Fresh Milled Flour 560g My favorite is 450g hard white wheat & 110g Kamut
- 1&1/2 cup Room temperature water 360g
- 3 TBSP Melted butter OR Olive Oil 42g
- 3 TBSP Sugar 36g OR Honey 60g
- 1&1/2 tsp Salt 9g
- 1 Egg, room temperature
- 1/2 cup Sourdough Starter 115g
- *optional egg wash 1 egg+1 tsp water for topping bread before baking
Instructions
- Firstly, make sure that you feed your sourdough starter the night before you want to bake with it. (Even if you already fed it in the morning. You want it nice and strong the night before.)

- Then, mill the flour. I like to use mostly hard white wheat with a little Kamut (Khorasan Wheat). Just make sure to use mostly hard wheat of some sort for this recipe. Otherwise, it will not develop the gluten enough to have a nicely risen loaf of bread.
- In a stand mixer, add water, melted butter (or oil), sugar (or honey), salt, and egg. Mix all these ingredients to combine.
- Then, add the freshly milled flour to the stand mixer, and start to mix slowly until all the dry flour is completely incorporated.
- Add the sourdough starter into the dough, and mix until incorporated. (The dough will seem very wet at this stage.)

- Cover, and let the dough sit at room temperature for a minimum of 15 minutes, or up to 1 hour. This resting time is important, It allows the fresh milled to start absorbing the liquid, and the bran to start softening. This is the Autolyse step.
- After the dough has had time to Autolyse, then start the kneading process. This kneading process could take anywhere between 7 to 30 minutes. This time varies greatly, so the best way to tell if the dough is done being kneaded is to check the dough itself. You want a nice stretchy dough that wants to stay together. This is a wet dough, so try to resist adding flour to it. See video for the desired texture of dough that you are looking for.

- Once kneaded, cover the dough and let it rise until doubled. This can take anywhere from 2 to 8 hours depending on your sourdough starter, and how warm it is in your kitchen. (Other variables I mentioned above in my blog post can affect this rise time as well.) Mine generally takes about 3- 4 hours for example.
- Prepare bread loaf pans with parchment paper.
- After the dough has doubled in size, then on a lightly oiled surface, cut the dough in half. This will make 2 small 1 pound loafs. See notes for other size bread pans. I use small 4×8 bread pans.
- Press each piece flat, then roll to shape, I show one shaping technique option in my video. But, make sure there is some surface tension, and no air pockets while rolling. it will be sticky so I recommend oiling your hands as well as the work surface.
- Place each loaf in the lined bread tin, and cover. Let rise this second time for 2-3 hours, or until it has risen and looks puffy. (Times may vary greatly, so make sure to check your dough occasionally during this second rise time.)
- During the end of this second rise preheat oven to 375*F.
- Once the loafs have risen and look puffy, you can brush with an egg wash to make the loaf shiny and more browned. This step is optional.

- Bake loaves for 35-40 minutes until the internal temperature of the center of the loaves are 205-210*F. If they are below this temp, the loaves may be gummy.
- Take bread out of the oven when the bread reaches that temp range. Then, remove them from the baking pans to a wire rack to cool. (The parchment papers can be used as handles so you don’t burn yourself.)
- Let the loaves cool completely before cutting into them! If you cut into them before they cool completely, they may be gummy on the inside.
- Once cooled completely, then slice to desired thickness, and enjoy!

Video
Notes
For Medium Bread Pan Size 4.5 x 8.5
-
- 7 cups Fresh Milled Flour 840g (I like to mill 700g hard white, and 140g Kamut)
-
- 2&1/4 cup Room temperature water 540g
-
- 4.5 TBSP Melted butter OR Olive Oil 63g
-
- 4.5 TBSP Sugar 60g OR Honey 90g
-
- 2&1/4 tsp Salt 13g
-
- 2 Eggs, room temperature
-
- 3/4 cup Sourdough Starter 174g
-
- *optional egg wash 1 egg+1 tsp water for topping bread before baking
For Large Bread Pan Size 5 x 9
-
- 9 cups Fresh Milled Flour 1,120g (My favorite is 900g hard white wheat & 220g Kamut)
-
- 3 cups Room temperature water 720g
-
- 6 TBSP Melted butter OR Olive Oil 84g
-
- 6 TBSP Sugar 72g OR Honey 120g
-
- 3 tsp Salt 18g
-
- 2 Eggs, room temperature
-
- 1 cup Sourdough Starter 230g
-
- *optional egg wash 1 egg+1 tsp water for topping bread before baking
*This post contains affiliate links, which means I make a small commission at no extra cost to you! As an Amazon Associate I earn from qualifying purchases. But, I will only suggest items I actually Love and Have Used!


Hi Kara! I’ve made this recipe once and it turned out great. I’m wondering if you think you could replace the water with milk? My family is partial to taste and texture of bread made with milk & not water. Not sure how that would react with the sourdough? Thanks!
Yes! You can sub milk for the water, but it does better if you scald the milk then let it cool before mixing the dough. Cold milk can inhibit the gluten formation. BUT, if the milk is too hot it will kill your sourdough starter, and you will not get a rise. Let me know how it goes! Happy Baking! 🙂
Will halving the honey (or omitting completely) require increasing any of the other liquid ingredients?
No, you can decrease the honey by half without changing the rest of the recipe. Let me know what you think! Happy Baking! 🙂
Hi, Thanks so much for posting this recipe and the video. Question: I have a basic Kitchen Aid mixer. Does anyone have any experience with this mixer? I have read not to run it more than 6 minutes to avoid overheating. So I am trying to mix and then stop for a few minutes and then start again. Since this is my first try, I don’t know how it will work but I am curious if others know. Thanks again!
Yes, with a kitchen aid, the manufacturer recommends to knead only for a few minutes then rest a few, etc. It can be done, it will just take a little longer. Let me know how it goes! Happy Baking! 🙂
I have made this recipe into rolls more times than I can count! It’s such a great recipe! However, I just found out that I have to go egg free for a short period of time and I’m wondering if I could just leave the egg out?
Yes, you can leave out the egg, you may need to slightly adjust to a little less flour.
I have tried this recipe twice, but always have to cook longer than 40 at 375°. Would it be possible to cook at a higher temperature, such as 400° for 35 minutes? So far I have to cook the bread for 55 minutes to get to an internal temperature of 200.
If you are putting it all in one large pan, then it will take closer to 1 hour to cook.
I followed your recipe to the T (to the g?) 😁 But I have a question. After kneading for 20 mins with my Kitchenaid, (checking every 5) my dough wasn’t breaking and was making windowpanes, but it’s so wet, sticky, and gummy. Like pre-chewed gum left out in the sun kind of gummy. I thought perhaps that was ok, since it was stretchy and made panes, but now I have now gotten to the end of the second rise. The dough easily doubled in size, but I couldn’t pick it up or fold it- even with well oiled hands and counter. It stuck to everything and wasn’t doughy enough to shape or roll. If that makes sense?
So clearly this goes back to my kneading. Did I knees too long? Or not long enough? Thank you so much for your help!
If you got a nice stretchy dough, then the kneading was good. It is a wet dough, but I am guessing it is possible that it was on the way to overfermentation. Sourdough with fresh milled flour ferments so quickly, and it starts to get super sticky as it ferments too long. To help work with it this time, a bench scraper is your best friend. But, in the future, I would shorten the rise time, and you should be good to go! 🙂
hi! i just ordered hard red winter wheat berries and im excited to try this recipe! i don’t have a kitchen aid or machine, the loaves i’ve baked in the past i’ve just did stretch and folds but the rise was like nonexistent lol. 3 questions: 1) are the type of berries i bought okay to use for this recipe? i’ve read that the red winter wheat has a higher protein content then the red spring wheat. 2) i always feed my starter with einkorn wheat fresh milled, can i continue to do this for this recipe? 3) what machine do you use for kneading?
thank you!
Yes, you can use the Red hard wheat, you may need just a bit more of it. I recommend watching the video I made with this one, and I show the texture of the dough you are looking for and the stages of what it should look like. I use an Ankarsrum in this video. But, I also have a Bosch now (and used to have a Kitchen aid), and they all work very differently from each other. https://youtu.be/-t-KaIR6CG4
wow thank you for the quick reply! i will certainly watch the video. when you say to add more, im guessing ill be able to tell when to because its too wet? and when i do, is it just like a pinch at a time?
funny thing lol after i sent the first question, my mom actually found her old hamilton beach stand mixer which i’ll try to see if it works for the recipe as it came with a hook.
thank you!
Awesome, just maybe 1-2 TBSP of flour at a time. But, in the beginning it should seem too wet, because it takes the fresh milled flour longer to absorb the flour than with white flour.
I make this on the regular. It’s perfect. Has anyone figured out what the nutritional facts with calories, fiber, etc are? I haven’t done that and want to try to enter it into myfitnesspal.
I am happy to hear that! I do have a nutritional calculator on my website that may help. https://grainsinsmallplaces.net/fresh-milled-flour-nutrition-calculator/
I am not new to sourdough, but I am very new to sourdough baking using fresh milled flour. I used my sourdough starter fed with unbleached white flour in the recipe since I had already fed it before finding your site and didn’t want to wait until it rose again using wheat flour. I kneaded my dough until I got a windowpane, but after 4 hours it has only risen about 1/4″ (I have it in a clear cylindrical container so I can see the rise better.) My house is about 74 degrees, so it isn’t too cold in here. And my starter was at peak when I added it to the dough. What am I doing wrong? Would using a white starter make that much of a difference? Thank you for your thoughts.
I would go ahead and continue the recipe. Most likely it is just because you are feeding your starter something new, and it just takes a couple feedings to get it used to eating fresh milled flour.
I did something wrong. I have a kitchen aid mixer. I used the dough hook and I think I let it mix too long. That is the only thing I can think went wrong. It wouldn’t rise and it was good new starter. Maybe another day I will try again.
I have a video I just made that I go over working with the kitchen aid if you want to check it out, here it is. https://youtu.be/tdnCrbOsVag
Thank you so very much! I will try the less water method and resting the dough. I live in southern AZ and temps are going to begin to rise. FYI, my Pastor loved the flavor of the the flat bread and planned to toast it for breakfast! May you have a happy Resurrection Day! Where do you buy your Einkorn berries?
That’s wonderful! Thanks so much! I have purchased them from Azure, and online. Here is a link to some places with any coupon codes I might have. https://grainsinsmallplaces.net/shop-grains-in-small-places/
Thank you. I try to buy only heritage grains since I have family and friends who are gluten intolerant. I found Grand Teton Ancient Grains for the Einkorn berries. I will try them. Thank you again and God Bless!
First, it is delicious!
Mine didn’t rise. Like at all. I moved forward with the process for some reason, and even with no rise it was still so good, light, and soft. It was obviously user error so I’ll try again later this week.
I am happy to hear it turned out great! Thanks! 🙂
I’ve been making sourdough for a year, I’m just getting started with fresh milled flour. This, hands down, is the best bread I’ve ever had/made. Your recipe and instructions made this so easy! Definitely my new weekly go to for bread.
Awesome! I am so glad to hear that! Nice job! Thank you so much! 🙂
Yay! This was my first successful sourdough sandwich bread! After like 5 loaves that were duds, I was so excited to see it do all the right things, rise at the right times etc. I added 20g vital wheat gluten and also used a hand mixer to start, then did some stretch and folds since I dont have a stand mixer. Turned out perfect…
However, I’ve had a problem with grit in my bread. Any ideas? I use my high power blender to mill, so I sift out the bran and soak it in 100 degrees water to soften it (once it cools its the water I add to the recipe). I switched from Redmond’s salt to fine sea salt and let that dissolve in the hot water too. I get my berries from Azure. Could it be rocks in the wheat? Any ideas would be SO helpful… We love this bread but I’m hesitant to give it to anyone else! LOL I’m determined to figure this out!
Yay! Nice job! I am happy to hear it was a hit. The grittiness is the bread is almost always caused by the salt or the milling of the wheat. Since you switched out the salt, my guess would be the blender just isn’t getting the flour very fine, even with the sifting it could still seem gritty with what is too small and falls through the sifter.
Such a delicious sandwich bread recipe! Easy to follow instructions. For my needs, I doubled the recipe and divided into 3 larger bread pans and bake at 350 for 40 min to perfection! Thank you thank you for these lovely recipes!!!
Thanks for sharing! I am glad it was a success, nice job! 🙂
I have 10” x 5” loaf pans. Should I double the recipe for these?
You can bake the whole batch in the one pan, rather than divide into two loaves. It will take longer to bake, closer to 55-65 minutes. Just check the internal temperature of the center of the loaf to 200*F.
If u need a picture of my disastrous bread I could send u one via e-mail….I’d really love to understand what went wrong
It sounds like it either over proofed- which causes too sour, and too loose of dough. Try only letting it rise for 3-4 hours max first rise. This recipe is for 2 small loaves to bake at that time. If you make one larger loaf it will take closer to 55-65 minutes. Here is a video I made on working with too wet dough that may help. https://youtu.be/tdnCrbOsVag?si=gQx1oq4C_iWPKc7f
I made this recipe to a “t” – measured the ingredients for the 4.5×8.5 pan version, let stand for an hour, kneaded it, let it rise for 4 hours, and then attempted to make it into loaves… that’s where I ran into an issue. The darn thing was a slushy amorphous blob – it developed nice texture and bubbles during the rise, but it had no structural stability. It was like it needed another 2 cups of flour. What did I do wrong? Did I need to knead it longer? Help!
If the dough was nice and stretchy before the rise, then it likely overproofed. To fix that, just shorten the rise time. If the dough was never stretchy, then it is possible it needed kneaded longer. During the summer and humid times, often the water needs decreased by a bit. So, if this is the case, leave a bit of the water out in the beginning of the recipe, and only add it in if the dough seems dry or tight. Let me know how it goes next time. Also, this video may be helpful to see what they dough looks like at each stage. https://youtu.be/-t-KaIR6CG4
Hi. Can you tell me why this shows 375° while your YouTube with the same recipe bakes at 400°? Thank you!
I often would bake my loaves at 400*F in my little oven, but many pointed out to me that in a standard oven, it will get dark on the top. So, I balanced out the baking time and temp.
Thank you so much for this recipe and your video instructions! It turned out so great and it feels so good to know I’m giving my toddler nourishing bread.
Yay! I am glad it was a hit! Thanks! 🙂