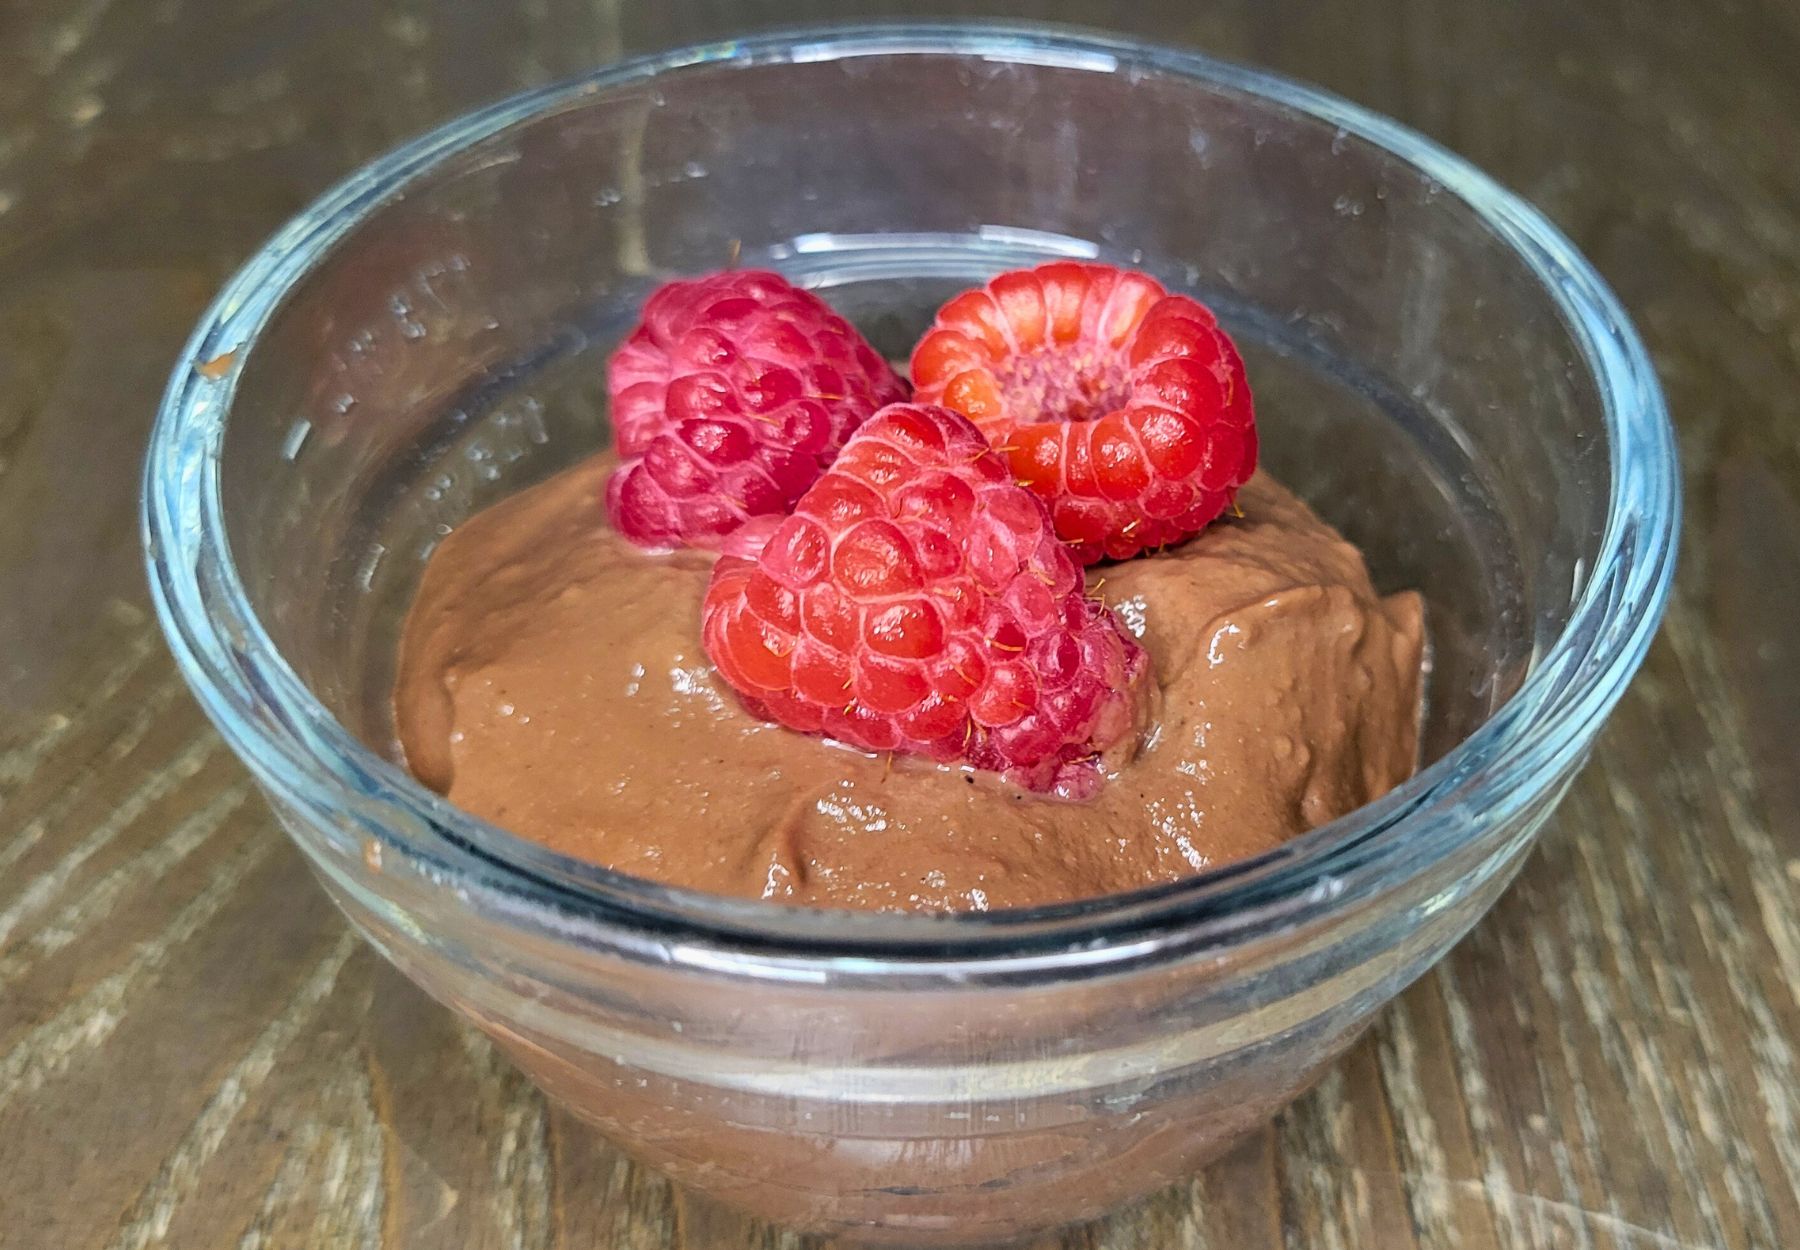
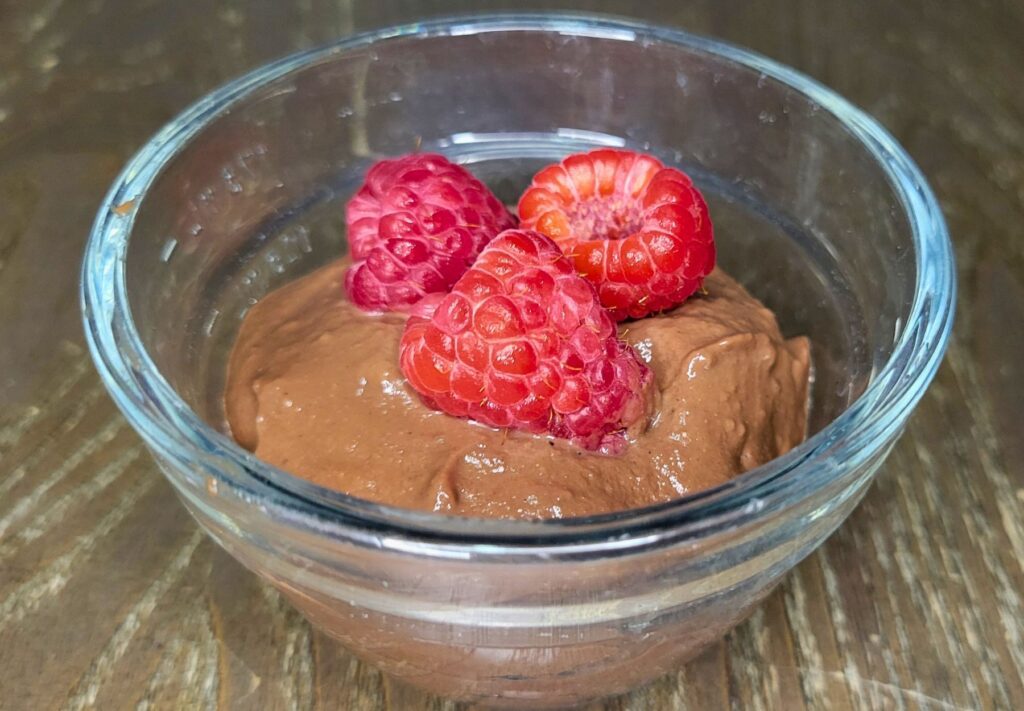
Chocolate Pudding With Fresh Milled Flour
This Chocolate Pudding made with fresh milled flour does not disappoint! It has the perfect smooth and creamy pudding texture, with the rich and decadent chocolate flavor. I typically thicken my pudding with with freshly milled soft white wheat, however you could use just about any wheat variety.
If chocolate pudding is not your favorite, then checkout my Banana Pudding Video that can be made in the microwave HERE.
A Fun Way To Serve This Fresh Milled Flour Chocolate Pudding
A super fun way to enjoy this fresh milled flour chocolate pudding is to turn it into “dirt pudding!” So, you can make this layered recipe, then let it chill. Crush up some Oreo style cookies, and then add those to the cooled pudding. Then, top that with whipped cream with a little more crushed cookies on top! To make it even more fun, you can add some gummy worms to the top! This is such a fun way to serve for a party, gathering, or any kids event.
What To Serve With
While this pudding is fantastic all on it’s own, sometimes it is just fun to add a few more ingredients. So, here’s a list of ideas to serve this chocolate pudding with.
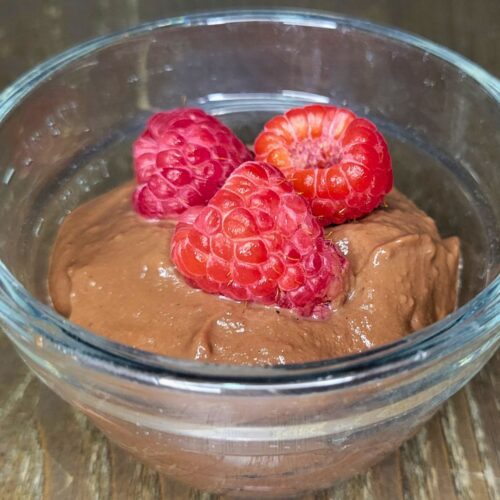
- Fresh fruit: Berries, banana slices, or citrus segments.
- Whipped cream: Light and fluffy contrast.
- Cookies: Shortbread, wafers, or biscotti for a crunchy pairing. HERE is my vanilla Wafer Cookie Recipe that would be fabulous with this pudding!
- Nuts: Toasted almonds, pecans, or hazelnuts for texture.
- Caramel or chocolate drizzle: Adds extra richness and visual appeal.
- Shaved chocolate: For an elegant touch and added chocolatey flavor.
- Coconut flakes: Toasted coconut for a tropical flair.
More Fun Ways To Serve
- Layer it: Create parfaits by layering the pudding with whipped cream, fruit, or cookie crumbles in clear glasses for a visually appealing dessert. HERE is a recipe for a fun fresh milled flour pound cake that would go great here!
- Pudding pops: Freeze the pudding in molds to make creamy chocolate popsicles.
- Flavored variations: Infuse the pudding with extracts like mint, espresso, cinnamon, or orange for a twist on the classic chocolate flavor.
- Serve As A Filling In Cream Puffs: Chocolate pudding makes a delicious addition to some cream puffs. Checkout my Fresh Milled Flour Cream Puff Recipe HERE.
Ingredients To Make Chocolate Pudding With Fresh Milled Flour
- 2/3 cup sugar 133g
- 1/4 cup unsweetened cocoa powder 20g
- 1/8 cup fresh milled flour 20g (I like to use soft white wheat)
- pinch of salt
- 1 Large egg
- 2 cups whole milk 480g
- 1 TBSP unsalted butter 14g
- 1 tsp vanilla extract
Instructions To Make Chocolate Pudding With Fresh Milled Flour
- Firstly, mill the flour.
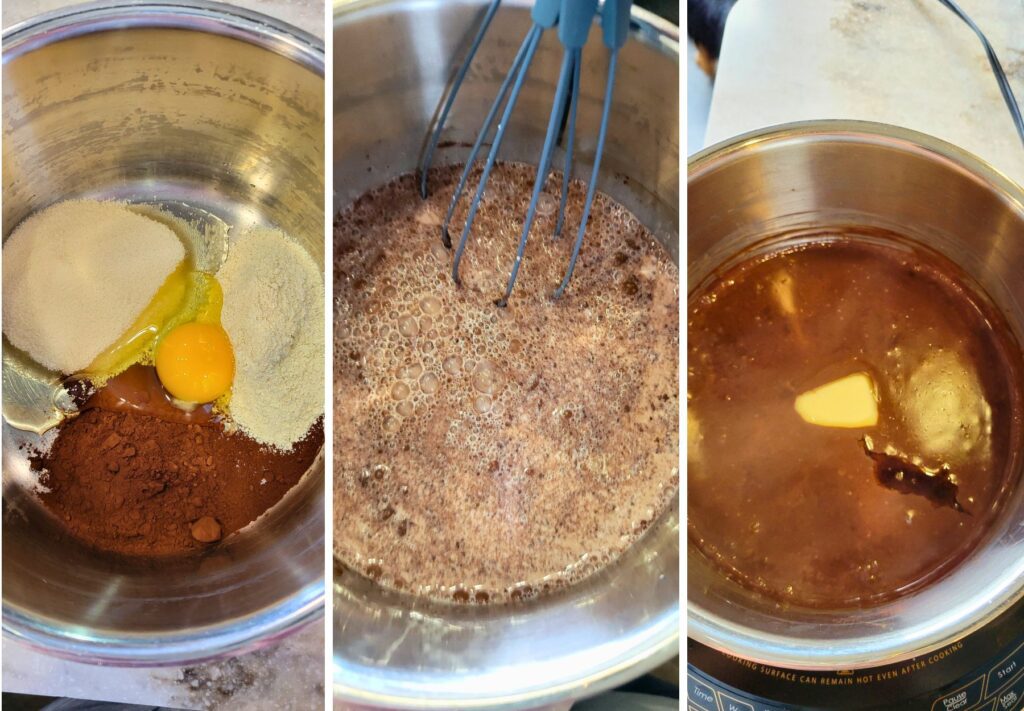
- Then, in a medium sauce pan, put the sugar, cocoa powder, fresh milled flour, milk and salt.
- Without the heat on, add the egg , and mix until combined and smooth.
- Once everything is combined, turn the heat to medium, and stir continually. Bring the mixture to a boil. Continue stirring constantly while the mixture cooks, and thickens. This should take about 3-6 minutes. (The pudding will continue to thicken as it cools as well.)
- Once the pudding has thickened, turn off the heat, and stir in the butter and vanilla extract. If you prefer your pudding warm, this can be served warm here, or to serve cold, continue on with the recipe.
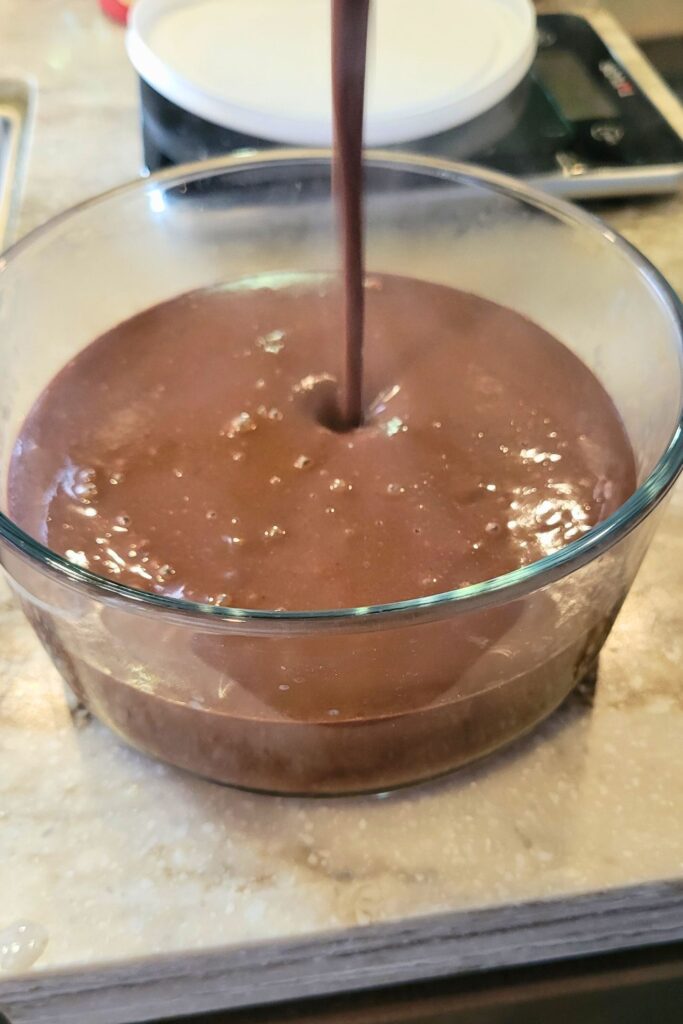
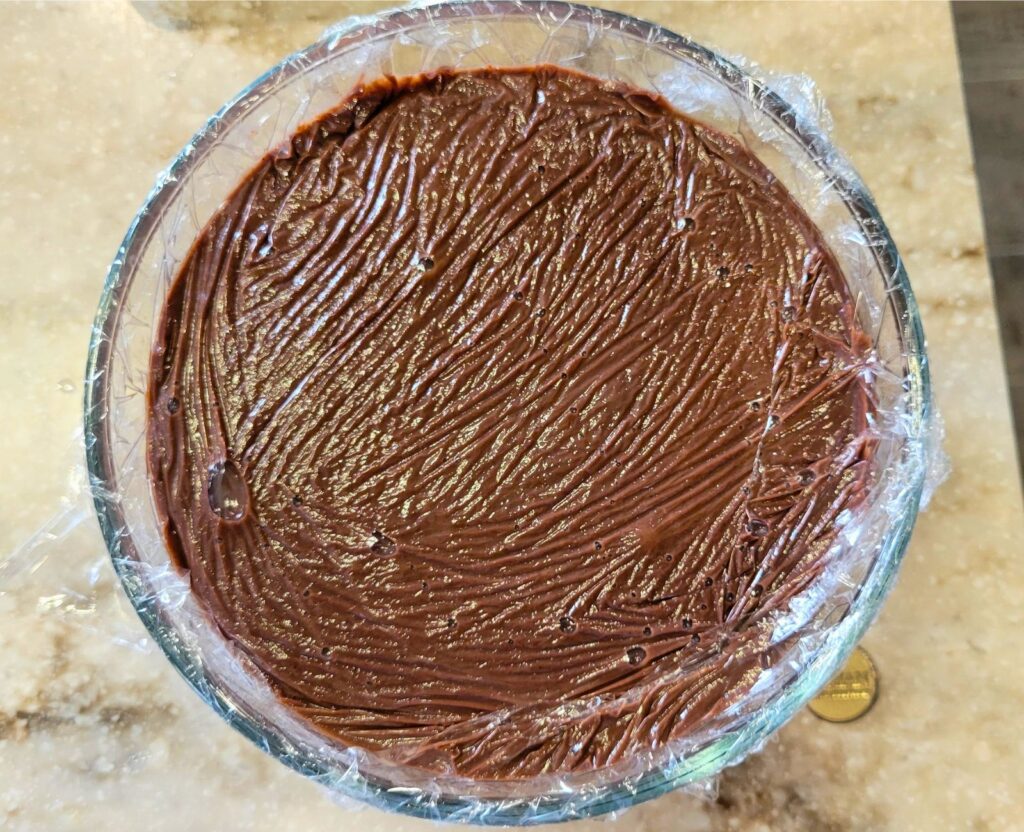
- Pour the pudding into a heat safe bowl, and press plastic wrap down over the surface to prevent a skin from forming on the top while the pudding cools.
- Allow to cool at room temperature for 1 hour, then place in the fridge to finish cooling. (2-3 hours.)
- Lastly top with fresh fruit, whipped cream, or enjoy the decadent chocolate pudding all on it’s own!
How To Store This Chocolate Pudding Made With Fresh Milled Flour
To Store this Fresh Milled Flour Chocolate Pudding, keep it in an airtight container, then place in the fridge for up to 5-6 days. You can freeze this for up to three months, but the texture will change a bit.
Shop This Post
Shop Nutrimill/Bosch ($20 OFF Coupon Code: Grainy)
Shop My Site Wheat Berries & Coupon Codes
Baja Gold Salt SAVE 10% OFF with Coupon Code: Grainy
Checkout Some Of My Other Fresh Milled Flour Recipes
Banana Pudding In The Microwave
Chocolate Pudding Made With Fresh Milled Flour Printable Recipe
Chocolate Pudding Made With Fresh Milled Flour
Ingredients
- 2/3 cup sugar 133g
- 1/4 cup unsweetened cocoa powder 20g
- 1/8 cup fresh milled flour 20g I like to use soft white wheat
- pinch of salt
- 1 Large egg
- 2 cups whole milk 480g
- 1 TBSP unsalted butter 14g
- 1 tsp vanilla extract
Instructions
- Firstly, mill the flour.
- Then, in a medium sauce pan, put the sugar, cocoa powder, fresh milled flour, milk, and salt.
- Without the heat on, add the egg, and mix until combined and smooth.
- Once everything is combined, turn the heat to medium, and stir continually. Bring the mixture to a boil. Continue stirring constantly while the mixture cooks, and thickens. This should take about 3-6 minutes. (The pudding will continue to thicken as it cools as well.)

- Once the pudding has thickened, turn off the heat, and stir in the butter and vanilla extract. If you prefer your pudding warm, this can be served warm here, or to serve cold, continue on with the recipe.

- Pour the pudding into a heat safe bowl, and press plastic wrap down over the surface to prevent a skin from forming on the top while the pudding cools.
- Allow to cool at room temperature for 1 hour, then place in the fridge to finish cooling. (2-3 hours.)
- Lastly top with fresh fruit, whipped cream, or enjoy the decadent chocolate pudding all on it’s own!

Notes
*This post contains affiliate links, which means I make a small commission at no extra cost to you! Also, as an Amazon Associate I earn from qualifying purchases. But, I will only suggest items I actually Recommend!


Can maple syrup be used in place of sugar?
Yes, you can sub maple syrup for the sugar, same amount. It may taste a bit more maple-ish, but that sounds yummy too!
I am assuming the milk is supposed to be added in step two, when added sugar flour etc. No where In directions is milk listed.
I’m sure she’ll update that soon but I’m pretty sure it will be the beginning of step 4, that makes the most sense to me. Plus, in the pictures you can see a photo of the egg and dry ingredients in the pot before milk is added, and then the next picture is showing it boiling with the milk in it.
I have updated it now. Thank you!
Yes, it is added with the sugar, flour, etc. I have updated that now, Thank you!
I doubled the recipe and made some in mugs and a few popsicles! The stuff in the pan was delicious, can’t wait to eat the rest once its chilled. Is there another flour I could substitute if I didn’t have soft white?
Yum! What a fun idea! You could use most any grain, and if you are measuring by weight, you can just substitute the same amount. If using a hard wheat and going by volume, then I would decrease the amount of flour. I hope that helps! I would love to know how the frozen ones turned out once you try them! 😊
So so good! Made this quickly and in a pinch and everyone loved it.
Awesome! I am so happy to hear that! Thanks! 🙂
Hi,
Thank you so much for this recipe. Could you use honey or sucanat instead of sugar?
Yes, you can sub either one. 🙂
Hi there! I was wondering if I omit the cocoa and add 1Tbs vanilla if I could be vanilla pudding? Thank you
Yes, you can do that, I would increase the Vanilla, and add a little extra butter for richness.