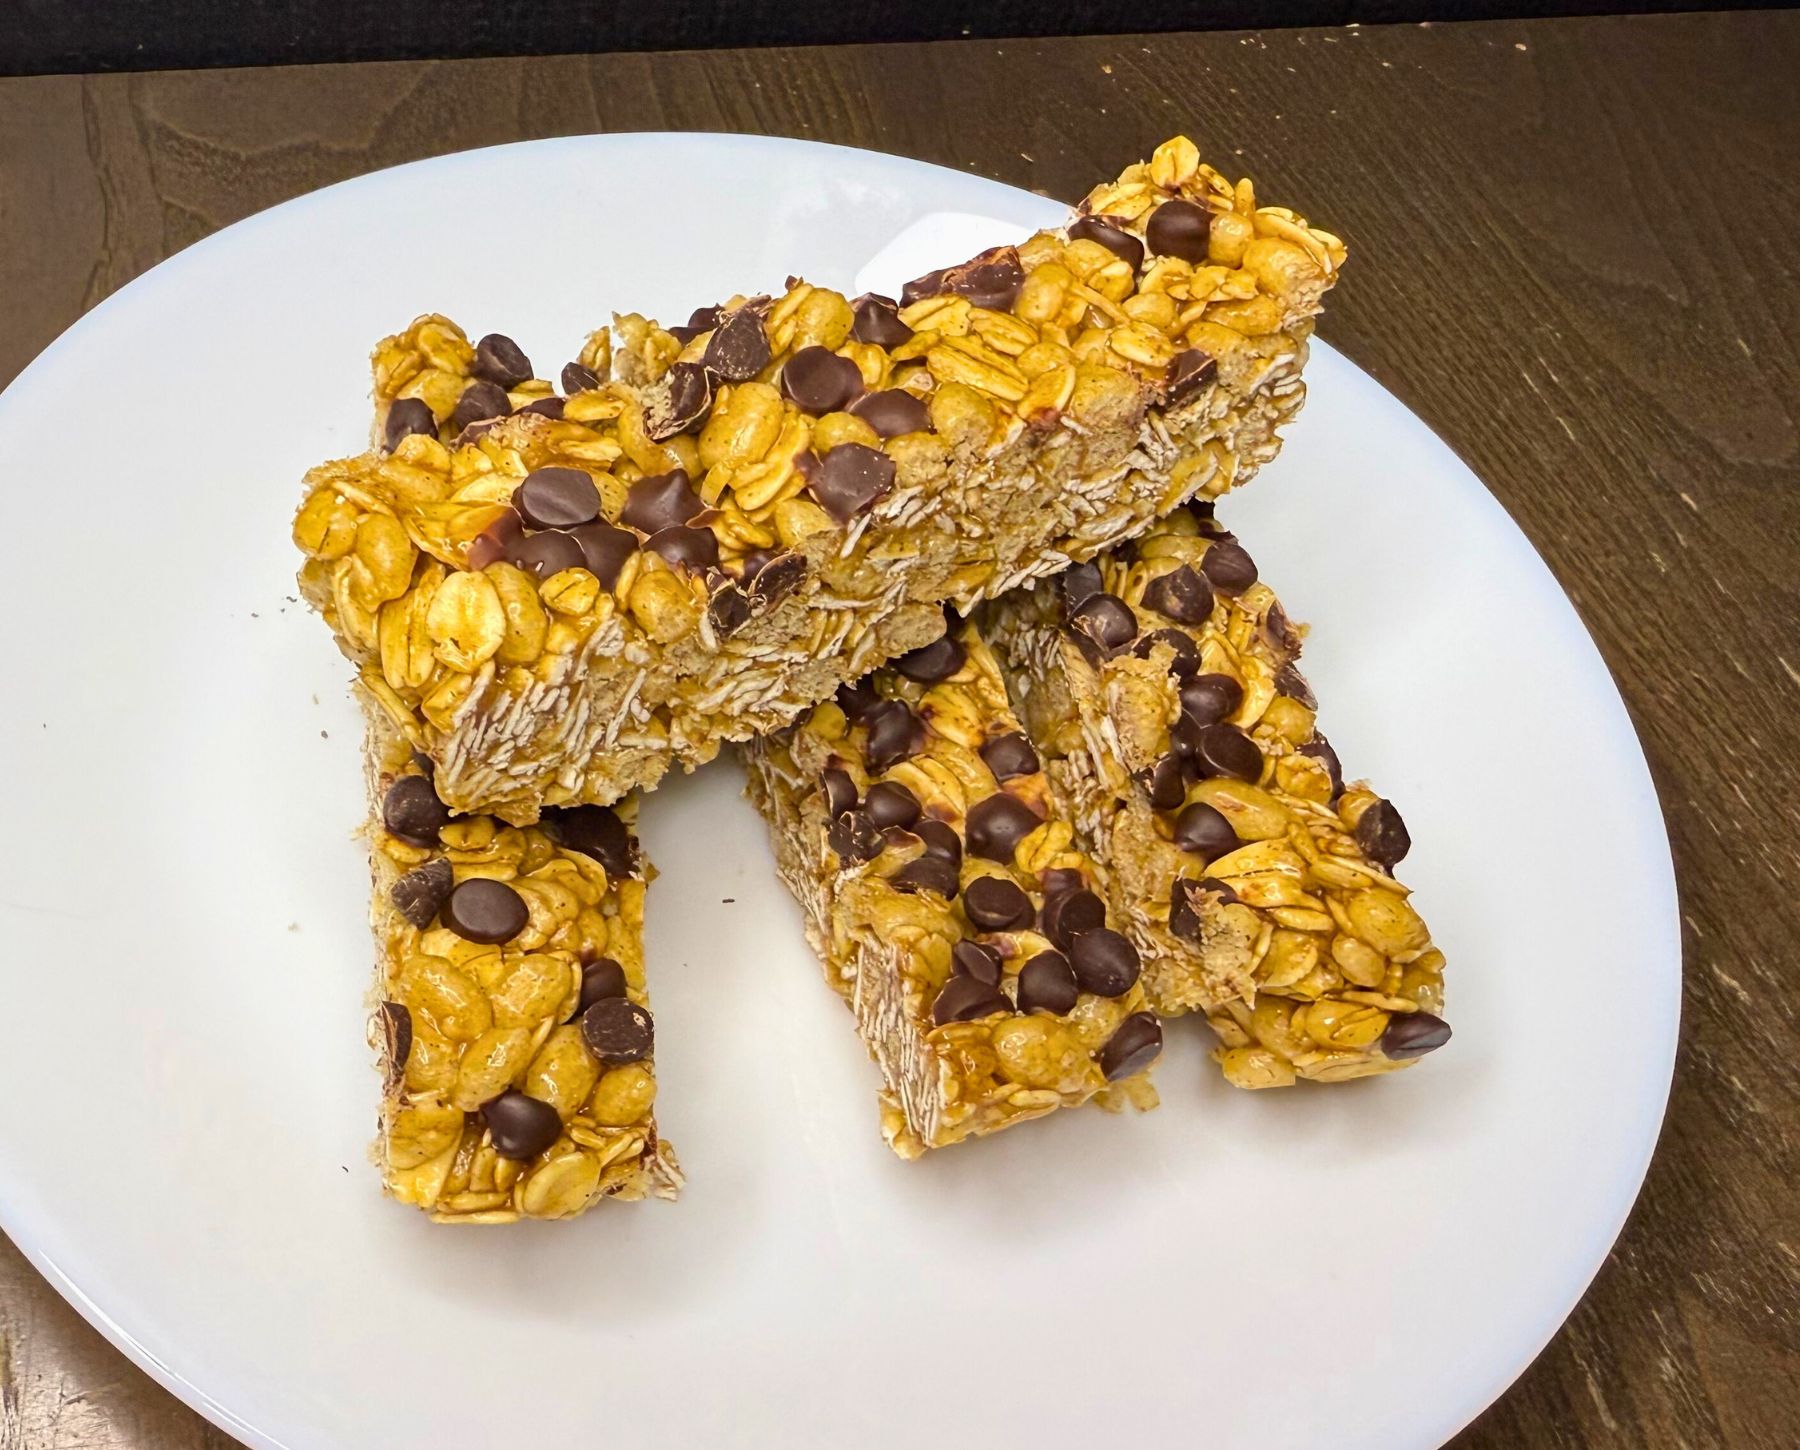
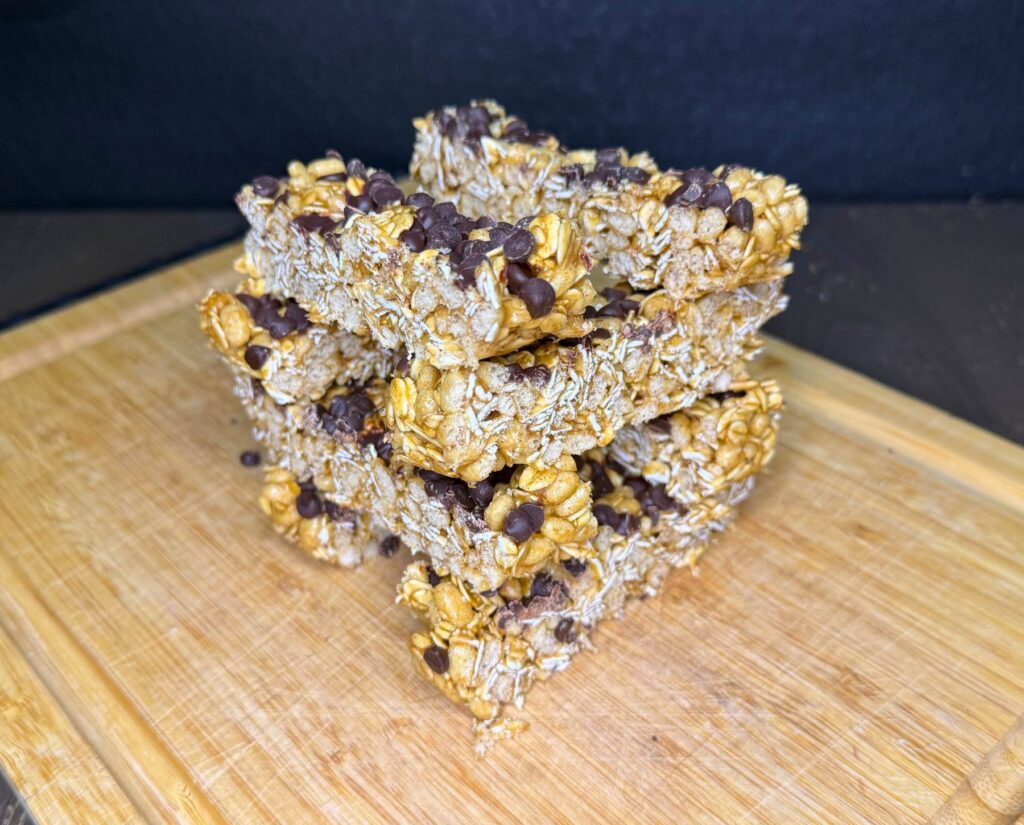
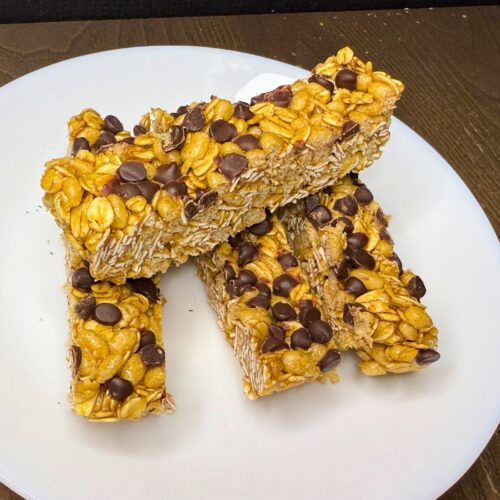
Chewy No Bake Granola Bars Recipe
This Chewy No Bake Granola Bars Recipe comes from my sweet and wonderful niece, Brianna. She has been playing around with granola bars for quite some time to find the perfect chewy option! These are perfect, quick and easy, not too sweet, truly chewy, and they are completely adaptable to your taste. Even after chilling in the fridge, these granola bars pack the perfect chewy bite!

Granola Bar Mix-In Flavor Ideas
One of the best things about these chewy no-bake granola bars is how easy they are to customize and adapt to your preferences. You can mix and match flavors to fit any season, holiday, or craving! Here are some delicious ideas to get you started:
Classic Favorites
- Instead of the mini chocolate chips, you could add one or a mix of these: White chocolate chips, peanut butter chips, mini M&M’s, butterscotch chips, nuts, coconut flakes, or crushed pretzels for a salty crunch.
- Also, I have a easy recipe for homemade Toffee bits HERE that would be amazing to top these homemade granola bars with.
- Try any combo of these Nuts: Chopped almonds, pecans, or walnuts.
- Adding Seeds can be a nutritional boost, try these options: Sunflower seeds, pumpkin seeds, chia seeds, or flax seeds
- Dried fruit is also a great addition, some ideas like these: Cranberries, raisins, cherries, Freeze-dried strawberries or raspberries, blueberries, or diced apricots.
Fun Flavor Combo Ideas
- Trail Mix Bars: Use almonds, raisins, and M&M’s
- S’mores Bars: Add mini marshmallows, chocolate chips, crushed graham crackers.I have a wonderful homemade fresh milled flour Graham Cracker Recipe HERE.
- Peanut Butter Cup Bars: A mix of mini chocolate chips and peanut butter chips. Dip in melted chocolate for even more chocolatey goodness!
- Tropical Bars: Try coconut flakes, dried pineapple, and chopped cashews.
- Cinnamon Apple: Add in extra cinnamon and some diced dried apple pieces.
So, have fun with it, and try different flavor combos to see what your family loves the most! You can even make two different pans with each batch! Let me know down in the comments below what your favorite mix-in’s are.
Ingredients To Make These Chewy No Bake Granola Bars
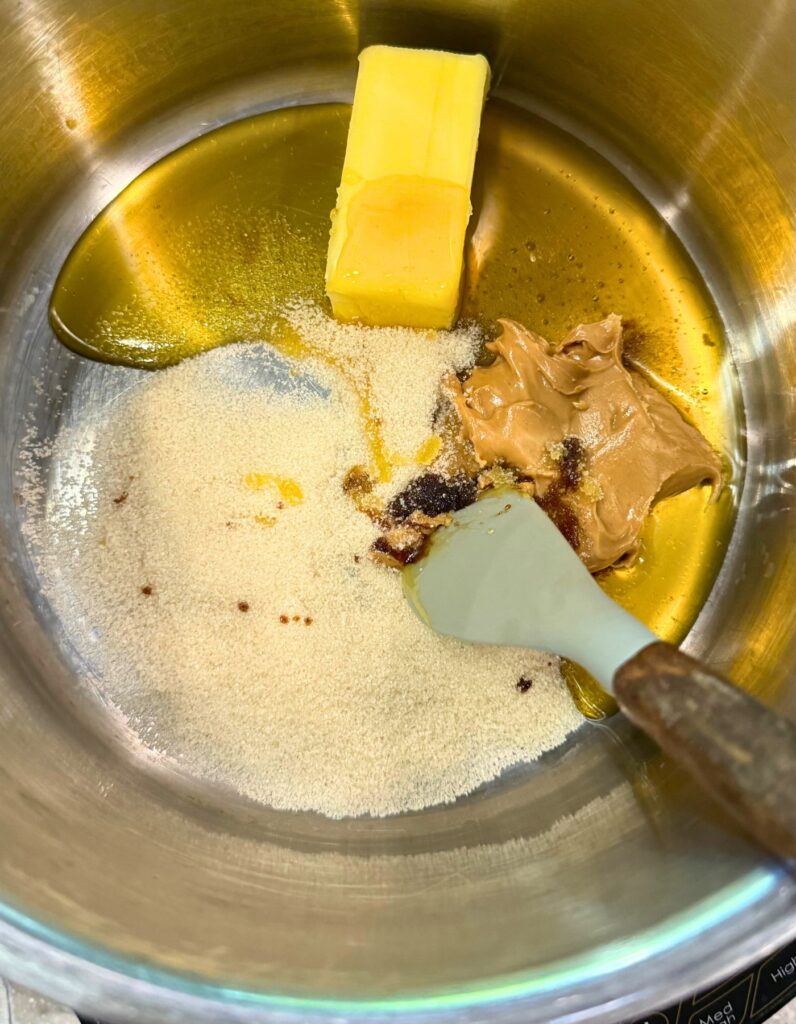
- 1/4 cup salted butter 56g (half a stick)
- 1/4 cup honey 84g (Can sub for maple syrup)
- 1/4 cup brown sugar 57g
- 1 TBSP Peanut Butter 16g (Can sub for nut butter substitute of your choice)
- 2 tsp vanilla extract
- 1 pinch of sea salt
- 1&1/2 cup rolled oats 120g
- 2 cups crisp rice cereal 58g
- *optional- 1 tsp cinnamon
- *optional- 1/8 to 1/4 cup of seeds of your choice
- *optional- 1/3 cup mini chocolate chips for top (Can sub for any chocolate chip variety, see blog post for some other ideas.)
Instructions To Make No Bake Chewy Granola Bars
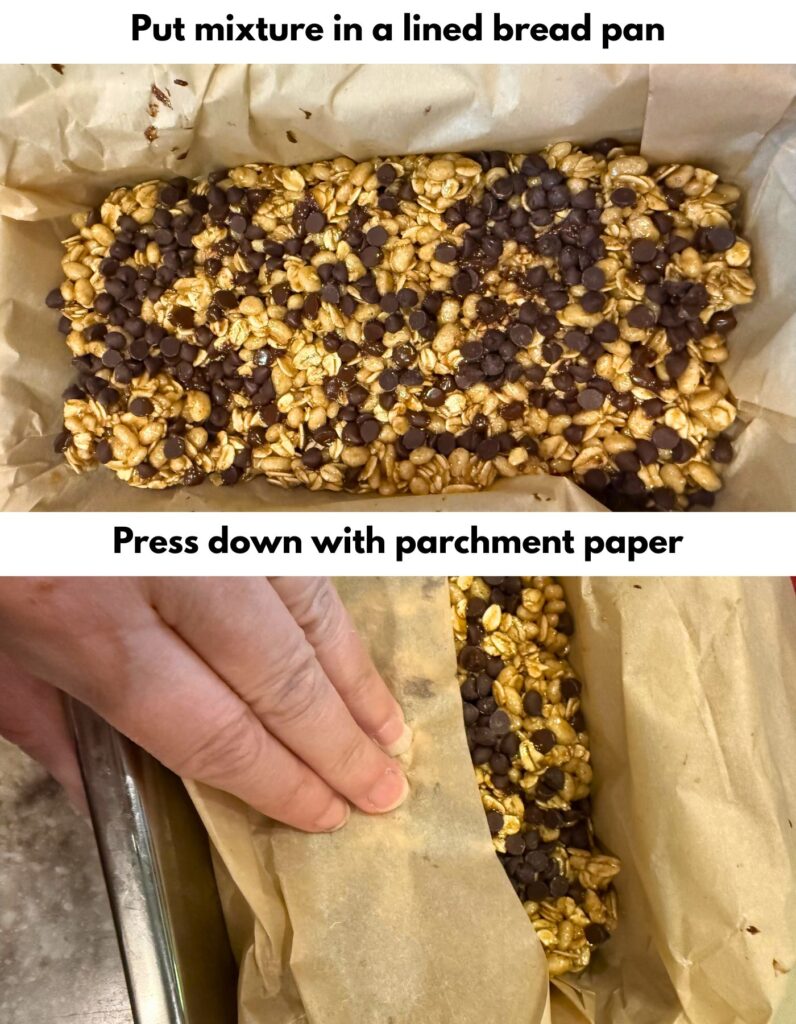
- Firstly, line two bread pans with parchment paper. The size of the bread pans can vary, smaller bread pans will give a thicker granola bar, and a larger bread pan will give a thinner granola bar size.
- In a medium pot add butter, honey, peanut butter, and brown sugar. Stir to combine.
- Then, turn heat on to medium heat, and cook until the sugar mixture melts and starts to bubble up, this should only take a short time. Once it bubbles up, turn off the heat.
- Stir in the vanilla extract and pinch of salt. Mix to combine.
- If adding cinnamon, stir that in.
- Then, add the rolled oats and mix.
- Next add in the crisp rice cereal and mix.
- If using seeds or nuts, add in and mix.
- Once everything is incorporated, then pour the mixture into two lined bread pans.
- Sprinkle the top of the mixture with chocolate chips if using. Then using the excess parchment paper, fold it over the top of the granola bar mixture and press it into the pan to flatten the mix. You want to press it in pretty firm.
- Place both pans in the fridge to cool. Allow 1 to 2 hours in the fridge before cutting.
- Once the mixture has cooled, slice into desired pieces. We like to slice them about 1 inch or so long.
- Lastly, enjoy!
How To Store These Chewy No Bake Granola Bars
Store these chewy No Bake Granola Bars covered in an airtight container in the fridge for 1-2 weeks. After that, they tend to get harder the longer they store. You can also freeze them in a freezer safe container for 3-4 months.
Checkout Some Of My Fresh Milled Flour Recipe
Easy Homemade Toffee Bits (Not Fresh Milled Flour, but delicious!)
Fresh Milled Flour Recipe Index
Shop This Post
Shop My Site Wheat Berries & Coupon Codes
Baja Gold Salt (My Favorite Salt) SAVE 10% OFF with Coupon Code: Grainy
My CookBook (Paperback)

Chewy No Bake Granola Bars Printable Recipe
Chewy No Bake Granola Bars
Ingredients
- 1/4 cup salted butter 56g half a stick
- 1/4 cup honey 84g Can sub for maple syrup
- 1/4 cup brown sugar 57g
- 1 TBSP Peanut Butter 16g Can sub for nut butter substitute of your choice
- 2 tsp vanilla extract
- 1 pinch sea salt
- 1&1/2 cups cup rolled oats 120g
- 2 cups crisp rice cereal 58g
- *optional- 1 tsp cinnamon
- *optional- 1/8 to 1/4 cup of seeds of your choice
- *optional- 1/3 cup mini chocolate chips for top Can sub for any chocolate chip variety, see blog post for some other ideas.
Instructions
- Firstly, line two bread pans with parchment paper. The size of the bread pans can vary, smaller bread pans will give a thicker granola bar, and a larger bread pan will give a thinner granola bar size.
- In a medium pot add butter, honey, peanut butter, and brown sugar. Stir to combine.
- Then, turn heat on to medium heat, and cook until the sugar mixture melts and starts to bubble up, this should only take a short time. Once it bubbles up, turn off the heat.
- Stir in the vanilla extract and pinch of salt. Mix to combine.
- If adding cinnamon, stir that in.
- Then, add the rolled oats and mix.
- Next add in the crisp rice cereal and mix.
- If using seeds or nuts, add in and mix.
- Once everything is incorporated, then pour the mixture into two lined bread pans.
- Sprinkle the top of the mixture with chocolate chips if using. Then using the excess parchment paper, fold it over the top of the granola bar mixture and press it into the pan to flatten the mix. You want to press it in pretty firm.
- Place both pans in the fridge to cool. Allow 1 to 2 hours in the fridge before cutting.
- Once the mixture has cooled, slice into desired pieces. We like to slice them about 1 inch or so long.
- Lastly, enjoy!
Video
Notes
*This post contains affiliate links, which means I make a small commission at no extra cost to you! Also, as an Amazon Associate I earn from qualifying purchases. But, I will only suggest items I actually Recommend!


Do these bars travel well for example if their taken from the refrigerator or freezer & placed in a plastic container for a 1 day road trip & have to stay without refrigeration for 1/2 a day will they still keep their shape? thank you for taking the time to answer my question.
Yes, they would do fine out of the fridge for a bit, as long as they don’t sit in the sun or get hot.
Hi! Can I sub cheerios for rice krispies ? Maybe if I chop them a bit?
I think that would work as a good substitute!
I make double or triple batches of these! They are a family favorite
Awesome! I am so glad to hear that! Thanks! 🙂
I have made this a few times. Today I flaked einkorn and oats and used 3/4 cup of each. They are so nutty this time! I need to lean hard on the mixture to compress as much as possible. Thank you for this great recipe.
Glad to hear it was a hit! Thanks for sharing! 🙂