Sub Buns From Fresh Milled Flour
Have you ever tasted a sandwich on freshly baked sub buns made from fresh milled flour? If not, you're in for a real treat! Not only does it taste better, but it's also healthier and more nutritious than bread made from processed flour.
Equipment
- 1 baking sheet
- 1 spray bottle of water
Ingredients
- 4 cups freshly milled flour 450g (I mill 2&1/2 cups of hard white wheat to get this)
- 1&1/2 cups warm water 350g
- 1&1/2 tsp salt
- 2 Tbsp sugar
- 3 Tbsp Extra Light Olive Oil
- 2&1/4 tsp instant yeast
Instructions
- Firstly, Mill your flour.
- Then warm the water to just above room temperature, but under 90*F. Pour the water in mixer bowl.
- Add salt, sugar, and Olive Oil, then mix ingredients until combined.
- Add flour, and mix to incorporate, the dough will still seem sticky at this point. (Resist the urge to add more flour.)
- Then, cover, and let sit for 10-60 minutes. This will allow the freshly milled flour to absorb the liquids.
- After the rest, remove cover, and start kneading.
- Now, it is time to add the yeast, then knead on level 2 for about 10-20 minutes. Check intermittently to preform the window pane test. (see link in post with video)
- If window pane test fails, and the dough is still breaking apart when you pull on it gently, then keep kneading until it passes the test. Make sure the dough is not too dry. (every mixer and each person will have different time results, I have had to knead for up to 25 minutes before, so don't be discouraged, and don't try to rush the process.)
- After the dough passes the window pane test, cover and let sit at room temperature for about 1 hour, or until dough seems to have doubled in size.
- Then, after the initial rise, take dough out of bowl, and place on a lightly oiled clean work surface. (I like to shape with oil to keep from sticking, instead of adding more flour.)
- Cut the dough into 4 equal pieces, and flatten the first piece into a rectangle. Roll the dough up into a log shape, tuck the two ends under and pinch the seams. (You can oil your hands if the dough is still sticky, I typically do.)
- Now, using your hands, cup the log of dough, and gently slide the bottom of your palms under the dough to tighten the top surface. This will create surface tension which is important for a free form dough like these sub buns. (See Video for shaping)
- Place on a parchment paper lined baking sheet, and repeat with the other 3 dough pieces.
- Cover the dough, and let rise for 30-45 minutes, until the look puffy and smooth.
- Preheat oven to 400*F towards the end of this second rise.
- Spray your sub bun dough logs lightly with some water, and spray the inside of your oven with a little water as you put the sub buns in.
- Bake for about 20-25 minutes, or until your dough reaches 190*F internally. (Yes, I use my meat thermometer to check this!)
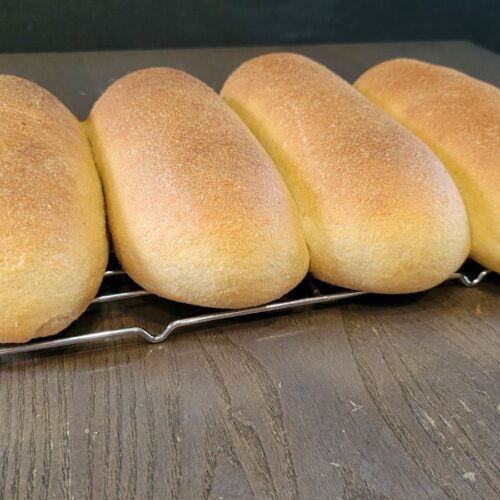
- Remove pan from oven, and place sub buns on a wire right right away to cool. (Be careful not to burn yourself!)
- Let cool for an hour or 2, then you can slice in half (hamburger style), and fill with any toppings you desire! Enjo
Video
Notes
You can double or triple this recipe for more buns.
*If you are making this recipe with regular store bought flour, your flour amount may need increased. Also, your kneading time will be for less.